
Models, text and images by Luca Cinacchio
Introduction
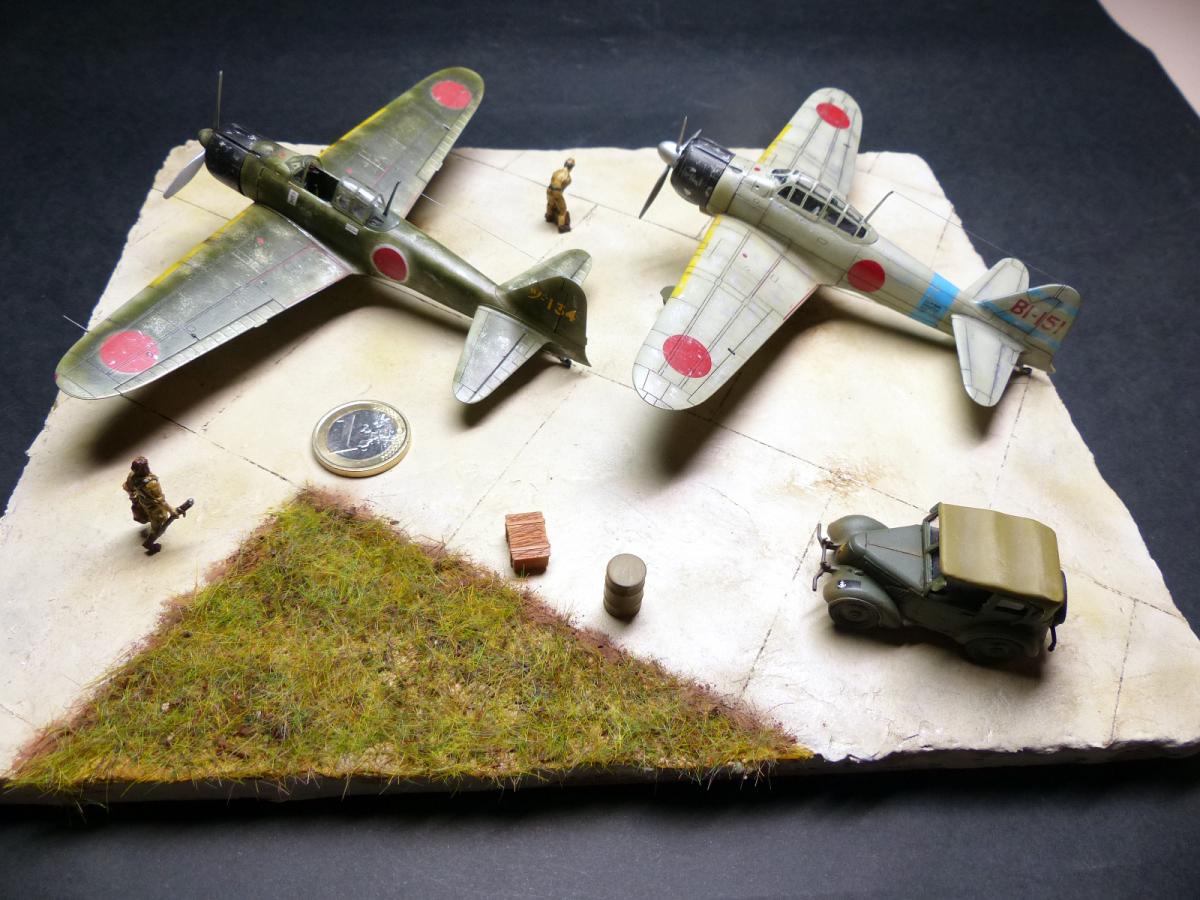
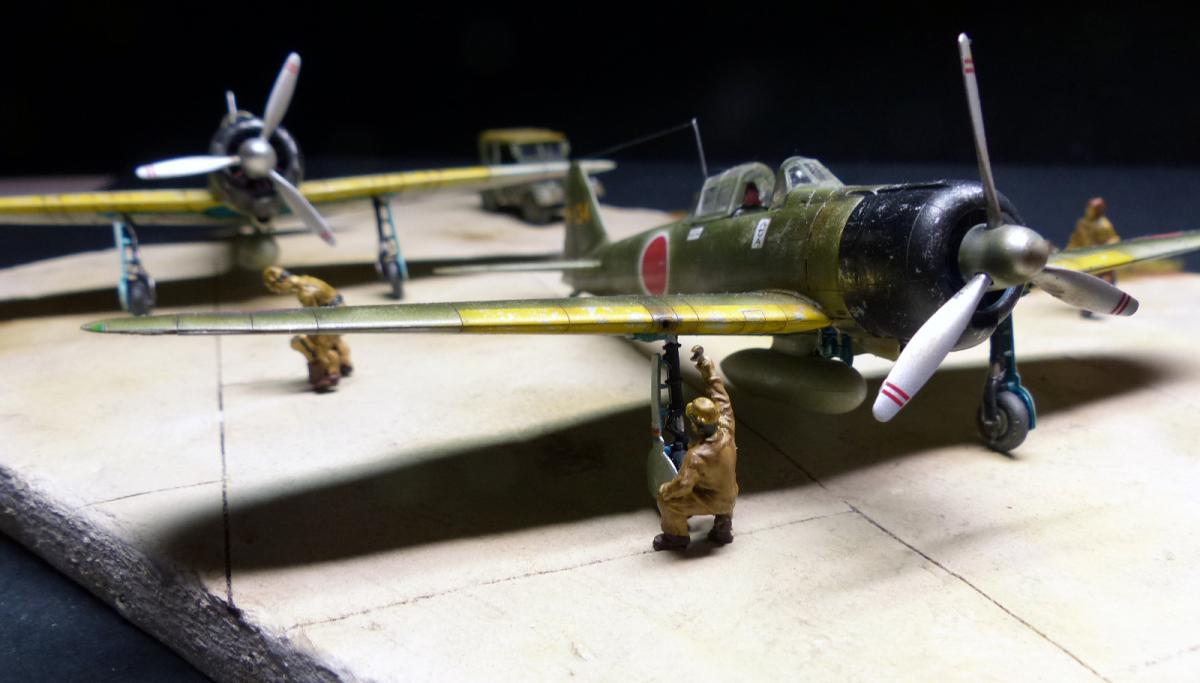
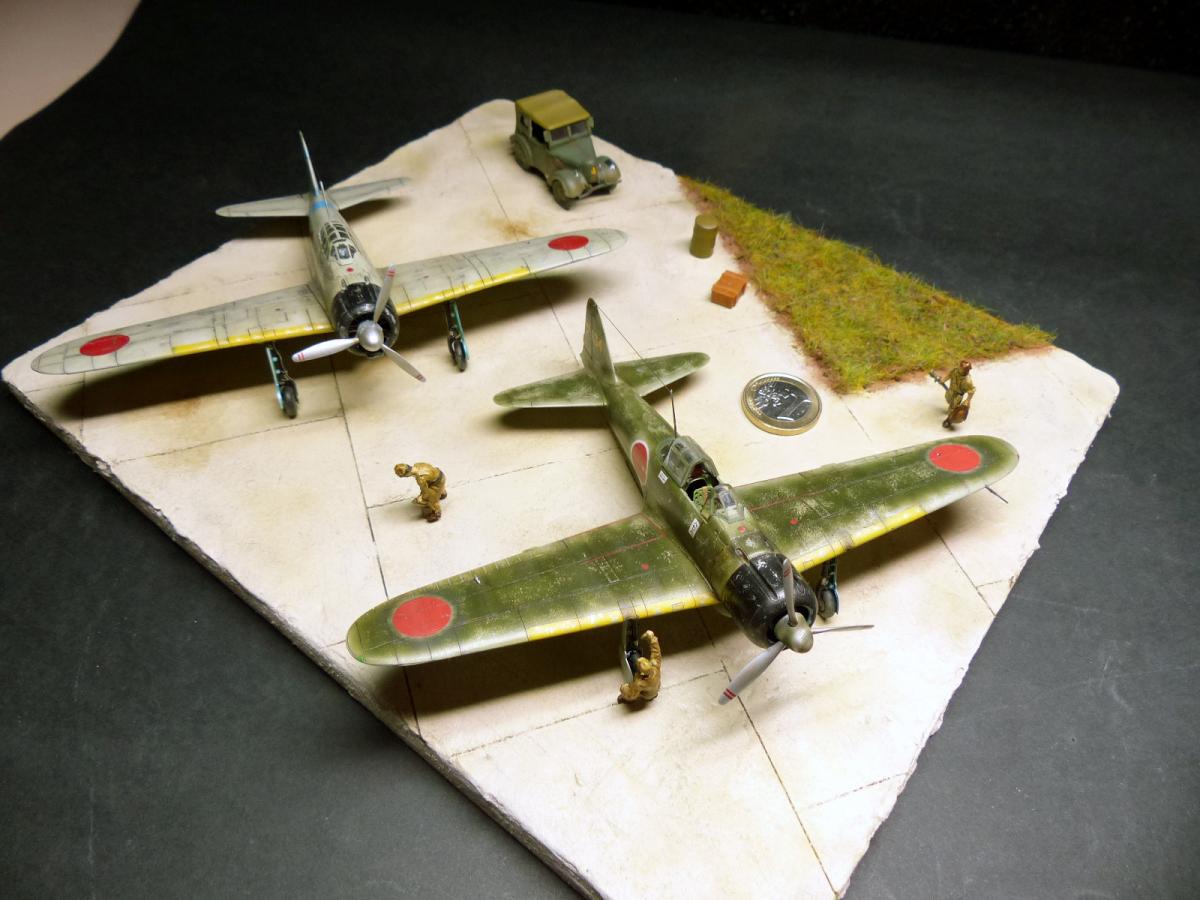
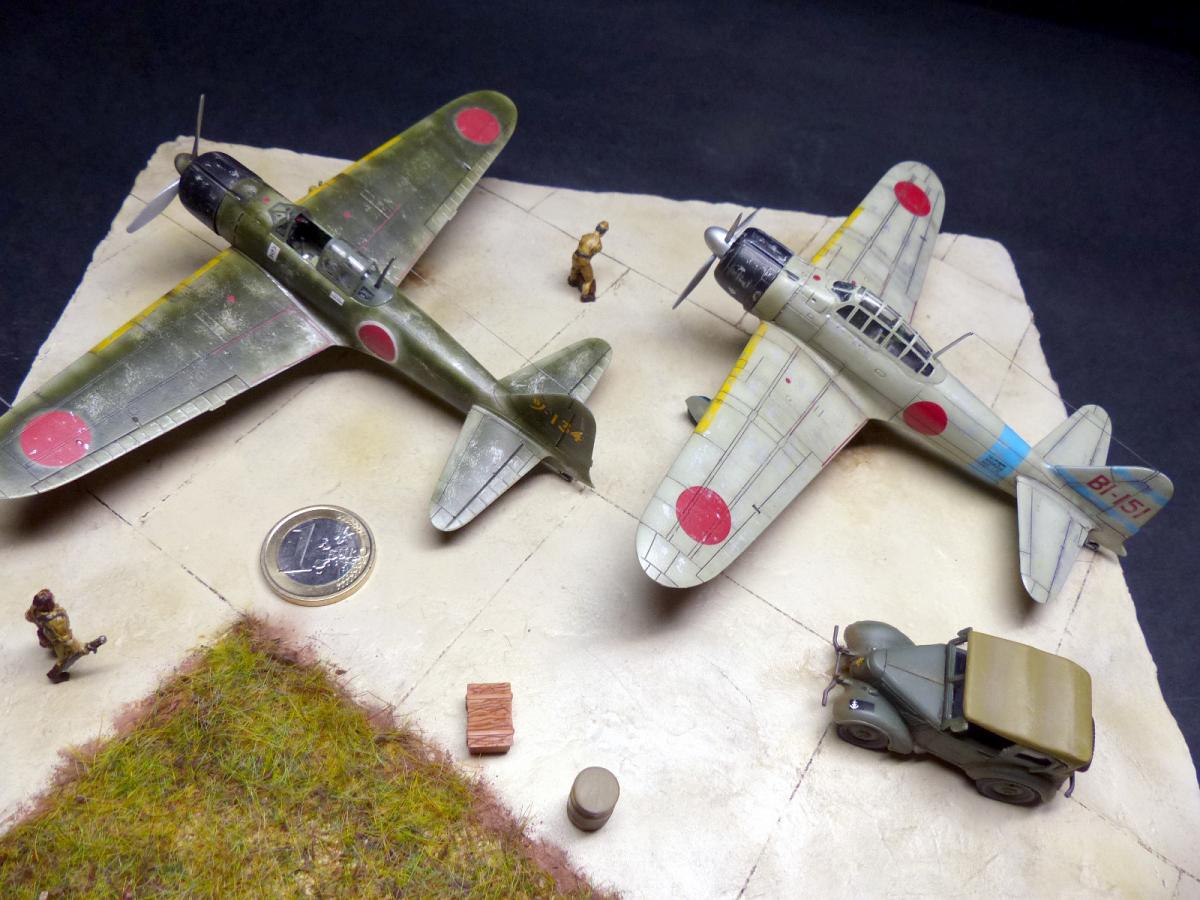
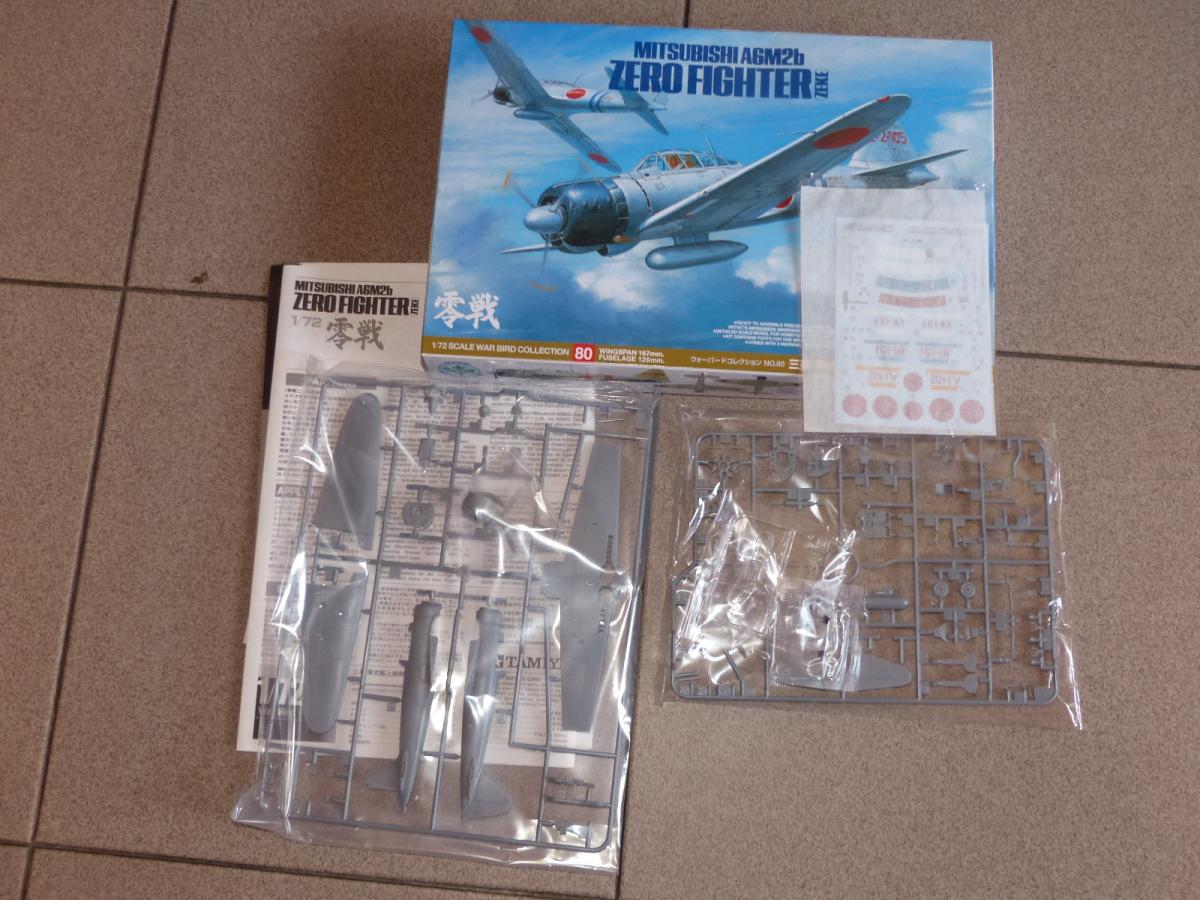
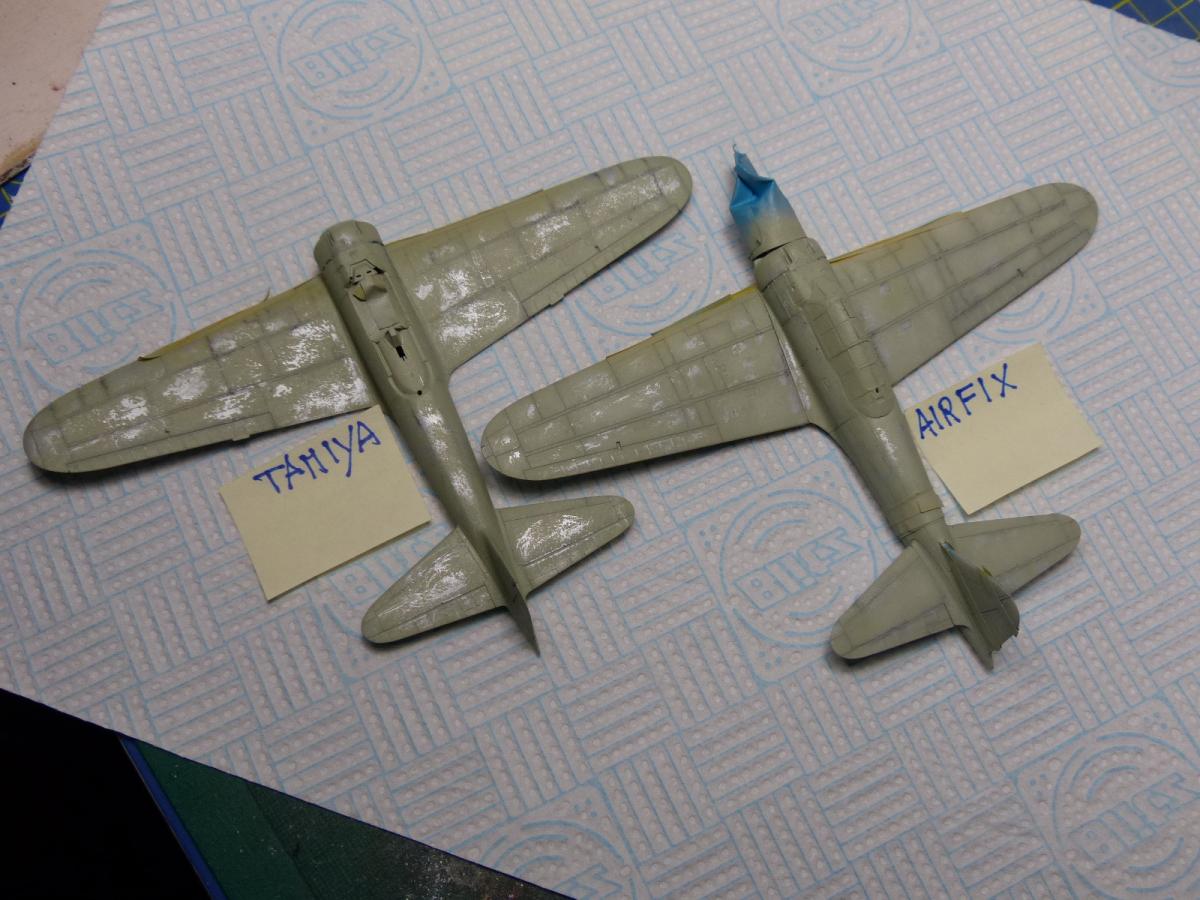
Being an Airfix lover, when last year the new Zero by Airfix came put, I could no resist and I ordered it. The kit was waiting for its moment in the stash, when some months ago a friend gave me as a gift the last Zero by Tamiya. suddenly an idea faced on my mind: a build of the two kits, both on the same scale, side by side, to see what the differences are, and to realize a small diorama.
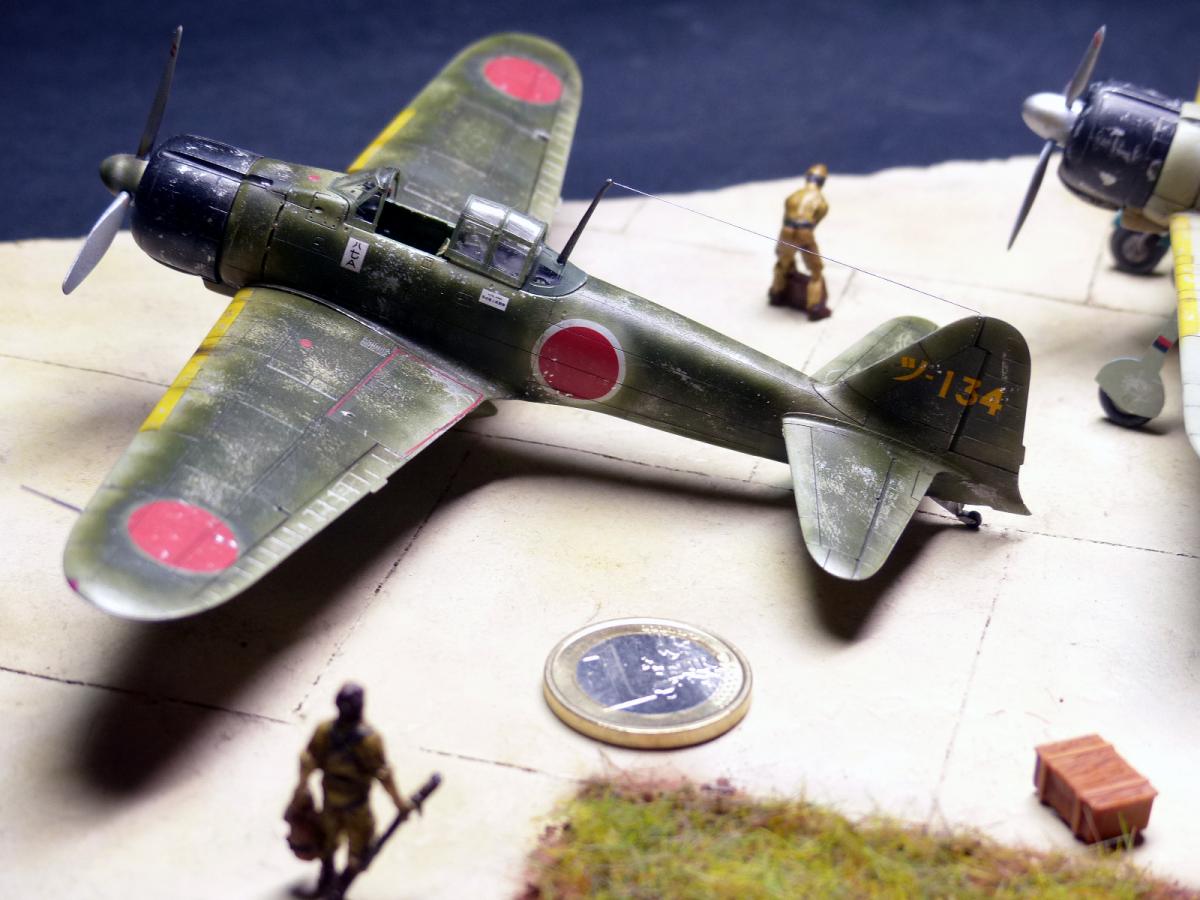
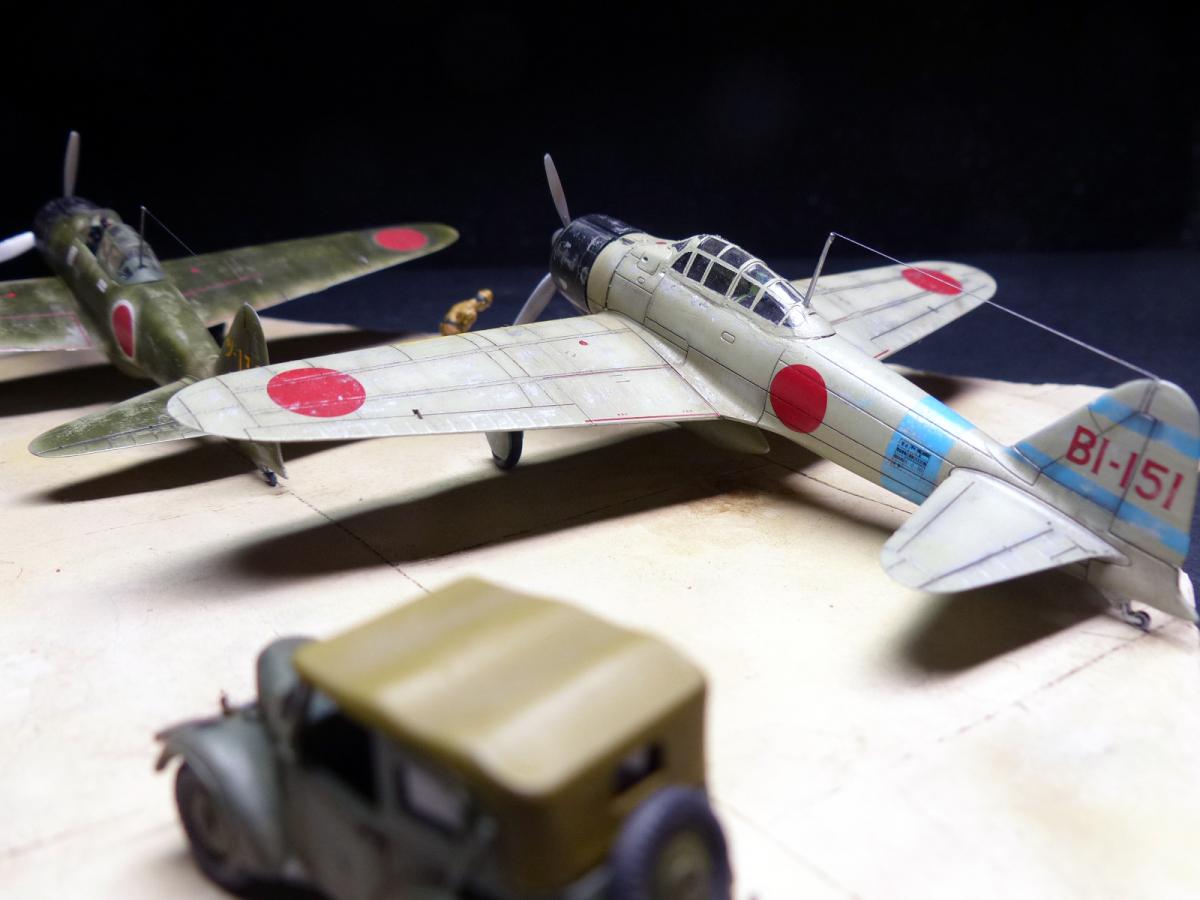
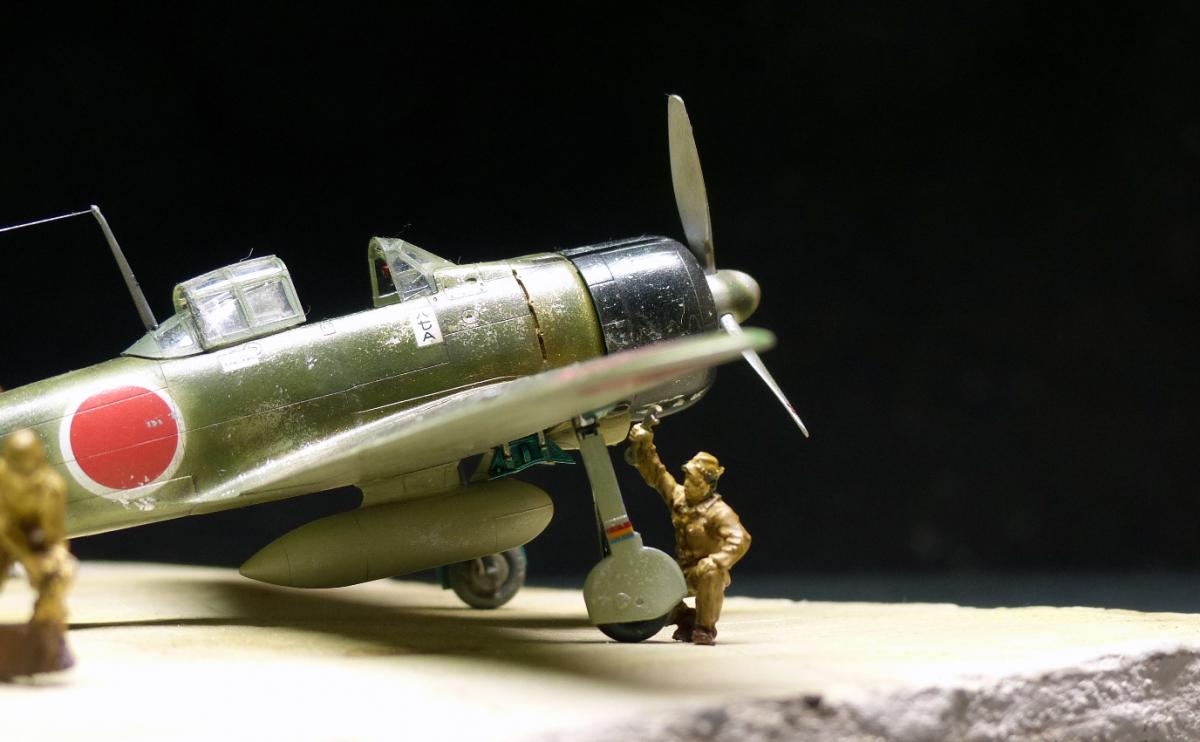
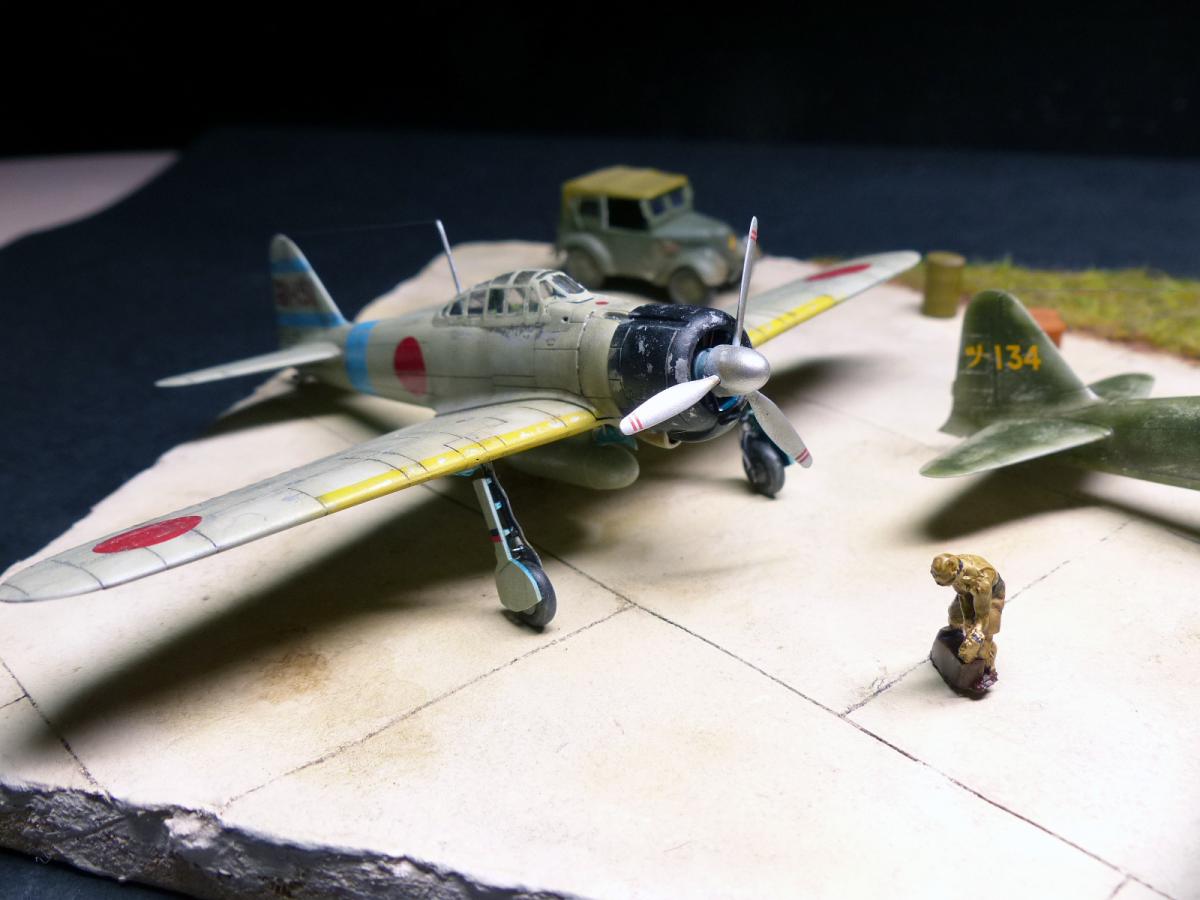
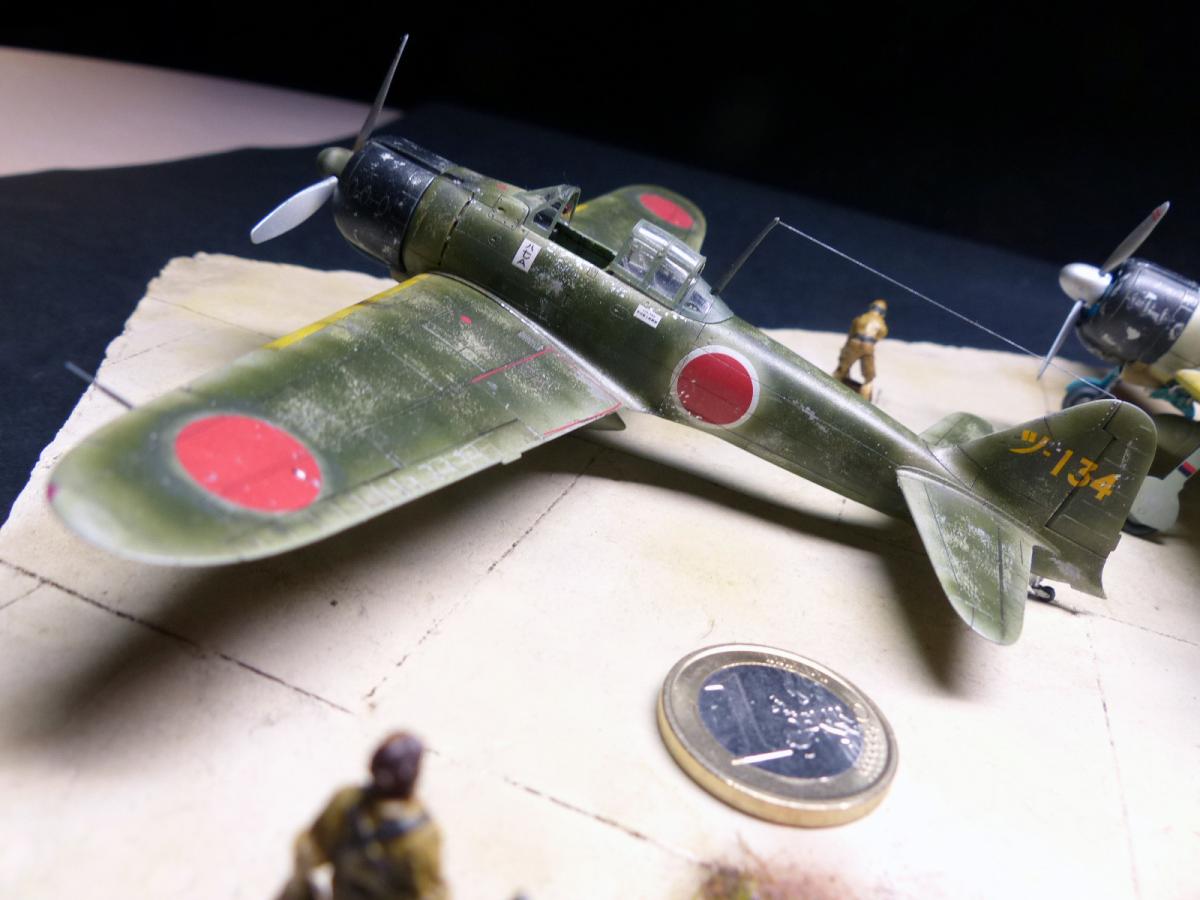
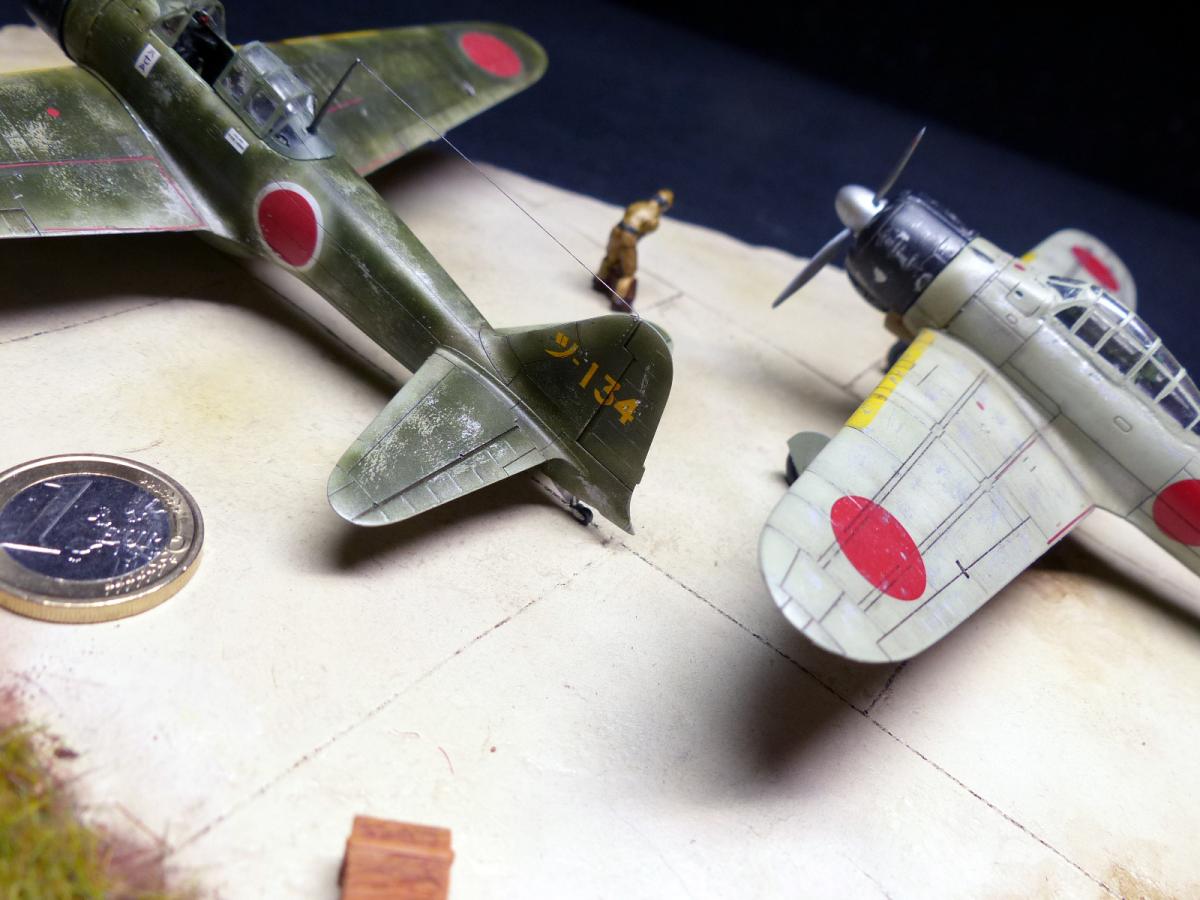
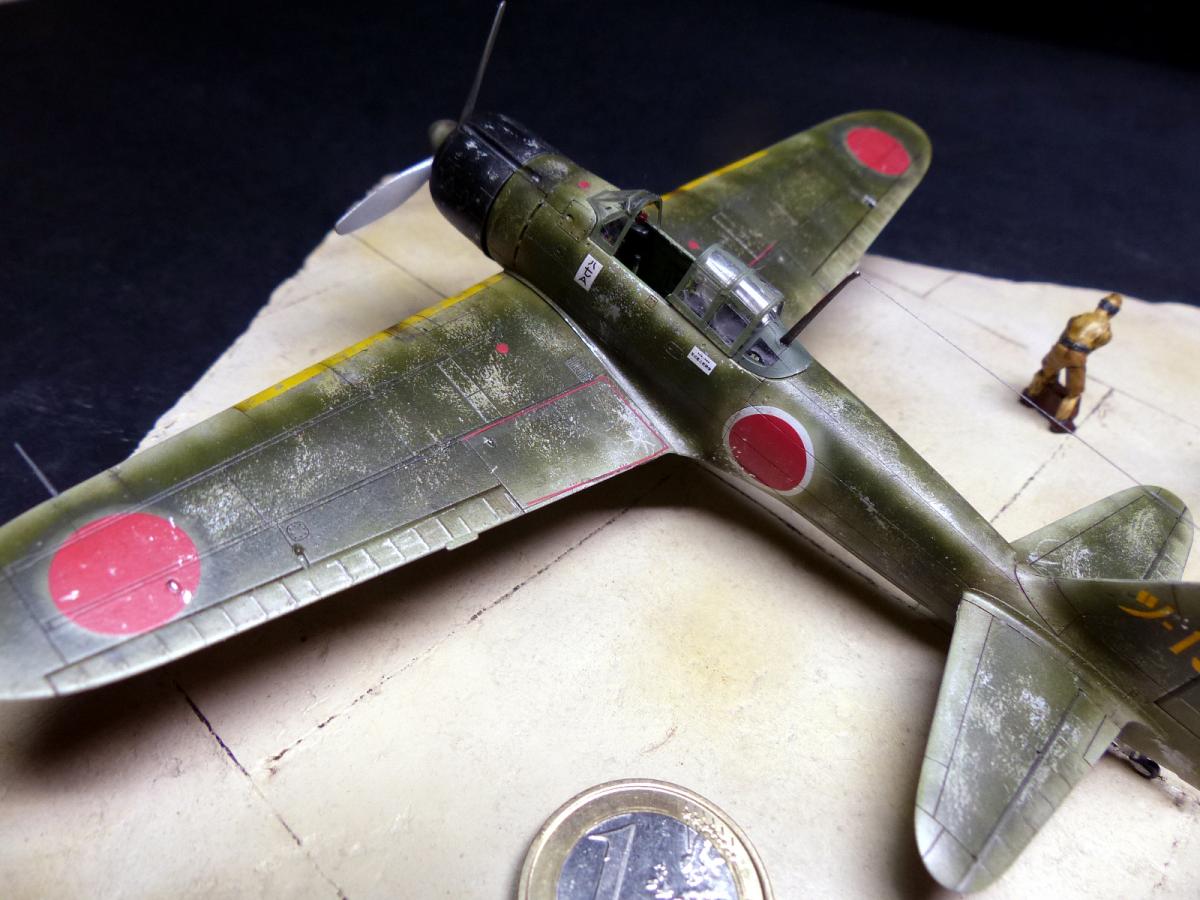
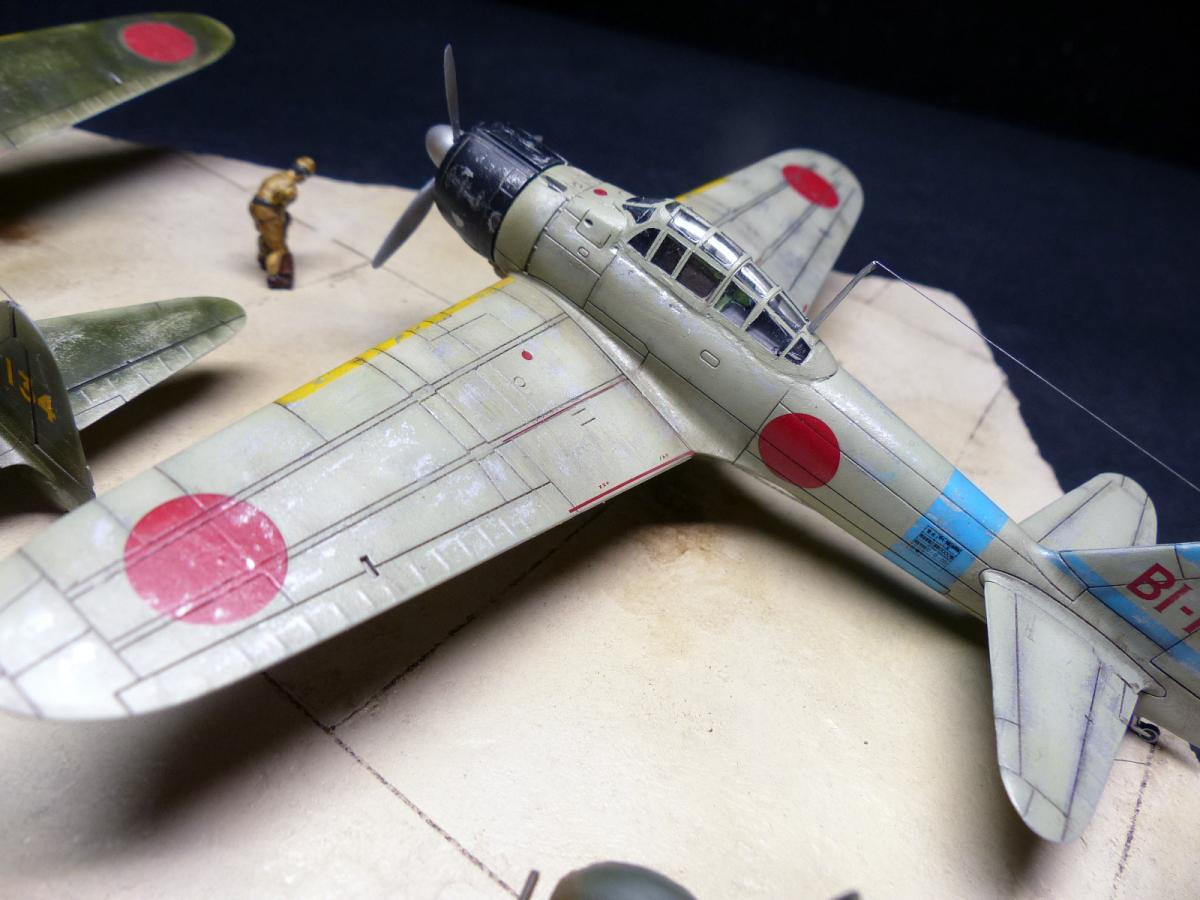
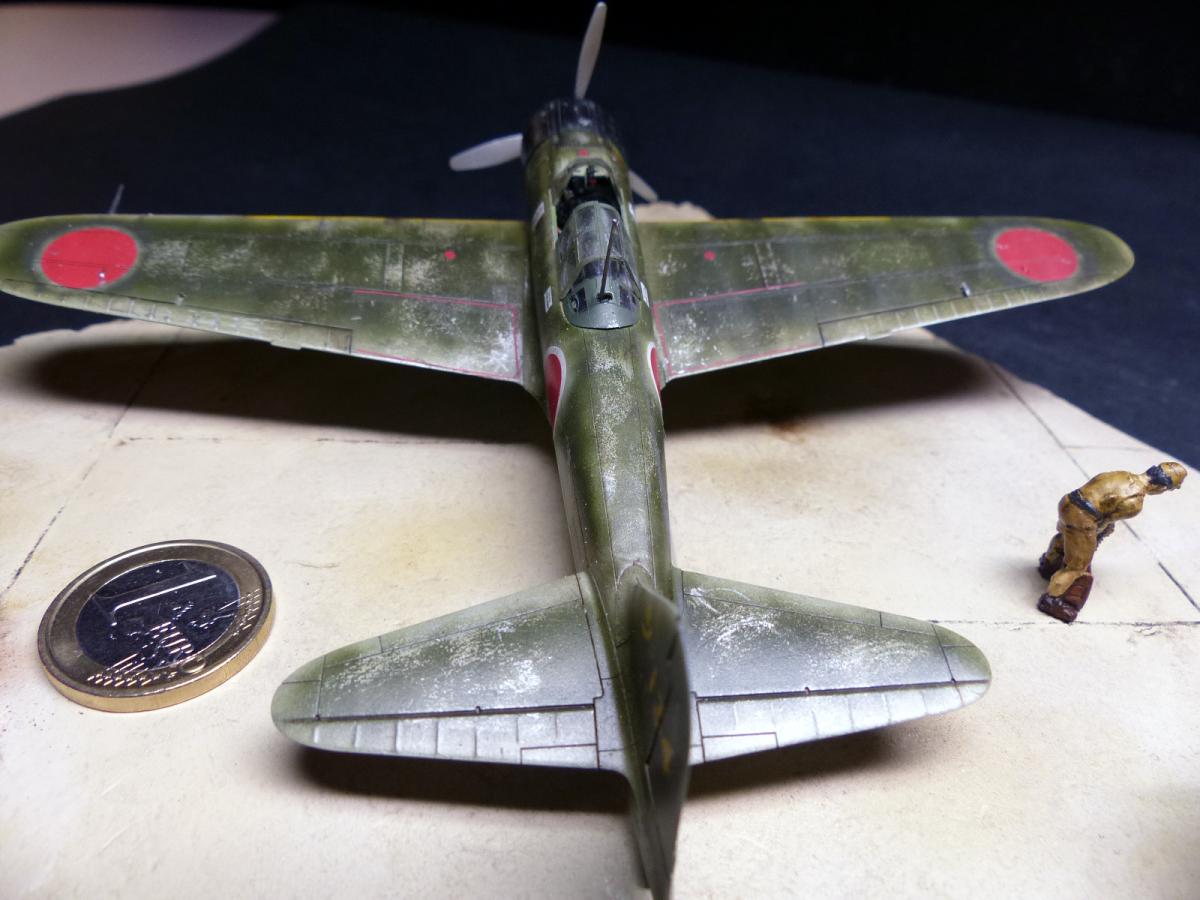
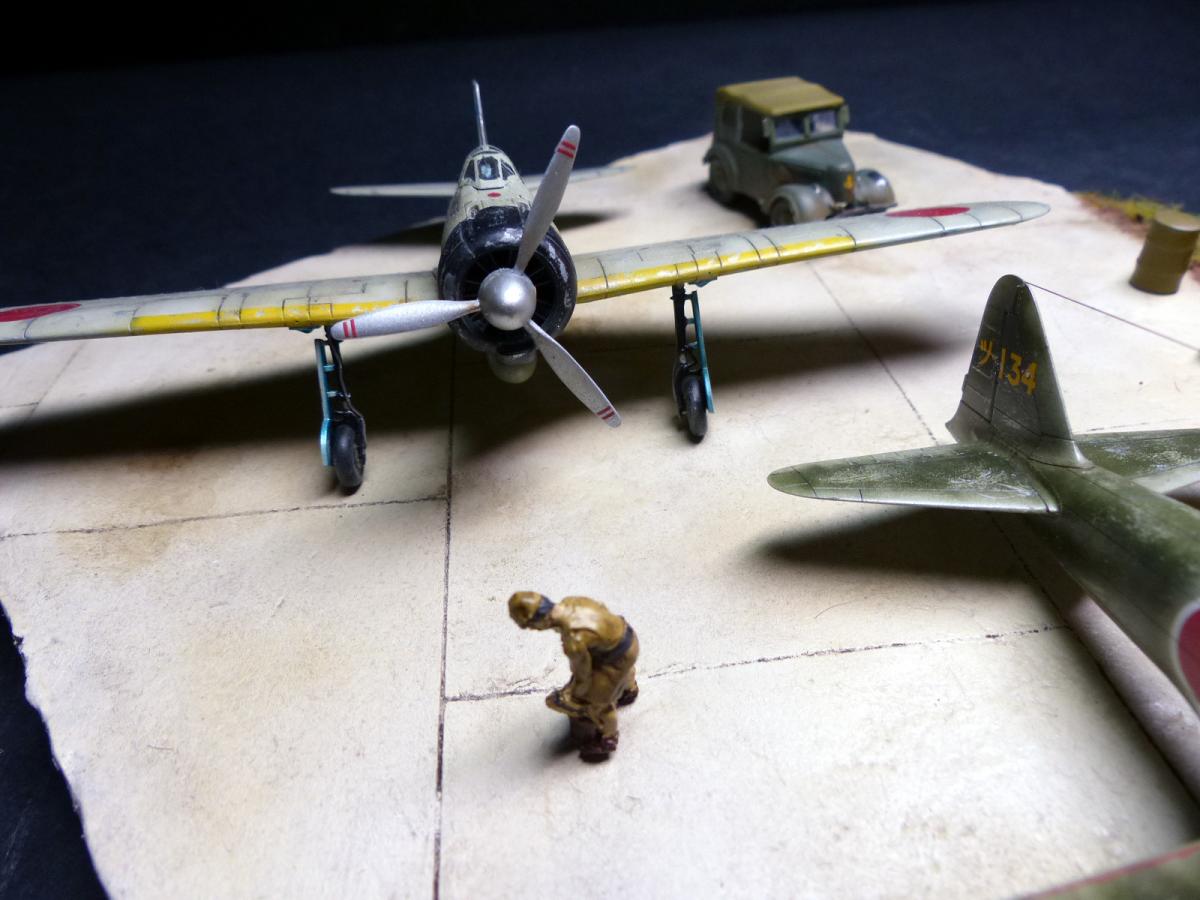
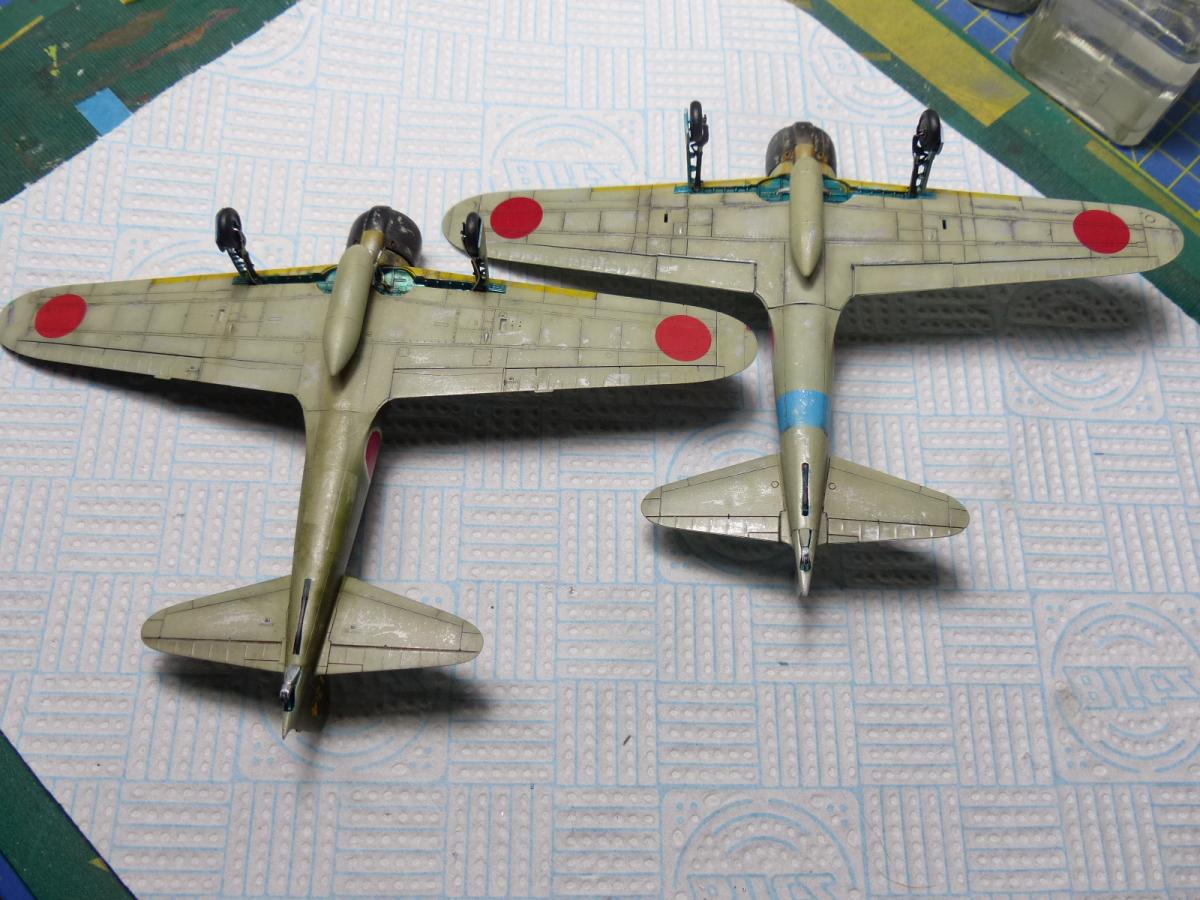
I decided to represent the Tamiya one in a 2 tones of green like in an article that i read on Illustrated Modeller dedicated to a Zero in service at the Salomon islands. And the Airfix one in the classic gray shade like depicted in the box-art of the Tamiya kit, so i switched the decals of the 2 kits: the Airfix has the Tamiya decals and viceversa.
I know that somebody will be ready to say that the marking for the Zero "Salomon Islands" are not correct. My answer is "yes, and i don't care. I am sorry, but i refuse to spend in decals more than the cost of the kit, sorry".
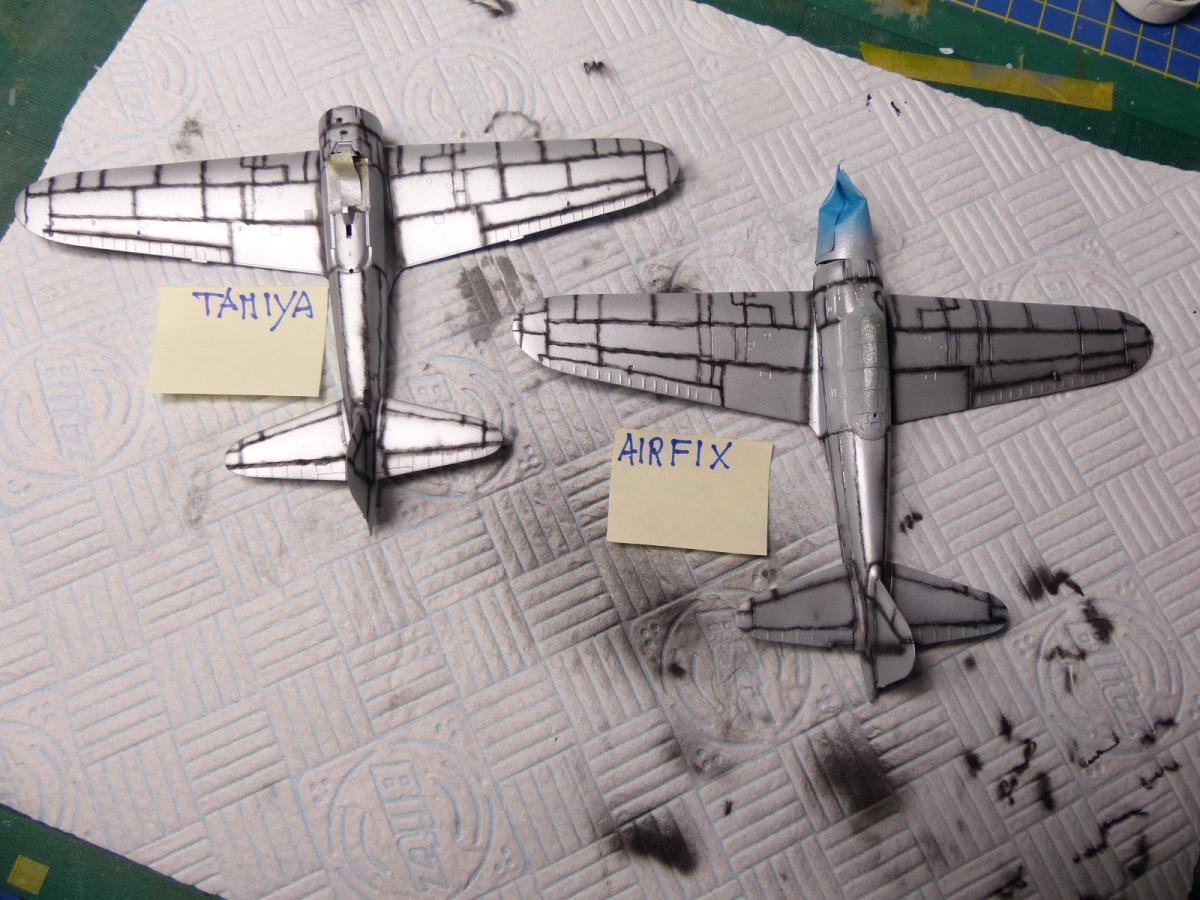
The 2 kits


Online there are many excellent reviews of the 2 kits, counting each single rivets and telling you everything you need to know about accuracy and so on, so i would suggest you to check one of these reviews for this matter.
Here i am focusing more on my feeling about the 2 builds, that i did in the same moment and side to side.
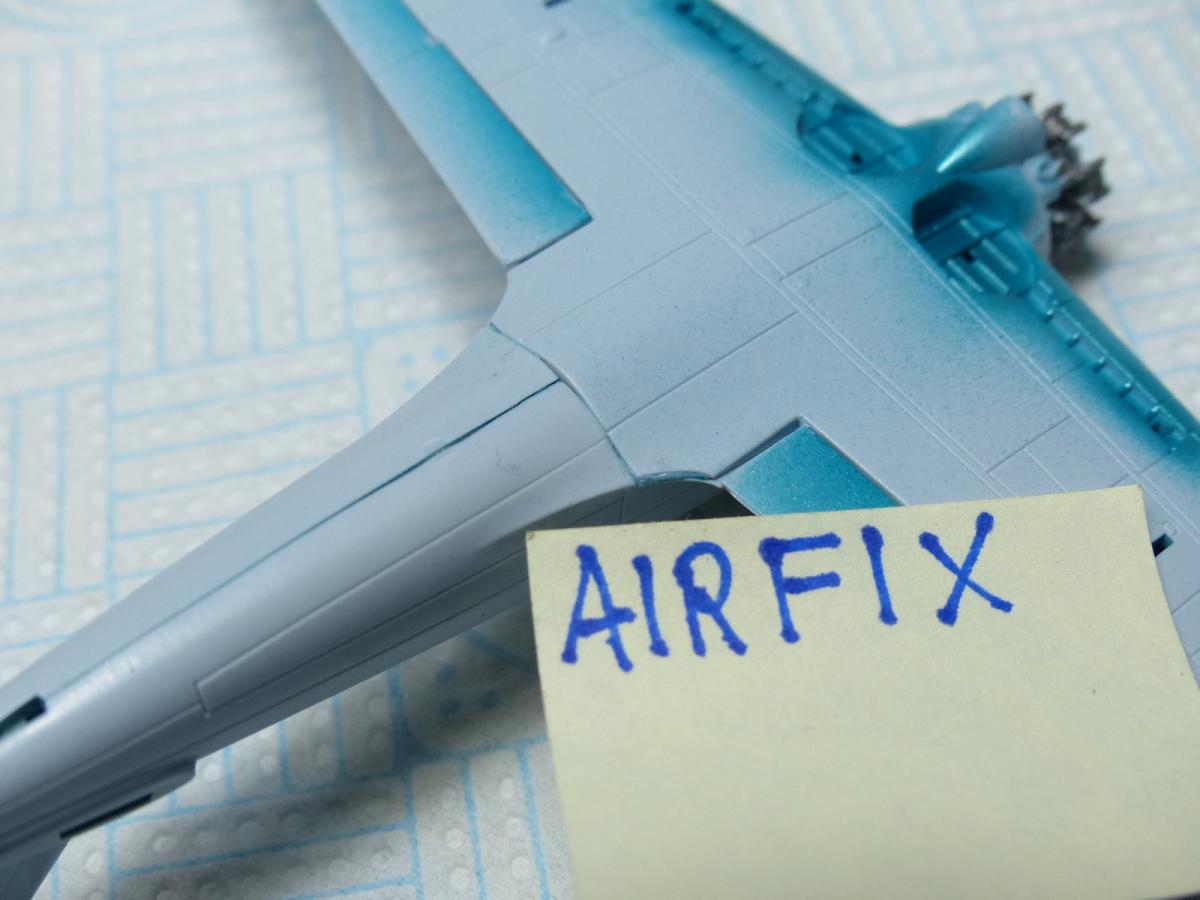
Both the kits come in a box with a very nice box-art, and both have very clear instruction. For the first time Airfix also add full colored profiles, so in this regard i must say that the winner is Airfix.
Both the kits have plenty of details; the Tamiya uses a more "stiff" plastic, and the "sprue gates" for each part are more subtle and easier to cut. The recessed panels are finer in the Tamiya one, but after many criticism Airfix improved a lot the deep of the panel lines: they are any longer trenches, and in my opinion are perfectly right, over all after priming and painting. If you are a such perfectionist that cannot live with that, you still have the option to sand them a little.
Bot the kits are well engineered and very easy to assembly: on this regard i would say it is a perfect draw.
Fitting is excellent for both the kits: perhaps the Tamiya as a slight advantage compared to the Airifix, but with both very little or nothing putty is required.
Decals: both have good decals, conforming well after some applications of Mr. Decals Softer.
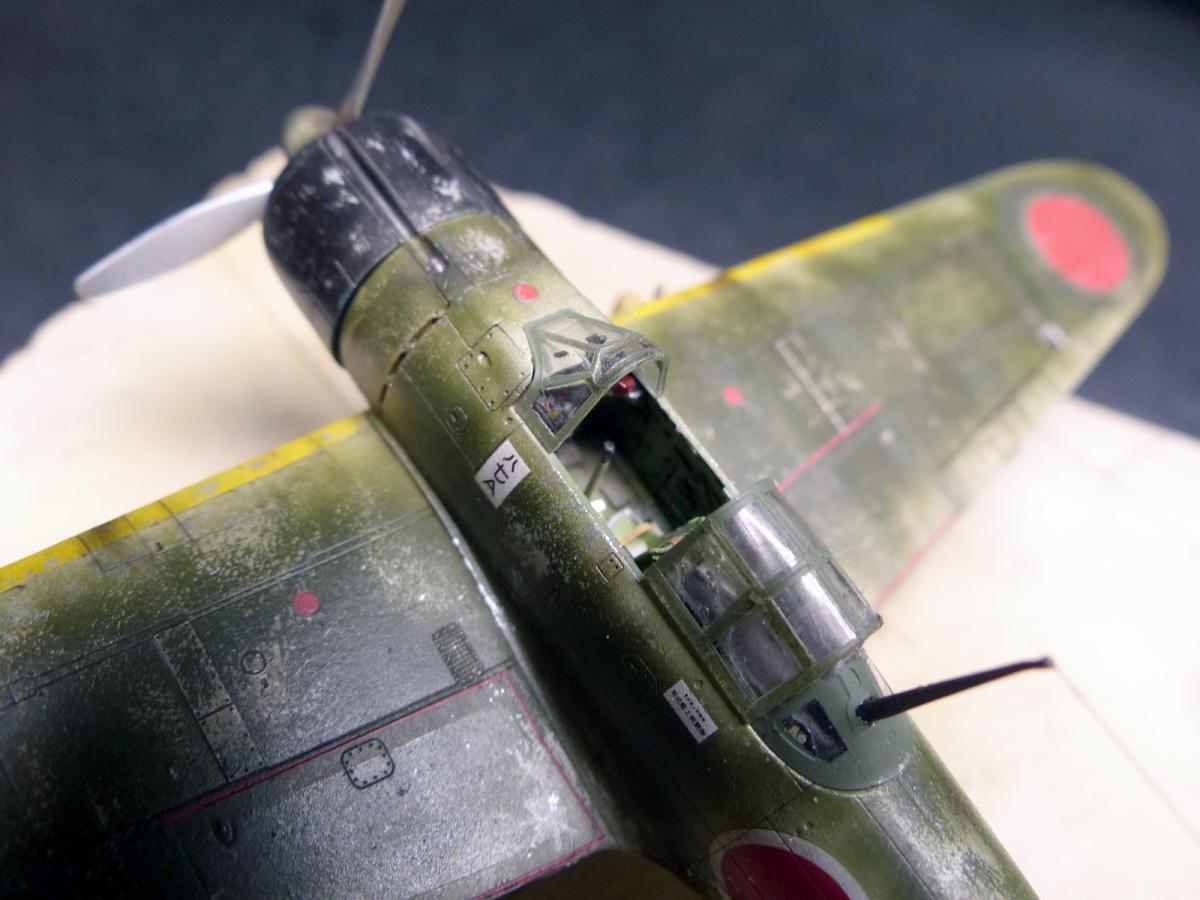
Both the cockpits are busy enough, but in this area the Tamiya is clearly the winner, although you will not be disappointed by the Airfix.
Canopy: both are clear, free of distortions, and conform well to the kit. But the Tamiya is the thinnest one, and over all also offer the option of the open canopy, while the Airfix doesn't. So here the winner is the Tamiya.
Price: the Airfix is significantly cheaper than the Tamiya kit, and for sure is the winner.
Conclusion: but the kits are small jewels. The Tamiya offers something more, but at a price. If in our judgement we include also the price, my conclusion is... a DRAW
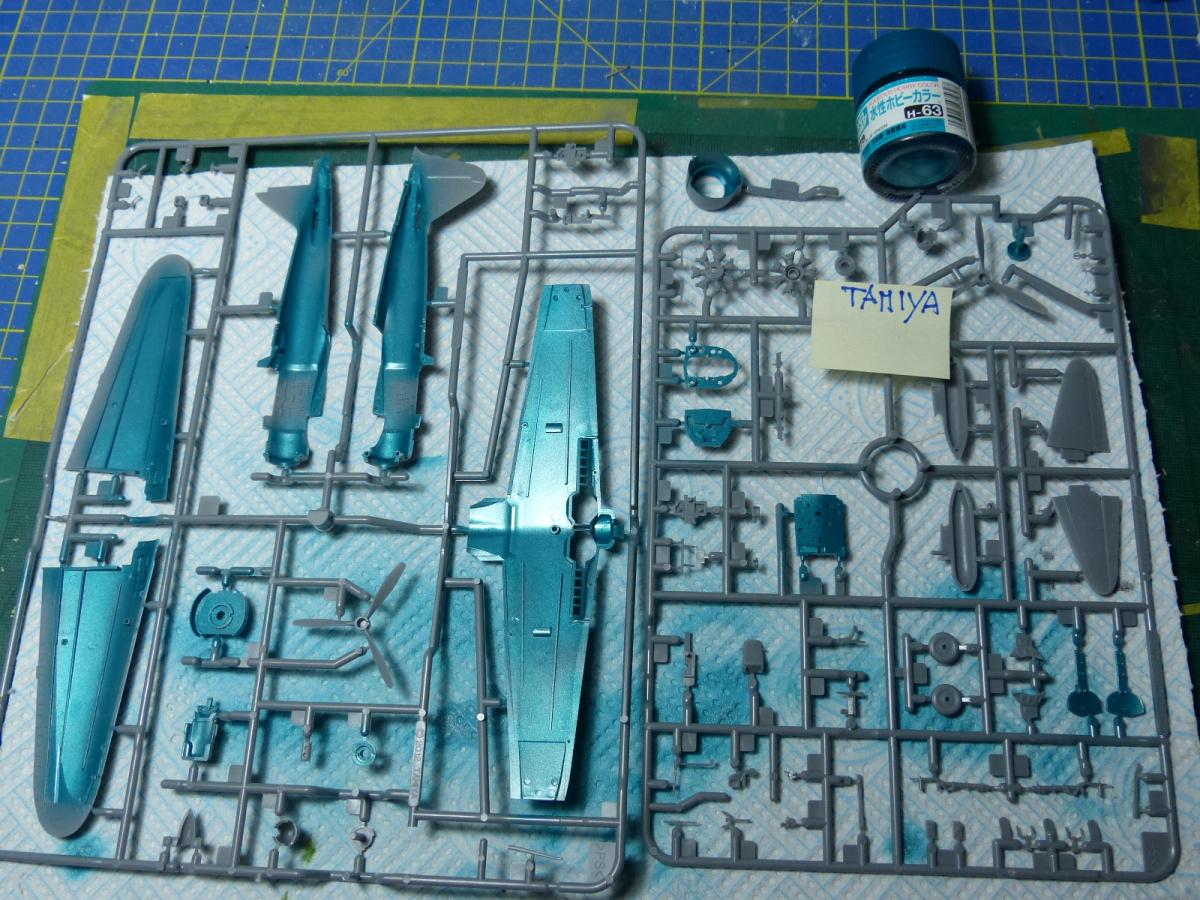
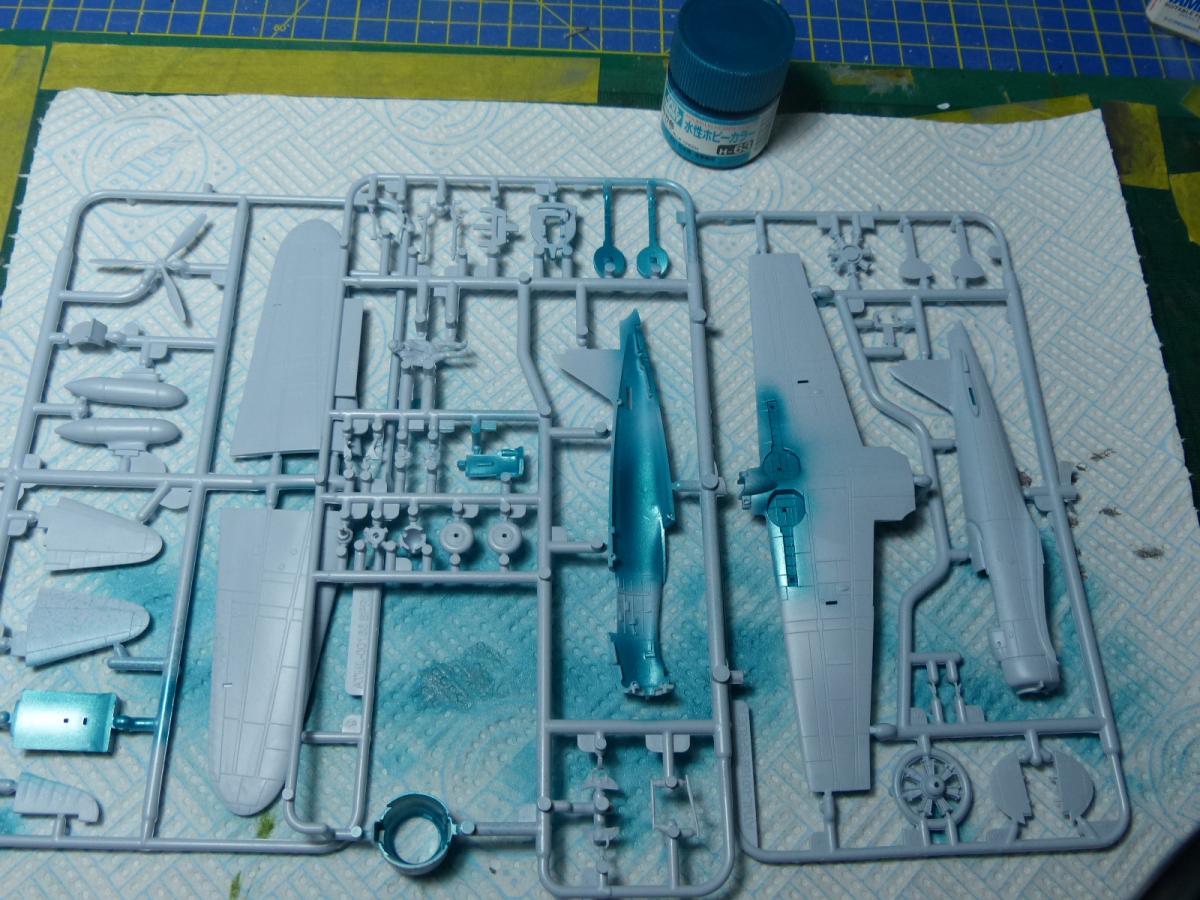
The building

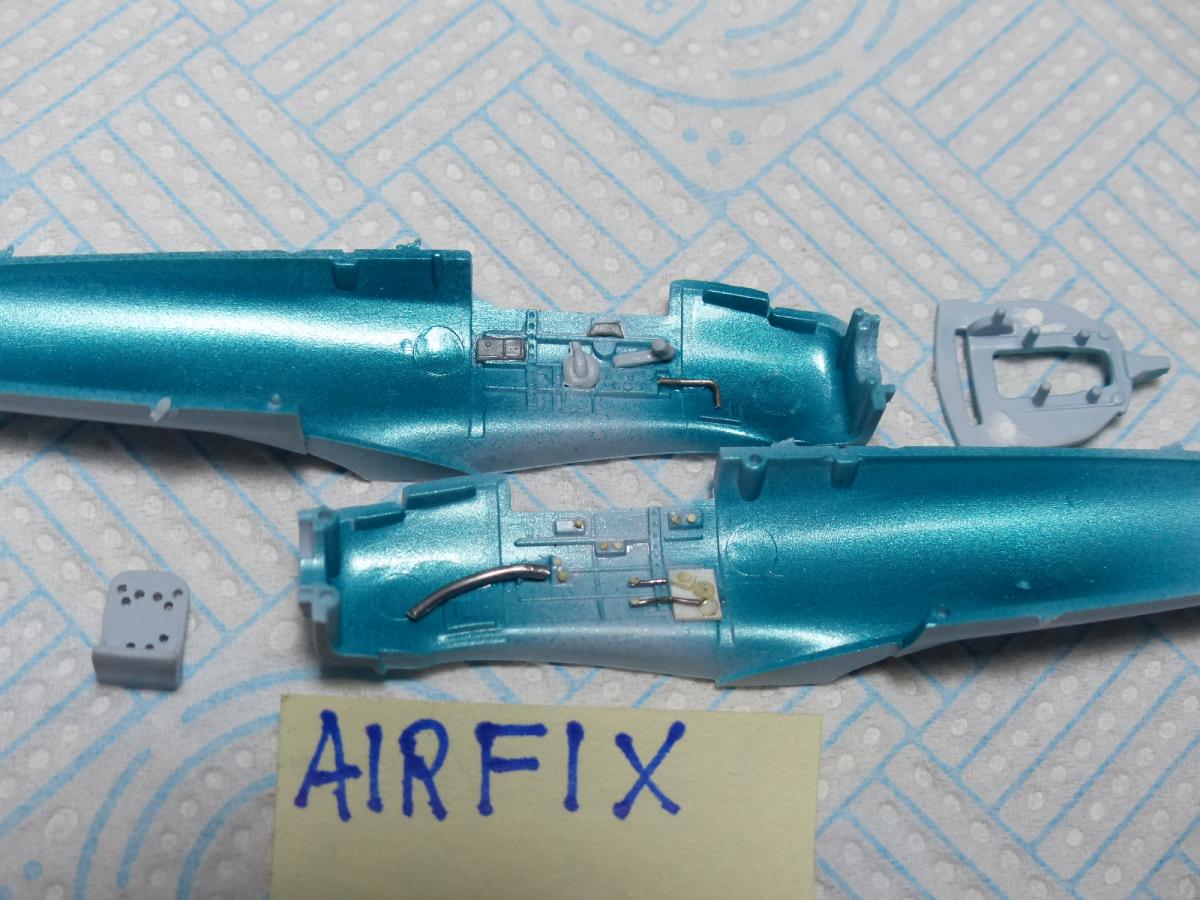
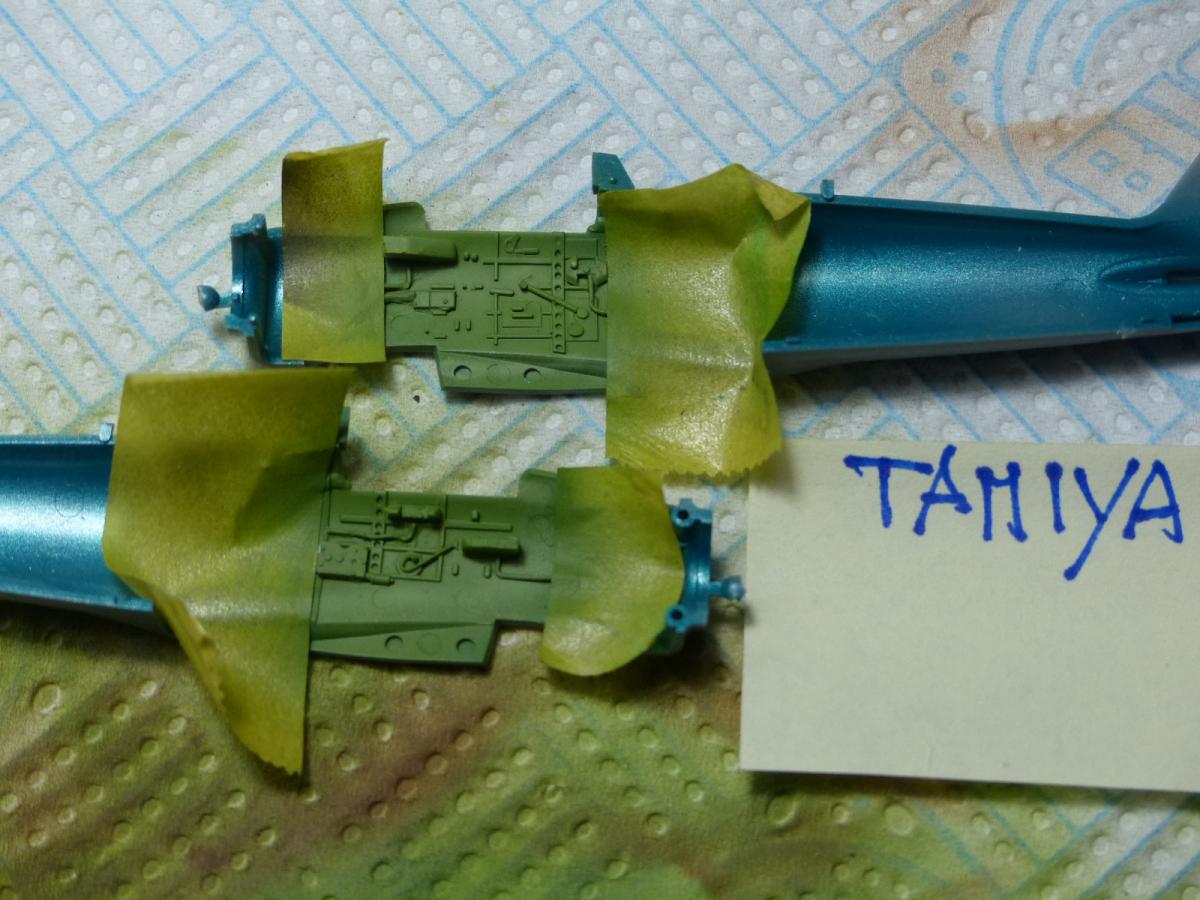
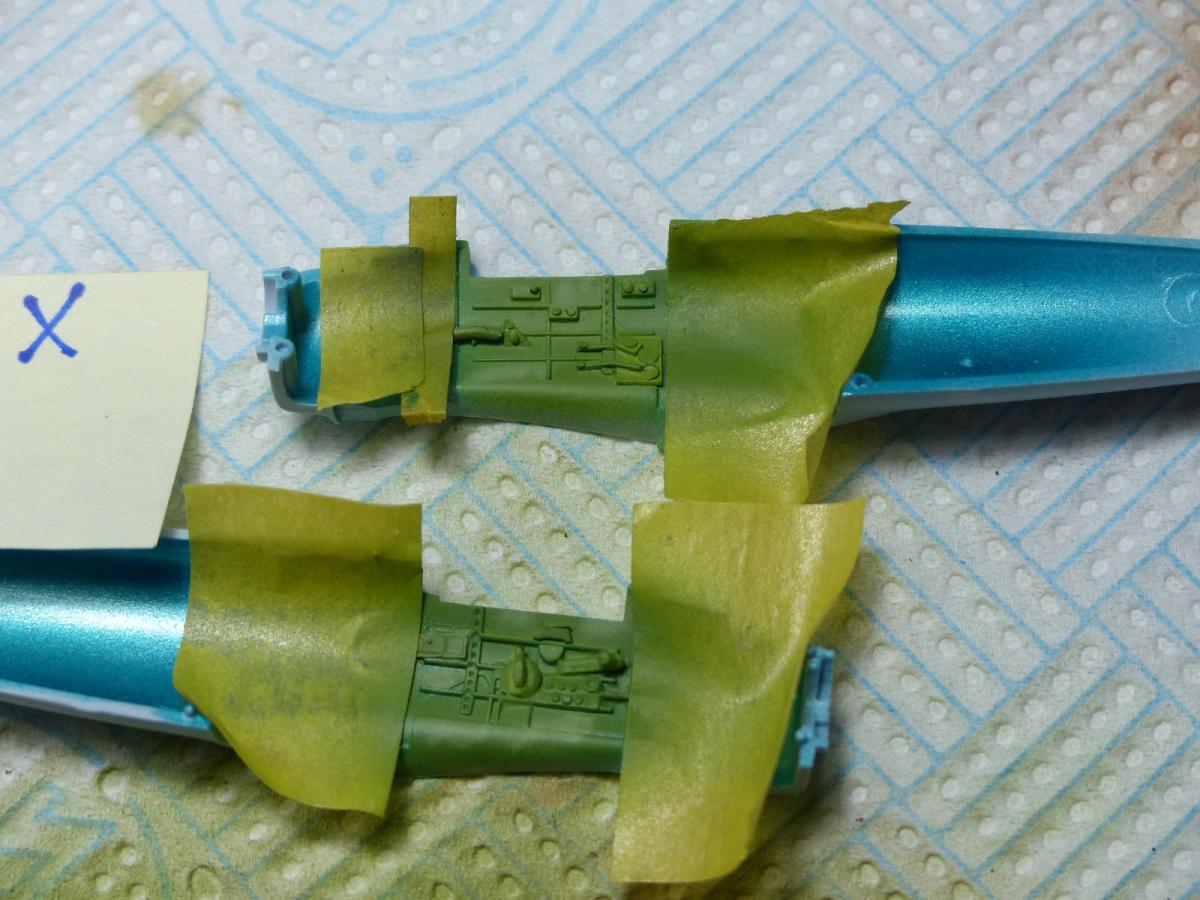
According to my references, first i airbrushed the metallic blue-greenish color (Gunze) and then i masked it and sprayed the interior green in the various areas of the planes.
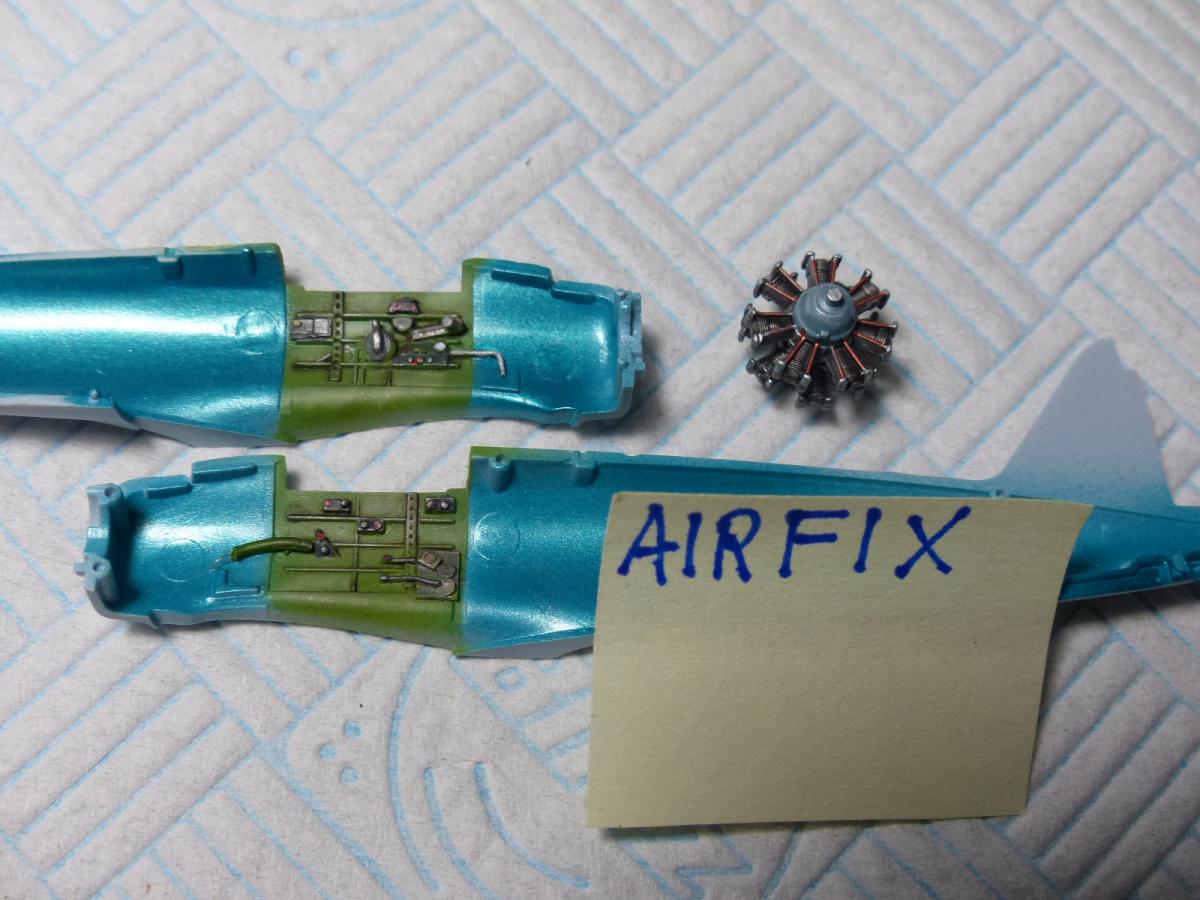
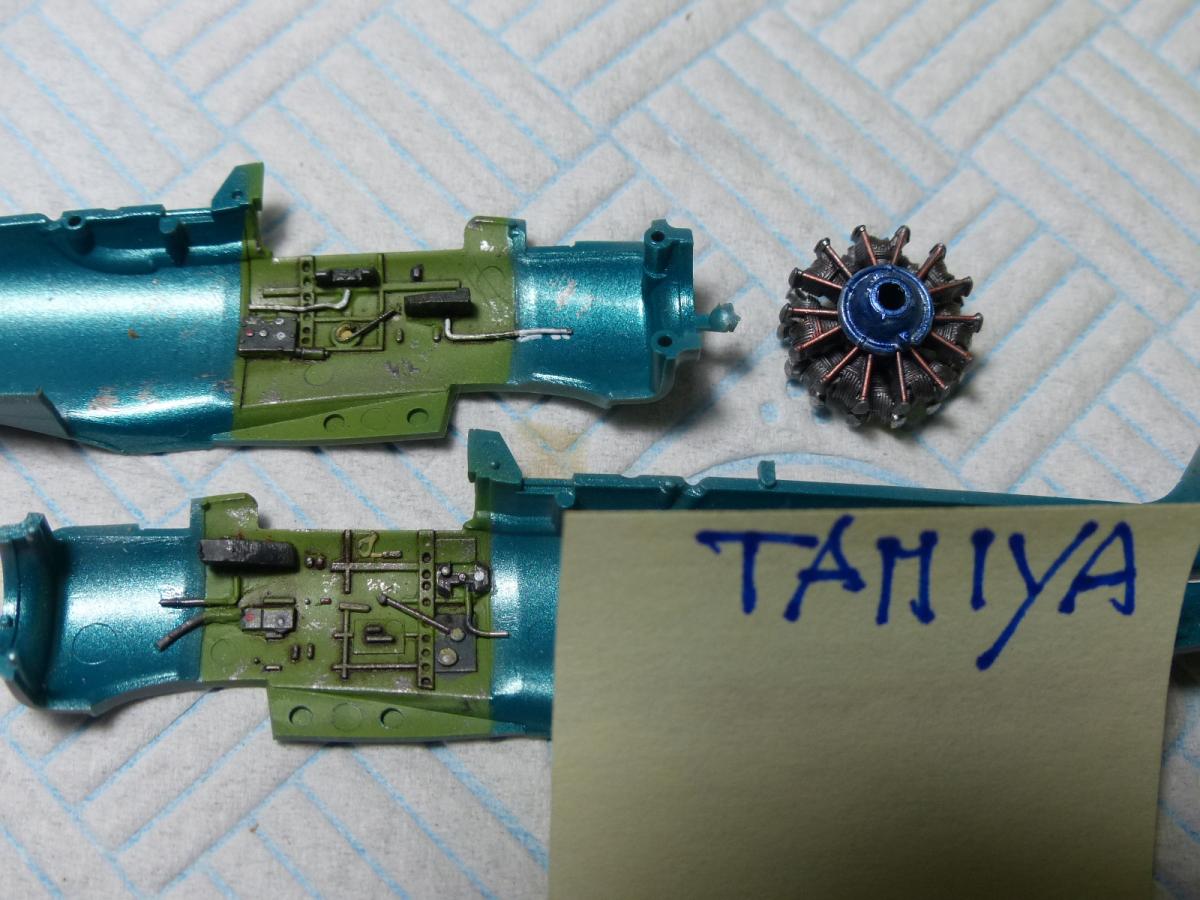
Both the englines are nicely represented. I am not a great scratchbuilder but for both i added some wiring, and painted the various part with Gunze Buffable Metallic, followed with a black wash.
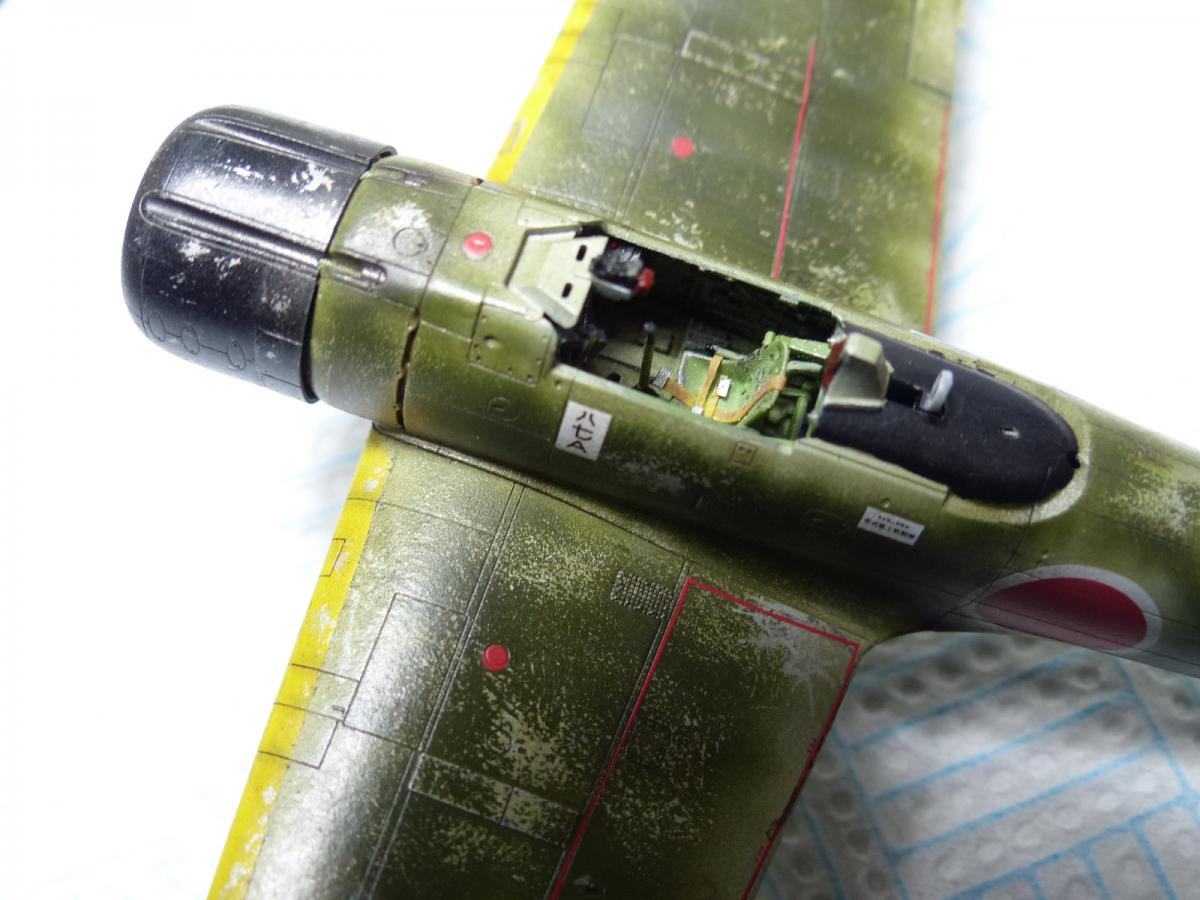
Both the kits have some details molded on the side of the cockpit, but the airifix have more. And here i made a great mistake: the Tamiya has less details moulded, because they provide them as separate parts!!! But i don't know why, i forgot that ! I had just added some scratchbuilt details to the Airfix, and i did the same with the Tamiya, when instead i could use the parts provided with the kit ! I realized that only much later, when it was too late to fix the mistake.
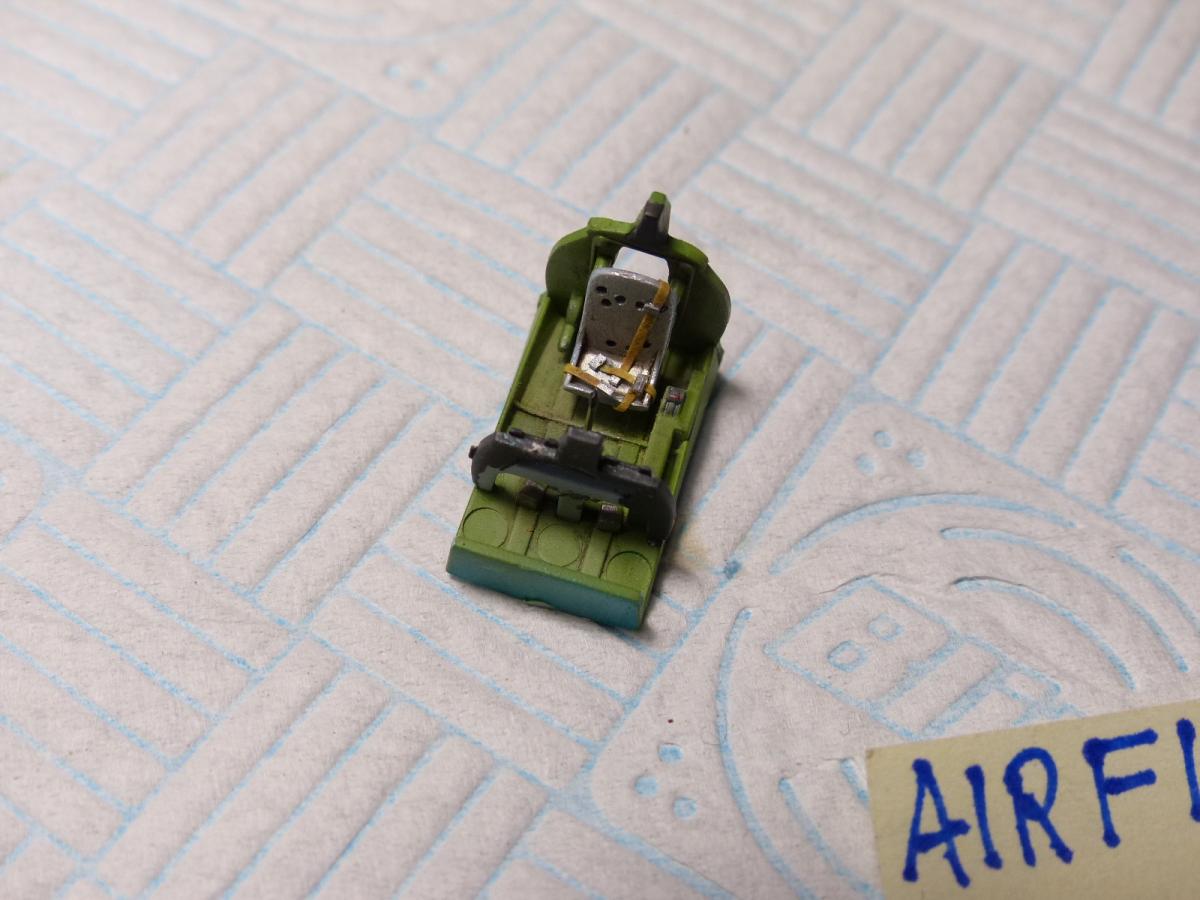
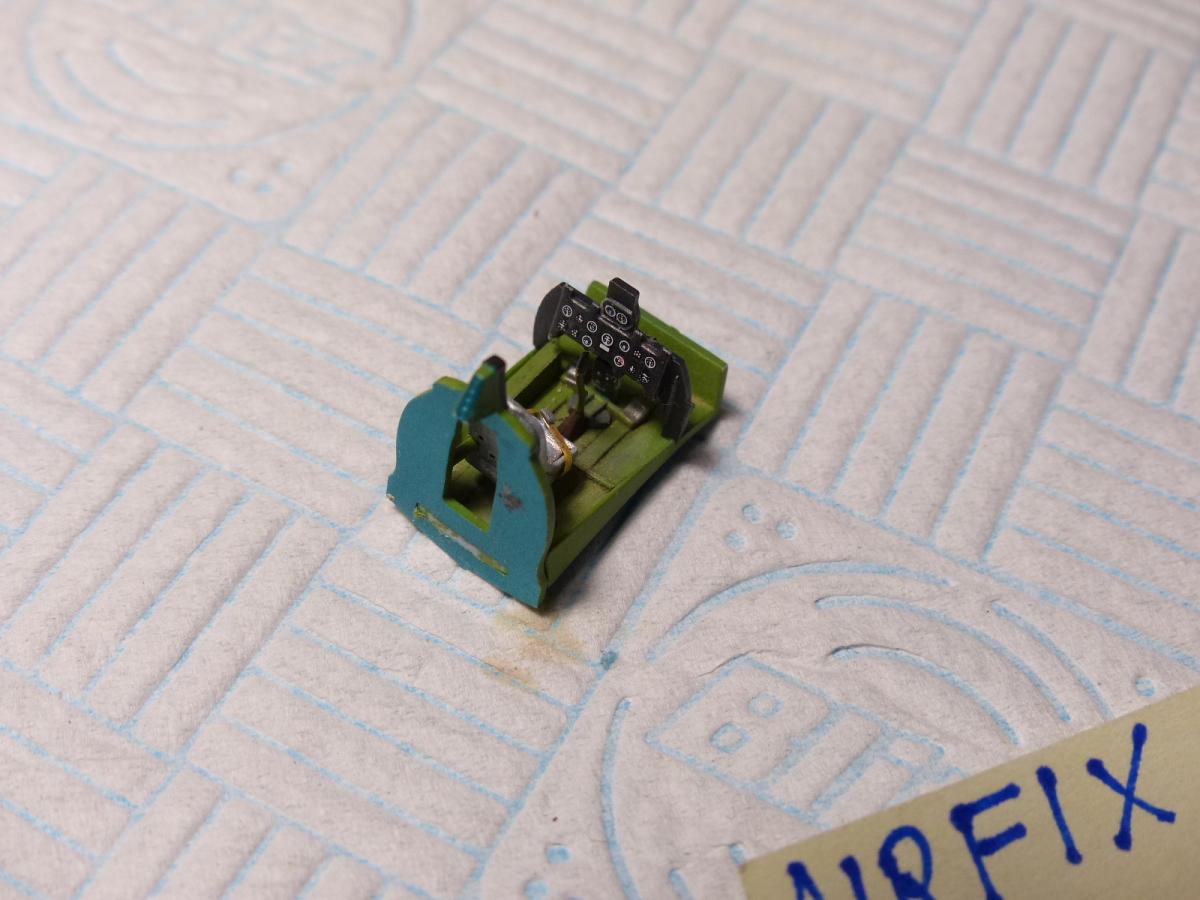
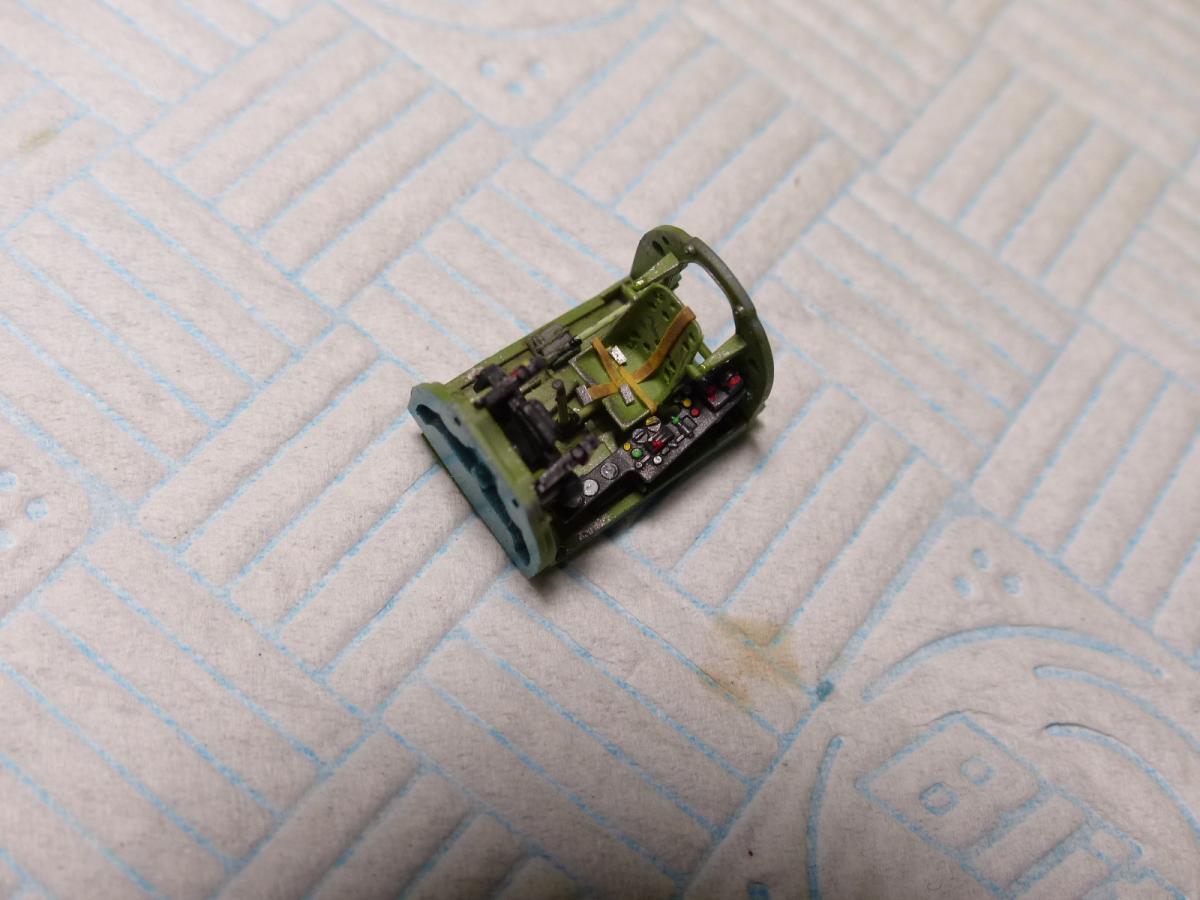
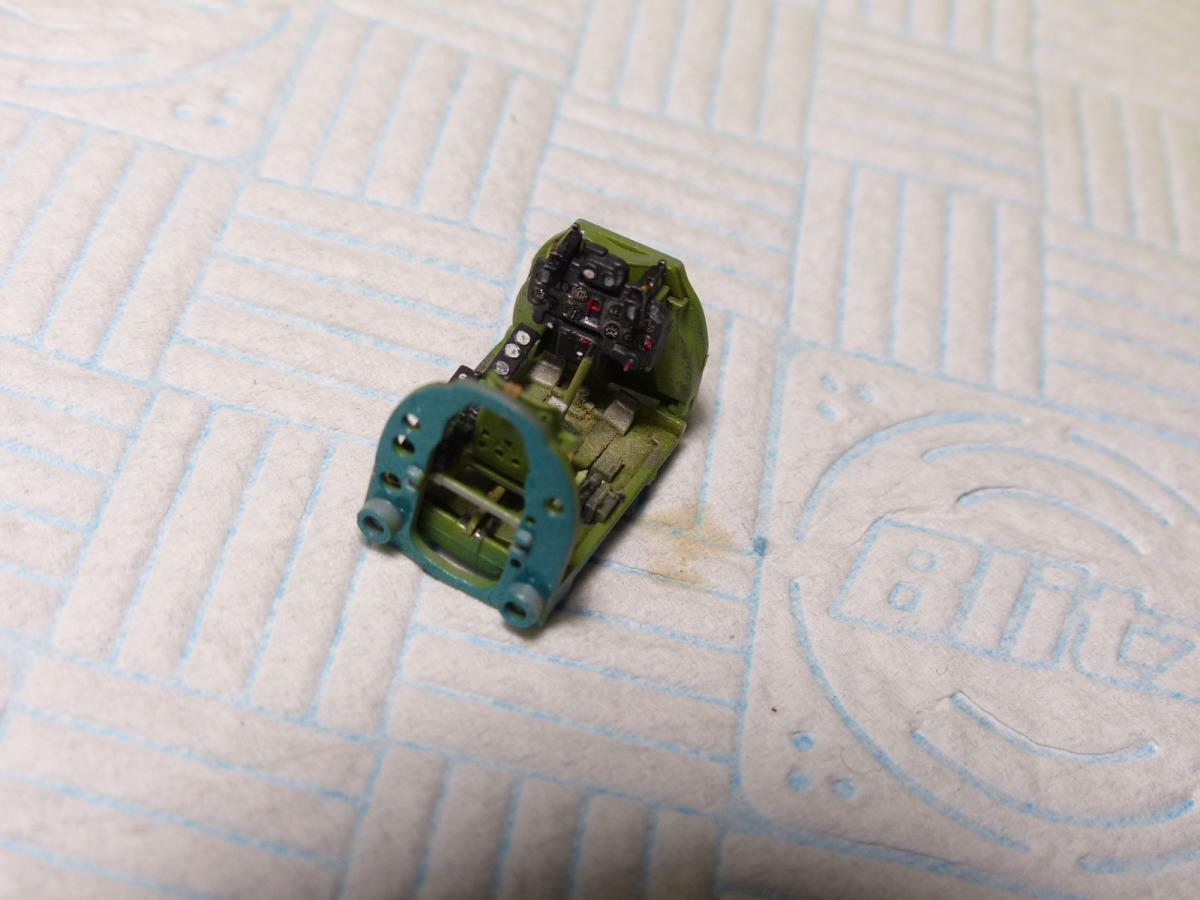
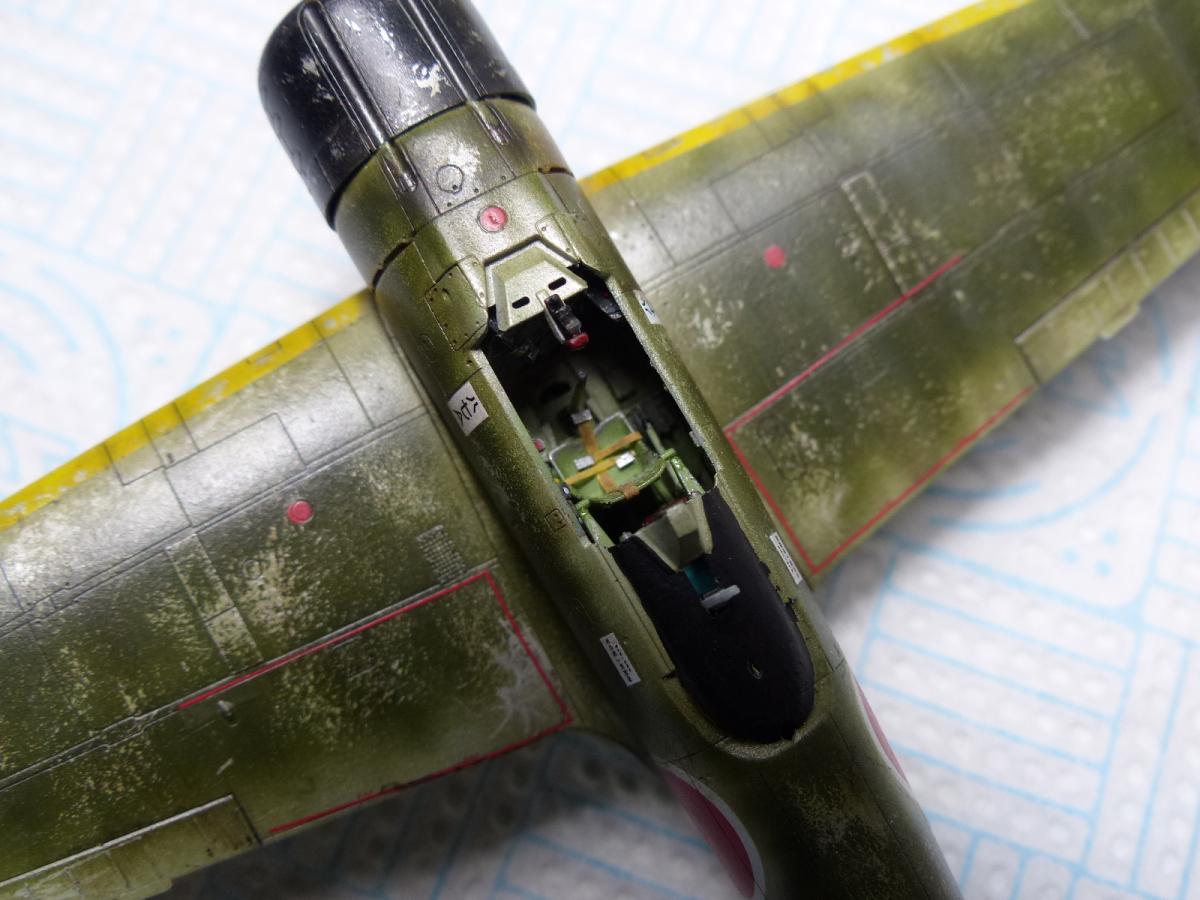
As you can see, both the pilot's offices are nicely busy, and i added some scratchbuilt seat belts using 0.6 mm tape and some small piece of evergreen. Unfortunately the Airifix's instruments panels is not molded, and all the details are provided as decal only, while the Tamiya is molded, allowing for some drybrush and a more realistic effect.


With the cockpits ready, it was time to close the fuselages and glue the wings. The wings roots was the only part of the Airfix kit where sosme putty was required... nothing hard to fix, i used some Perfect Plastic Putty, and i cleaned it with a cotton bud damped with water.
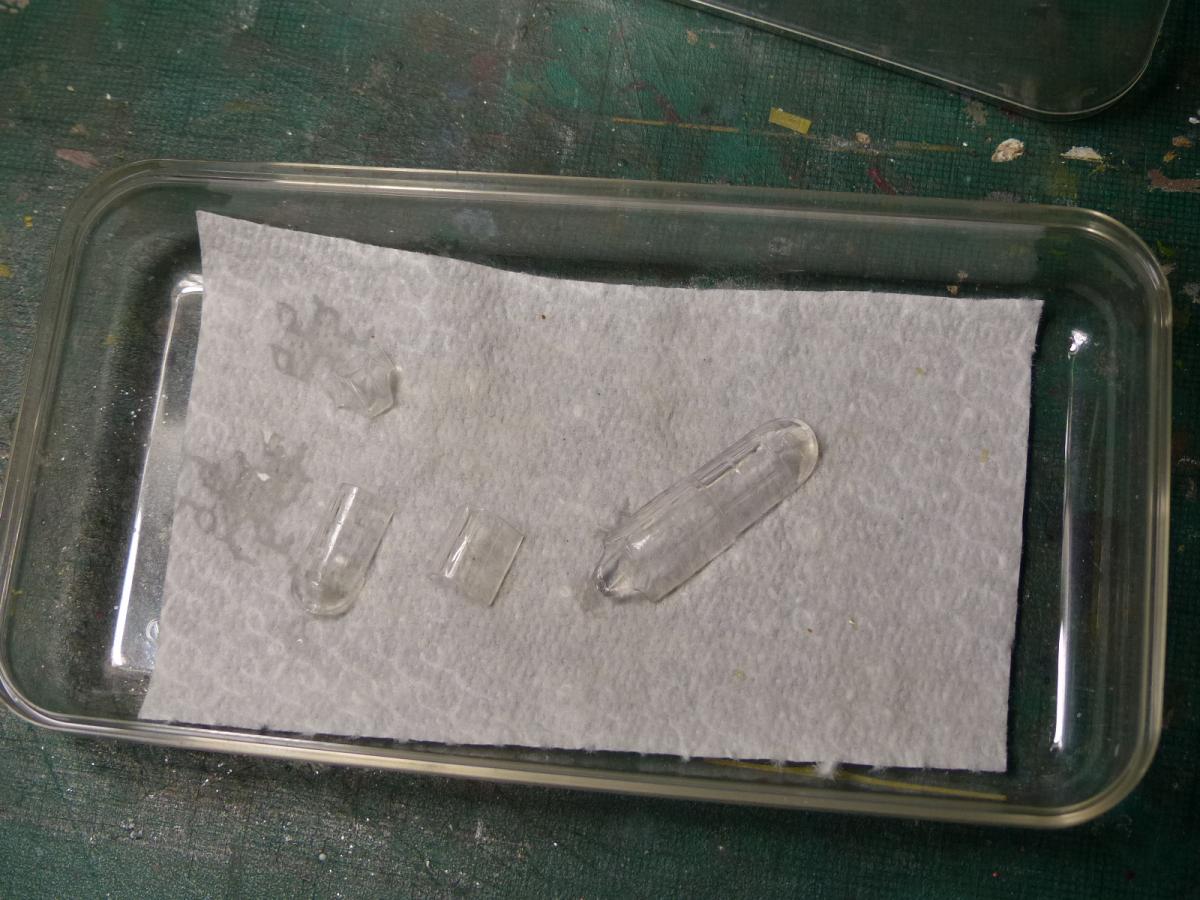

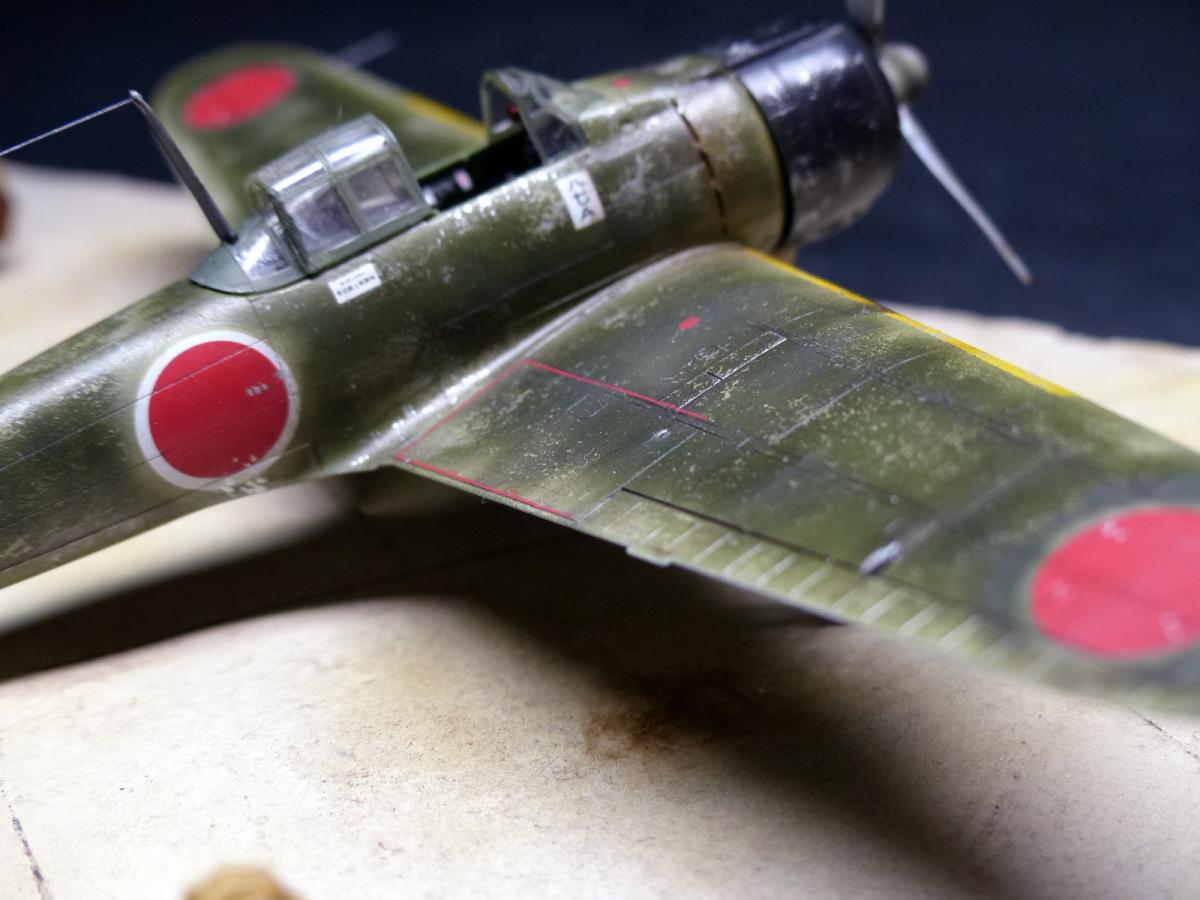
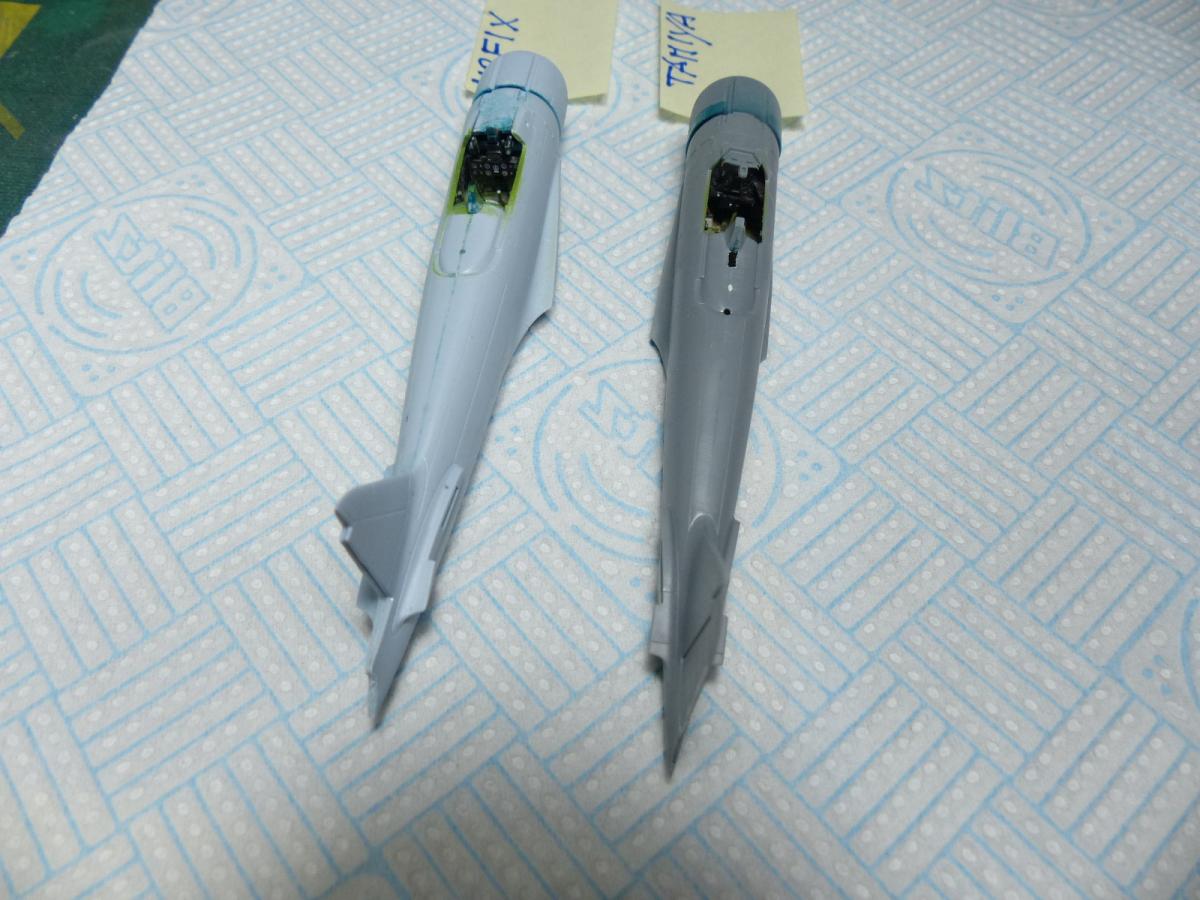
I soaked the canopies with Future, then i masked both with Tamiya tape; I glued the Airfix canopy and added some putty for a perfect joint, while i masked the fuselage for the Tamiya, that will stay open, for gluing it later. Both the canopy has been sprayed with interior green.
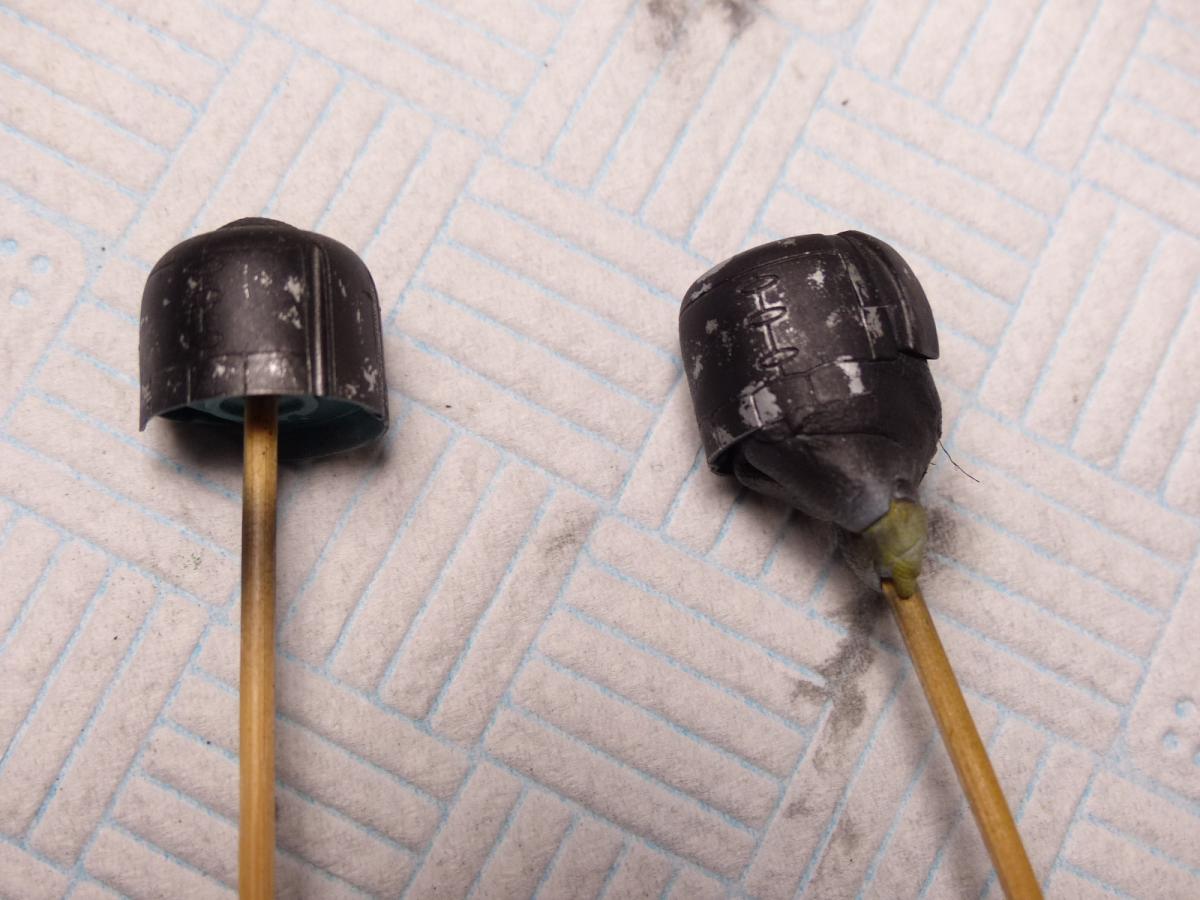

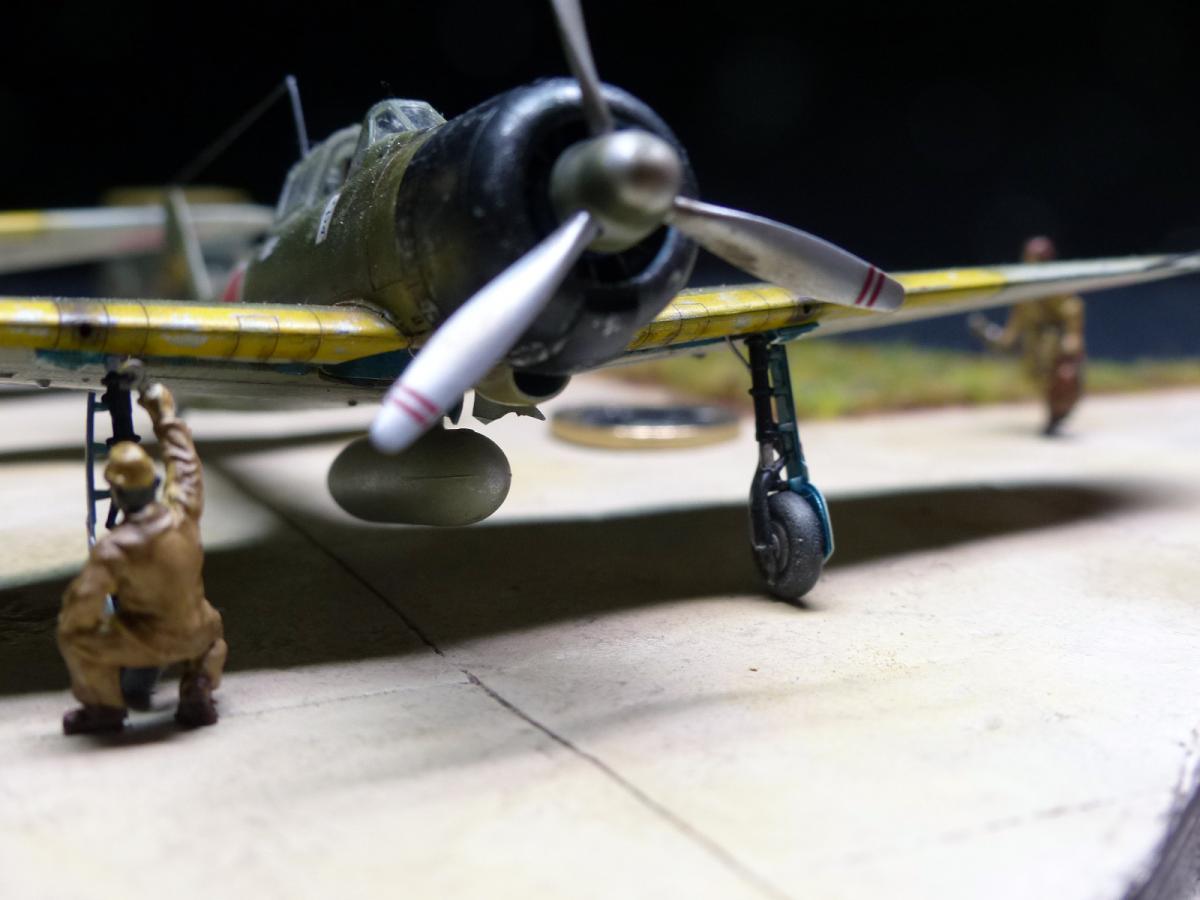
Engine's cowling: both received a first aluminium coat, followed by hairspray, then by a coat of black, and then chipped with a brush damped in warm water.
Alumium was also sprayed on both the planes, followed by a pre-shading.
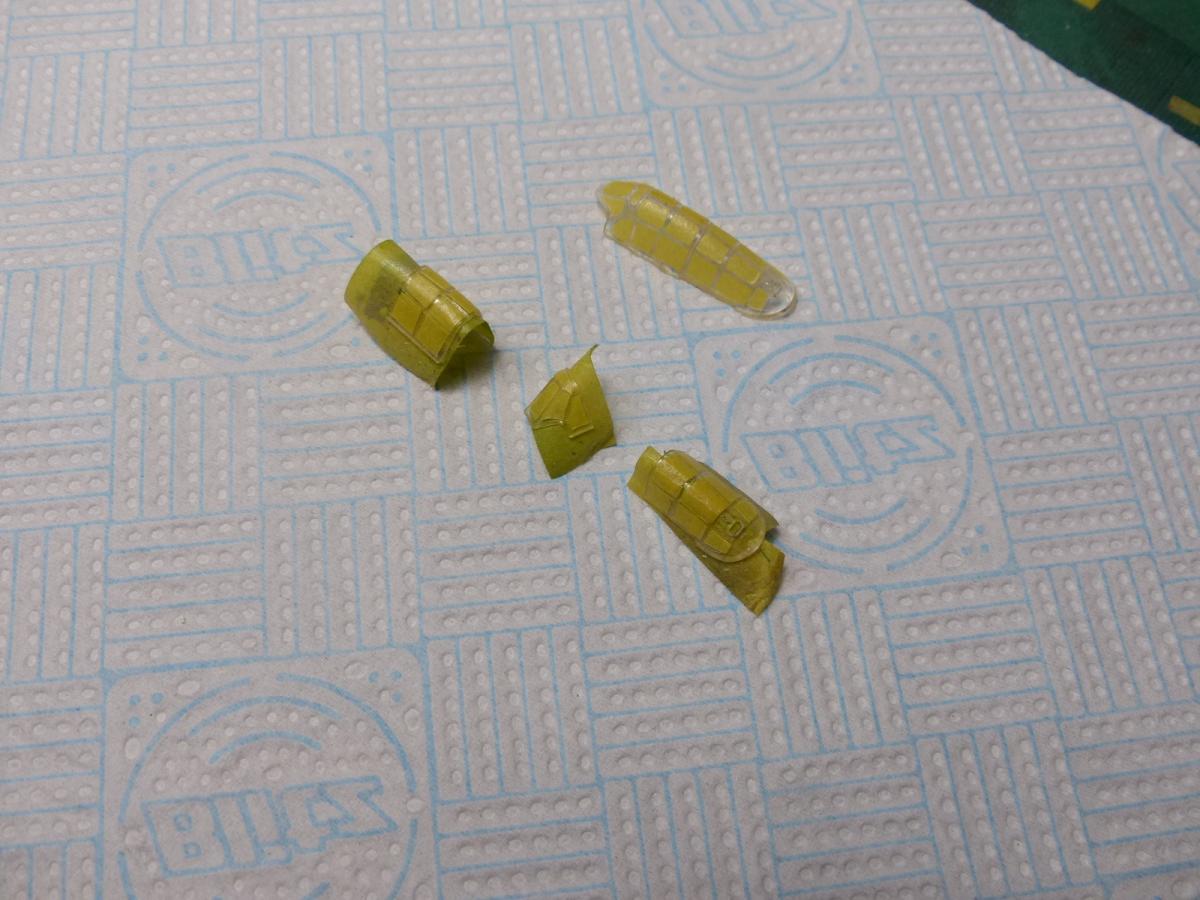
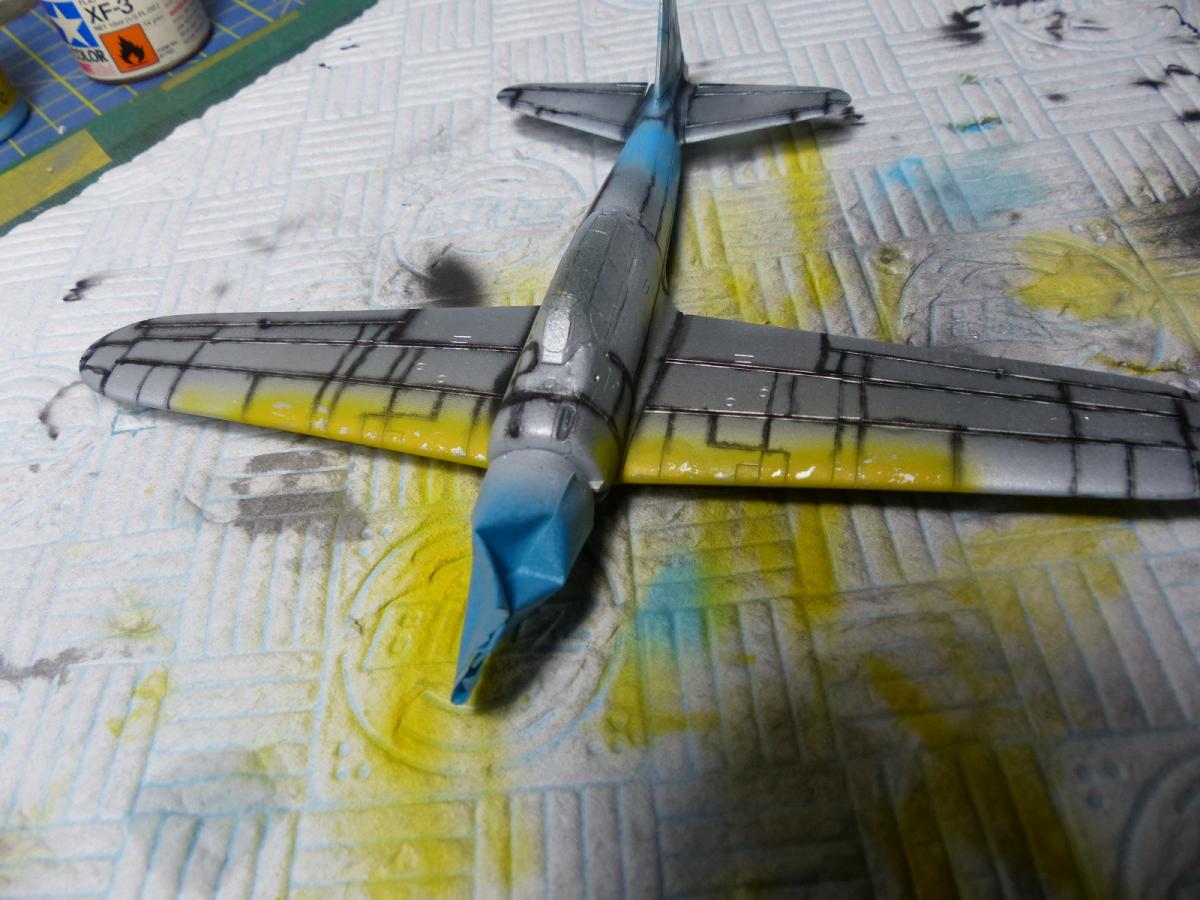
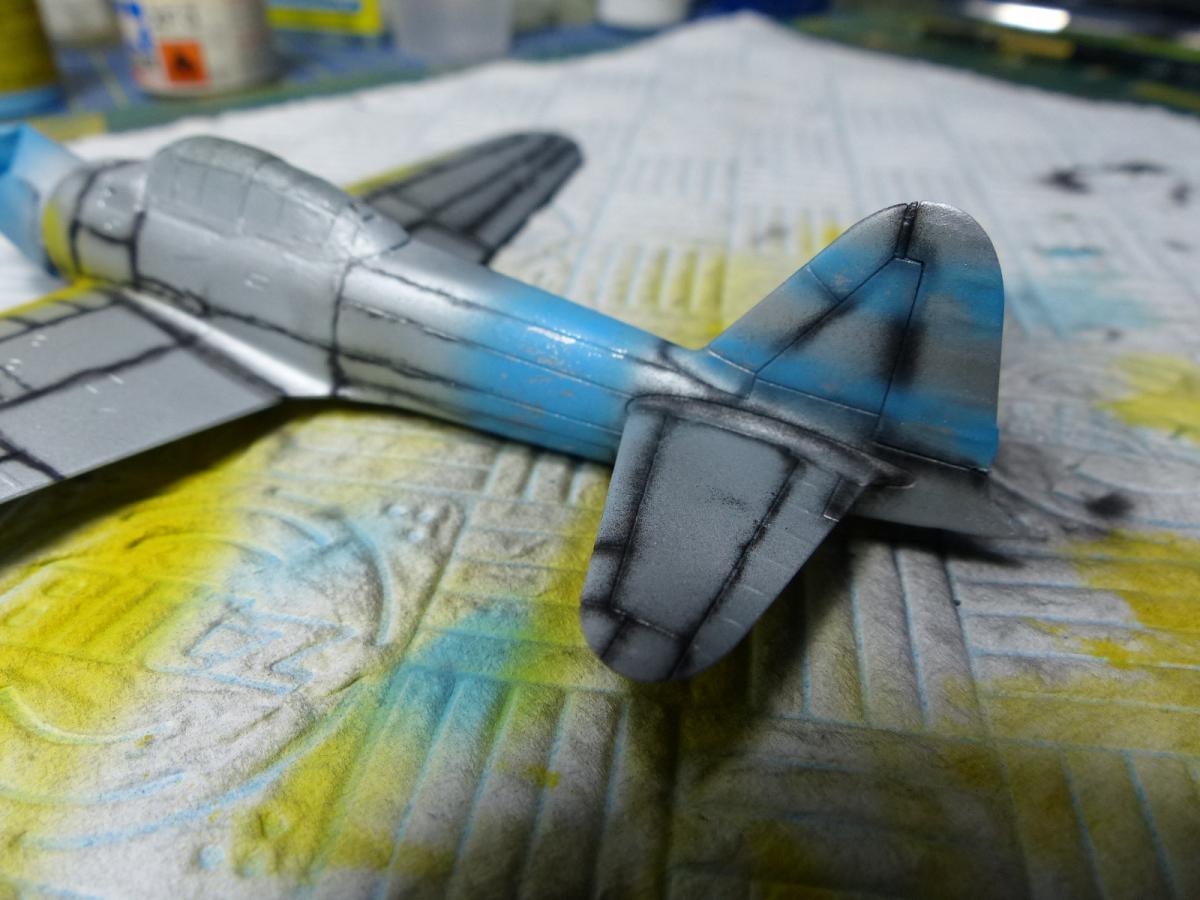
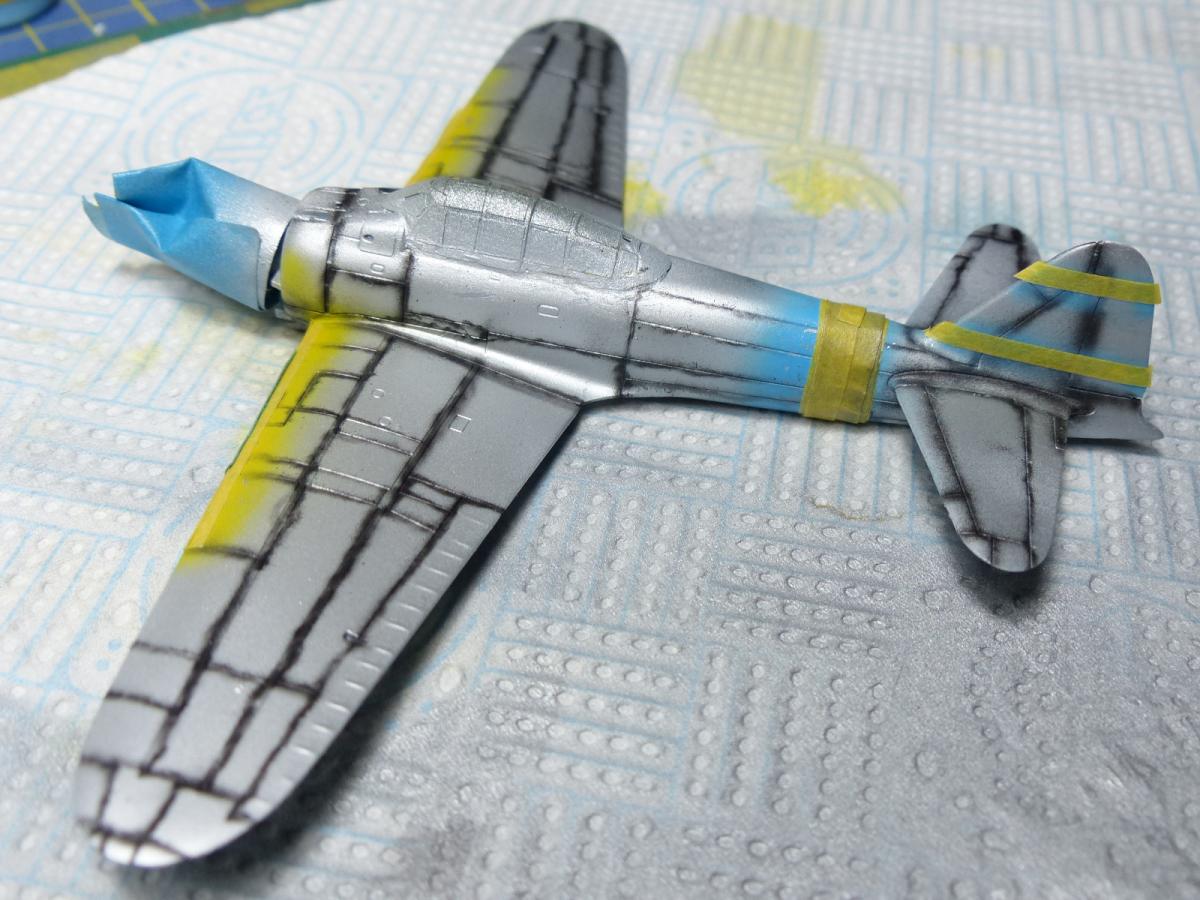
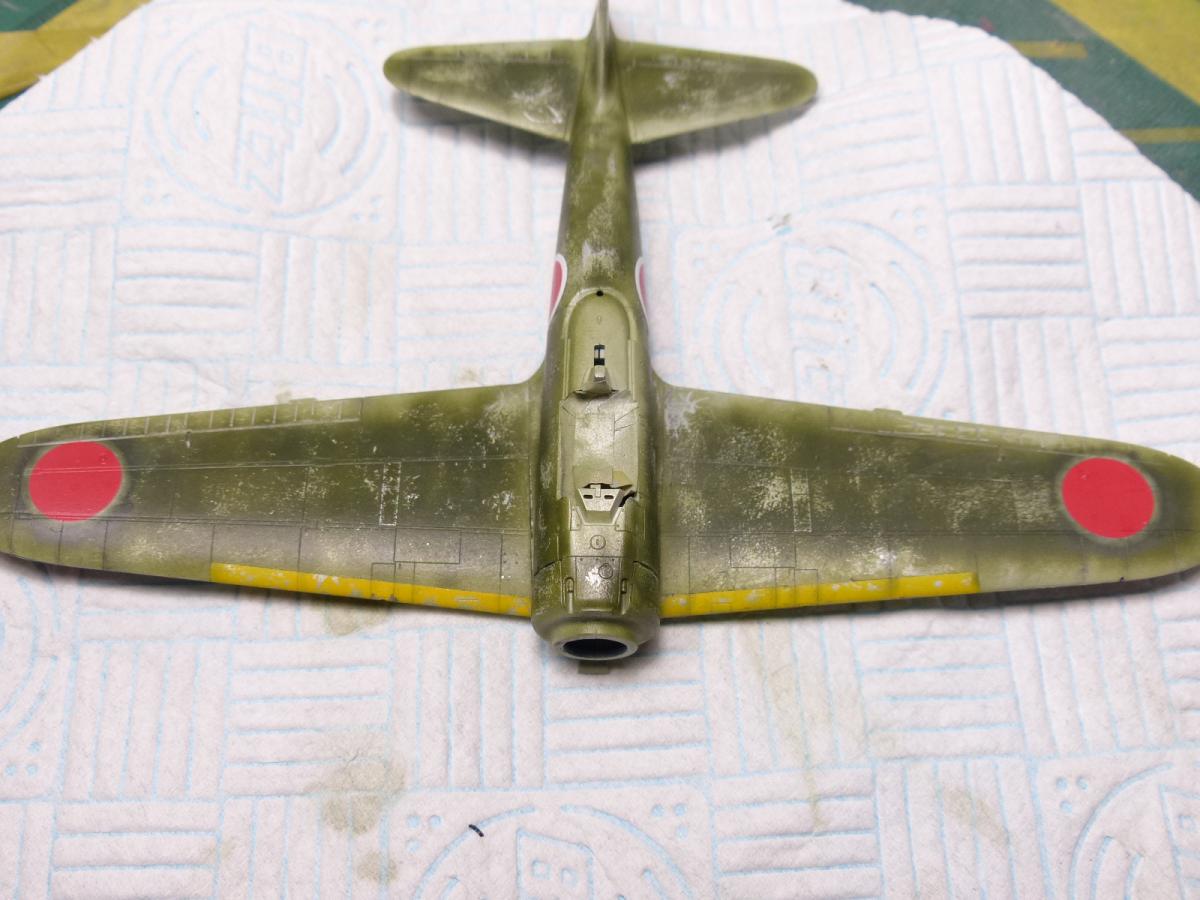
For the various yellow and blue strips: i sprayed them, applied hairspray and chipped them, and then carefully masked them: i try to avoid as much as possible the decals.
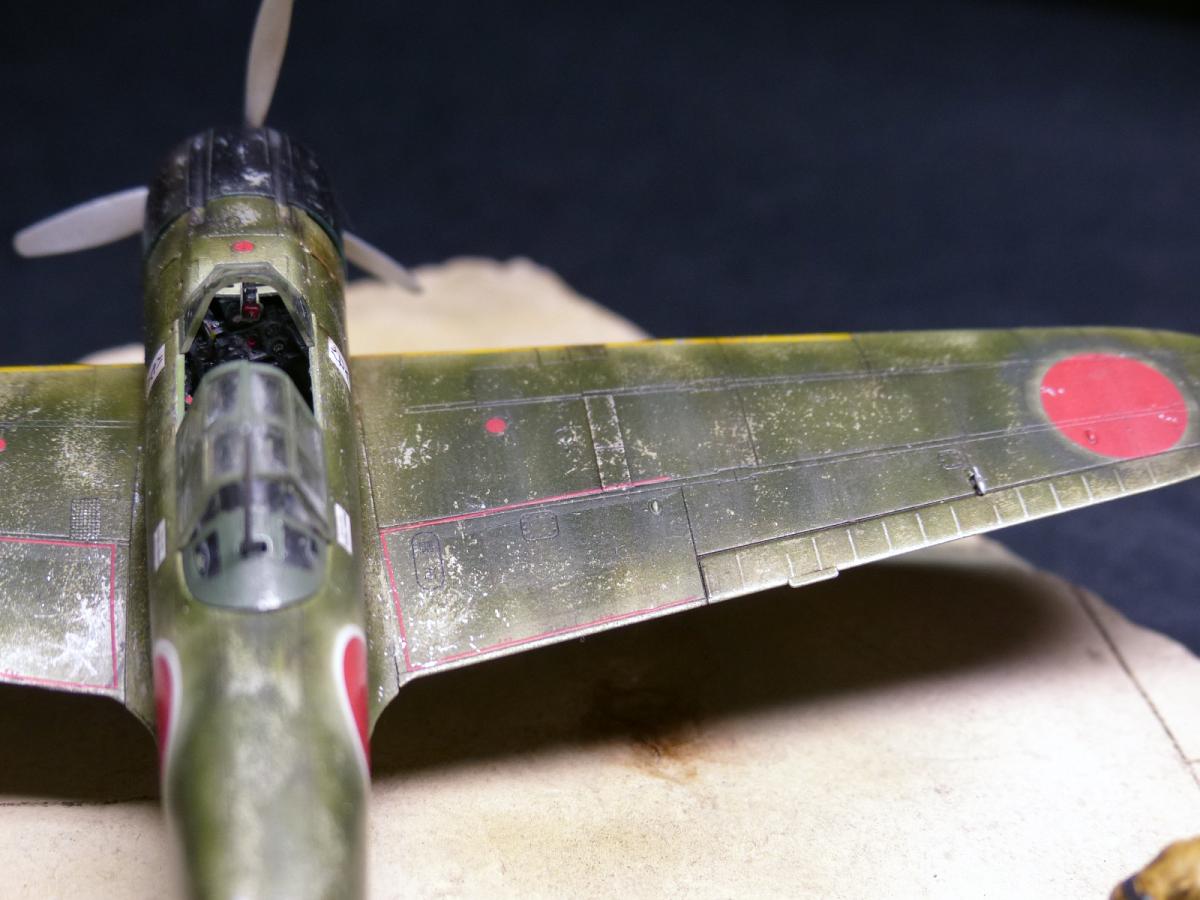
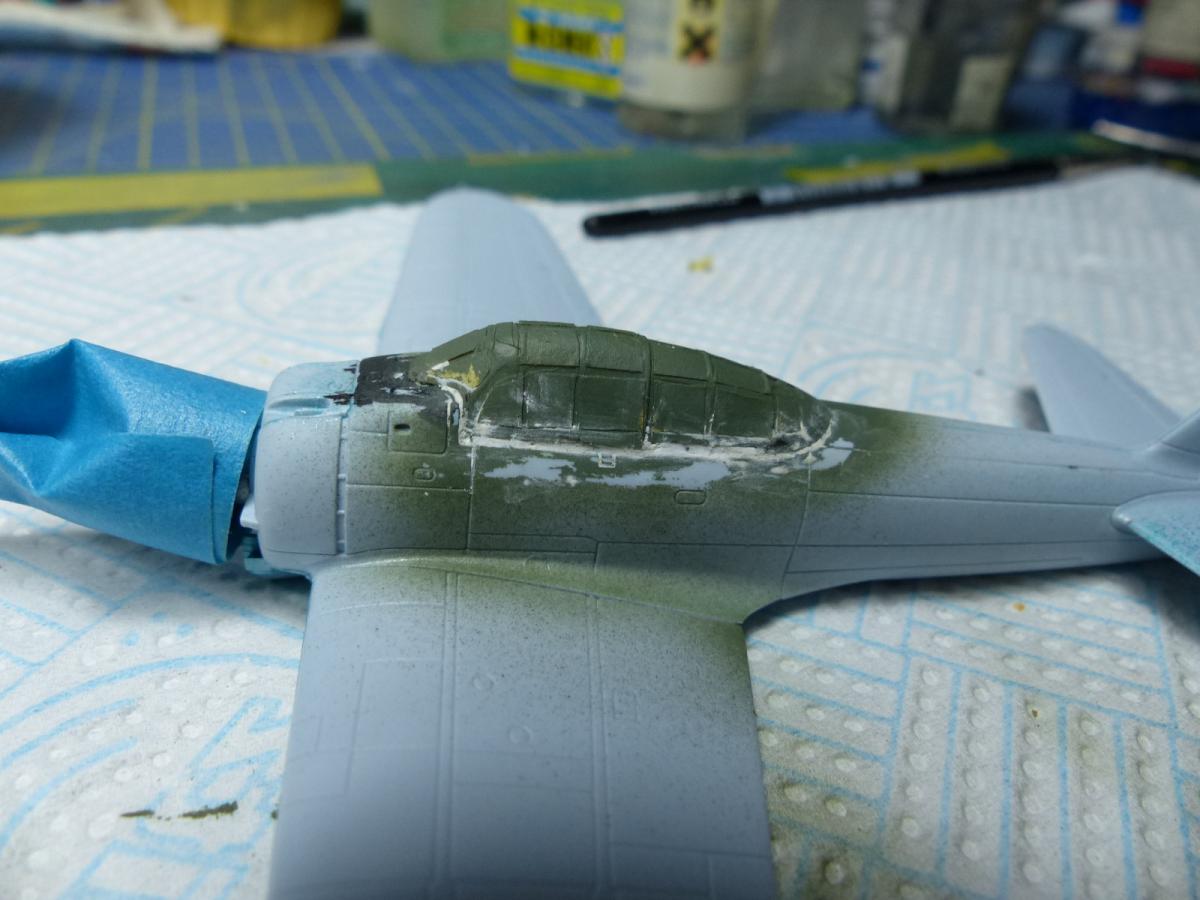
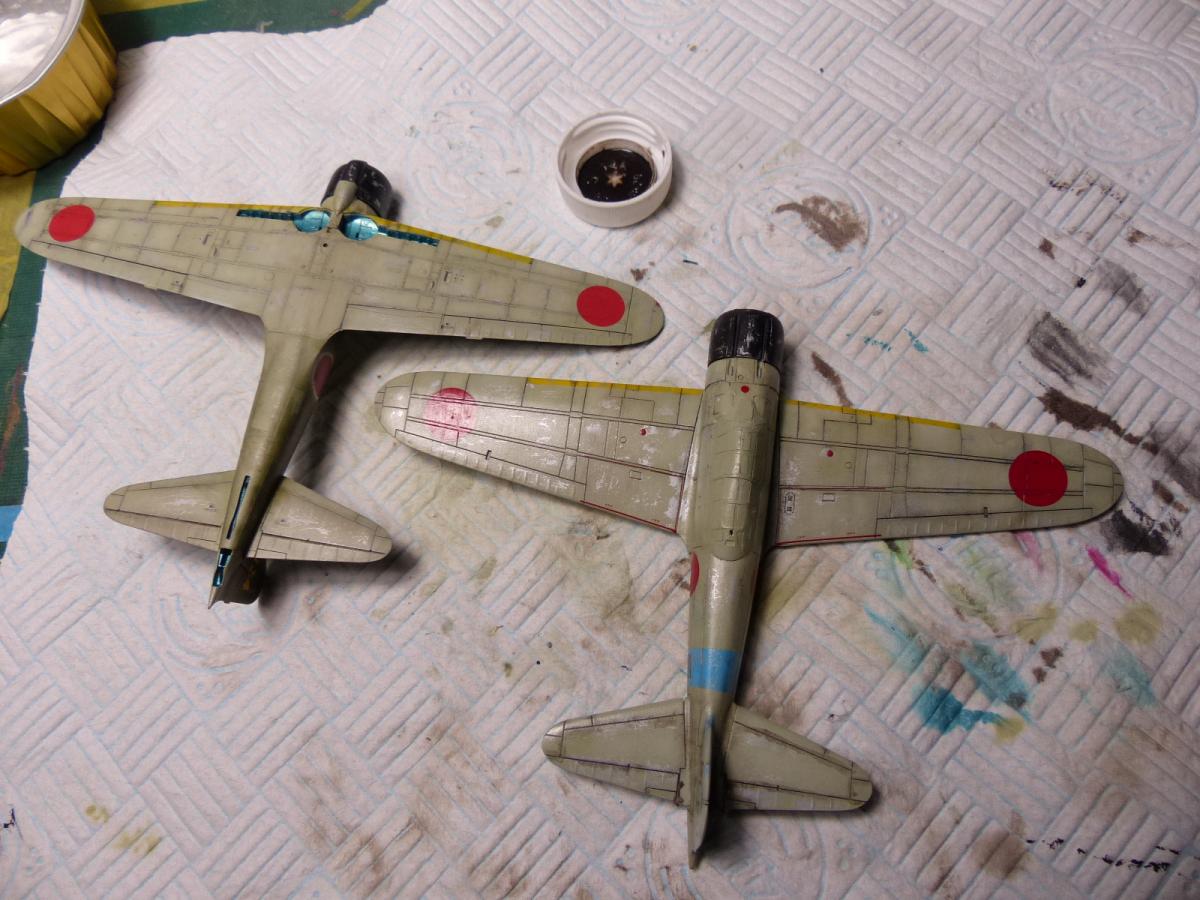
The same procedure was used for the basic Japanes gray on both the airplanes: the chippings on the Tamiya one are much stronger, because the model is going to receive one more coat of green of different shade.
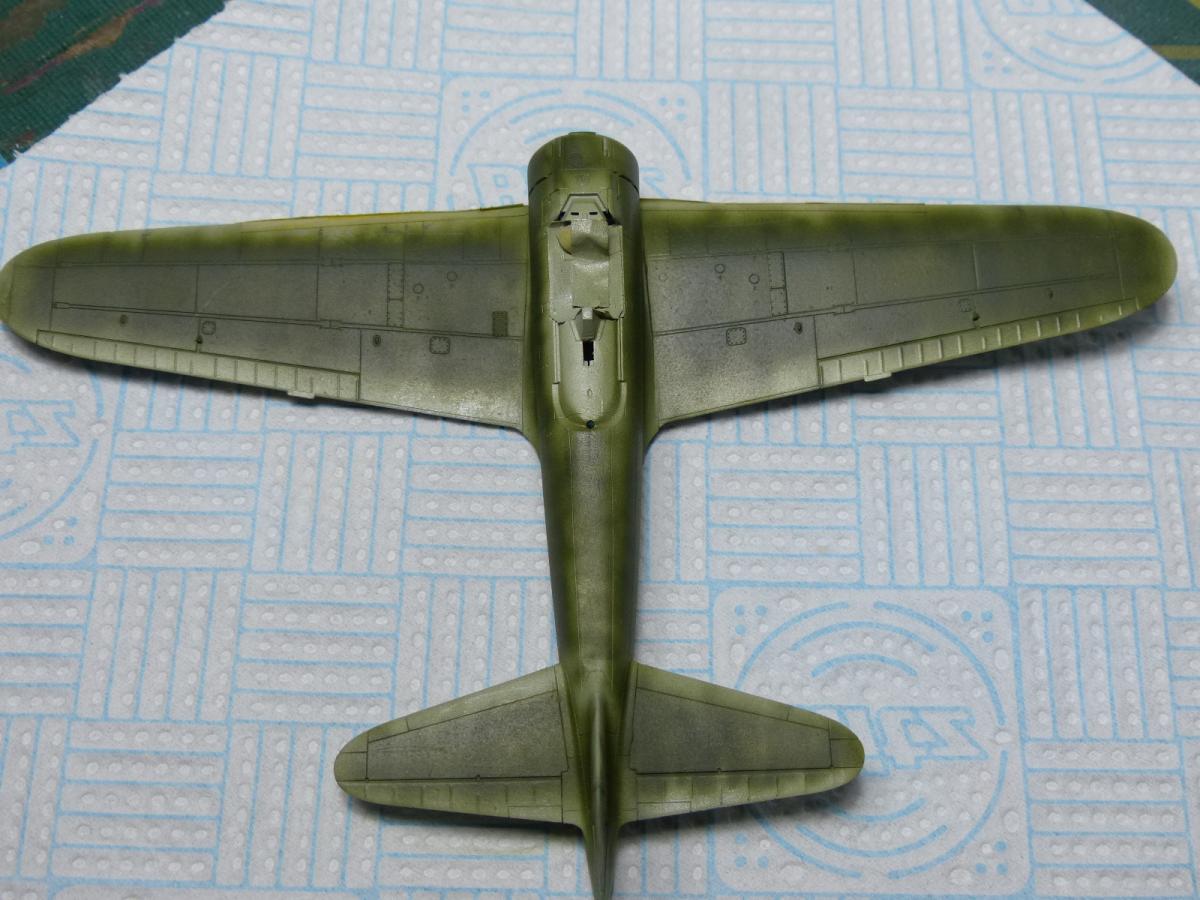
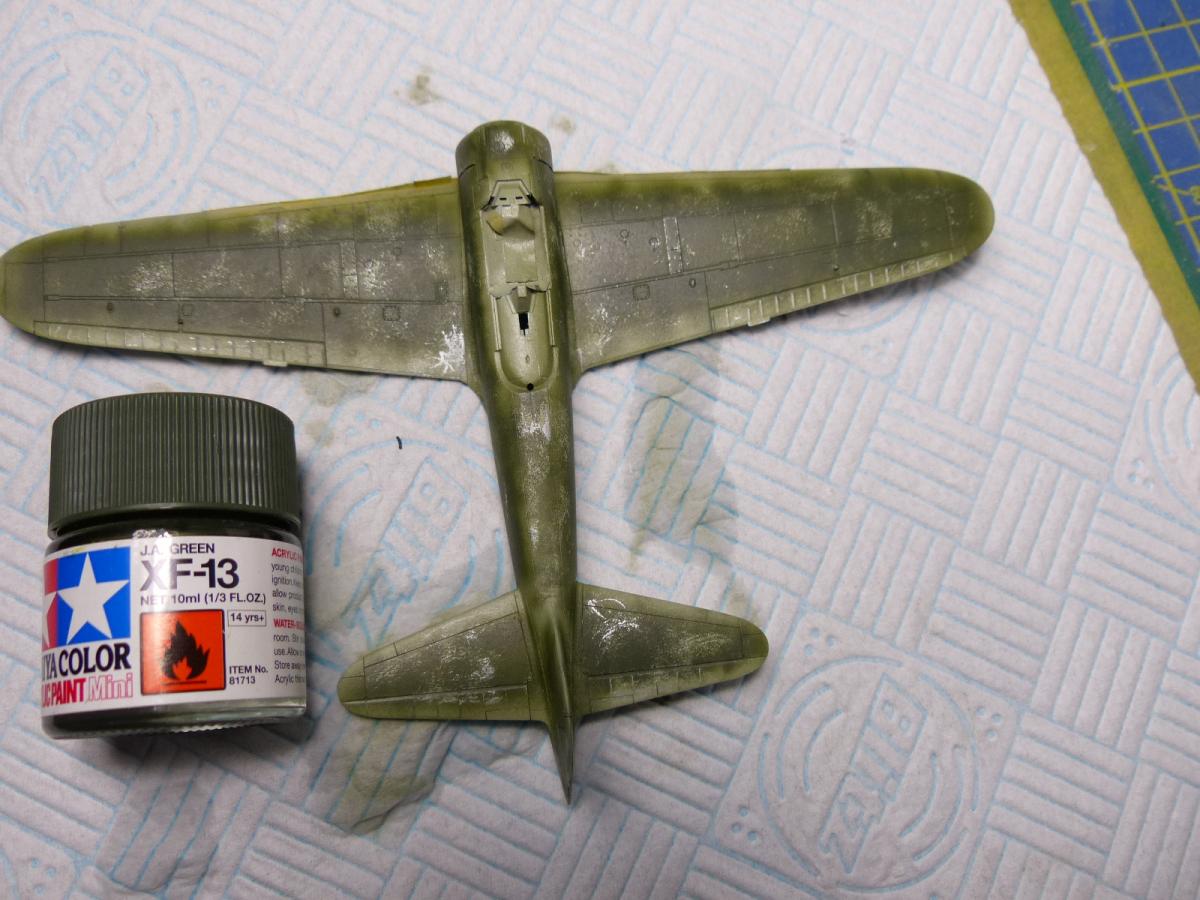

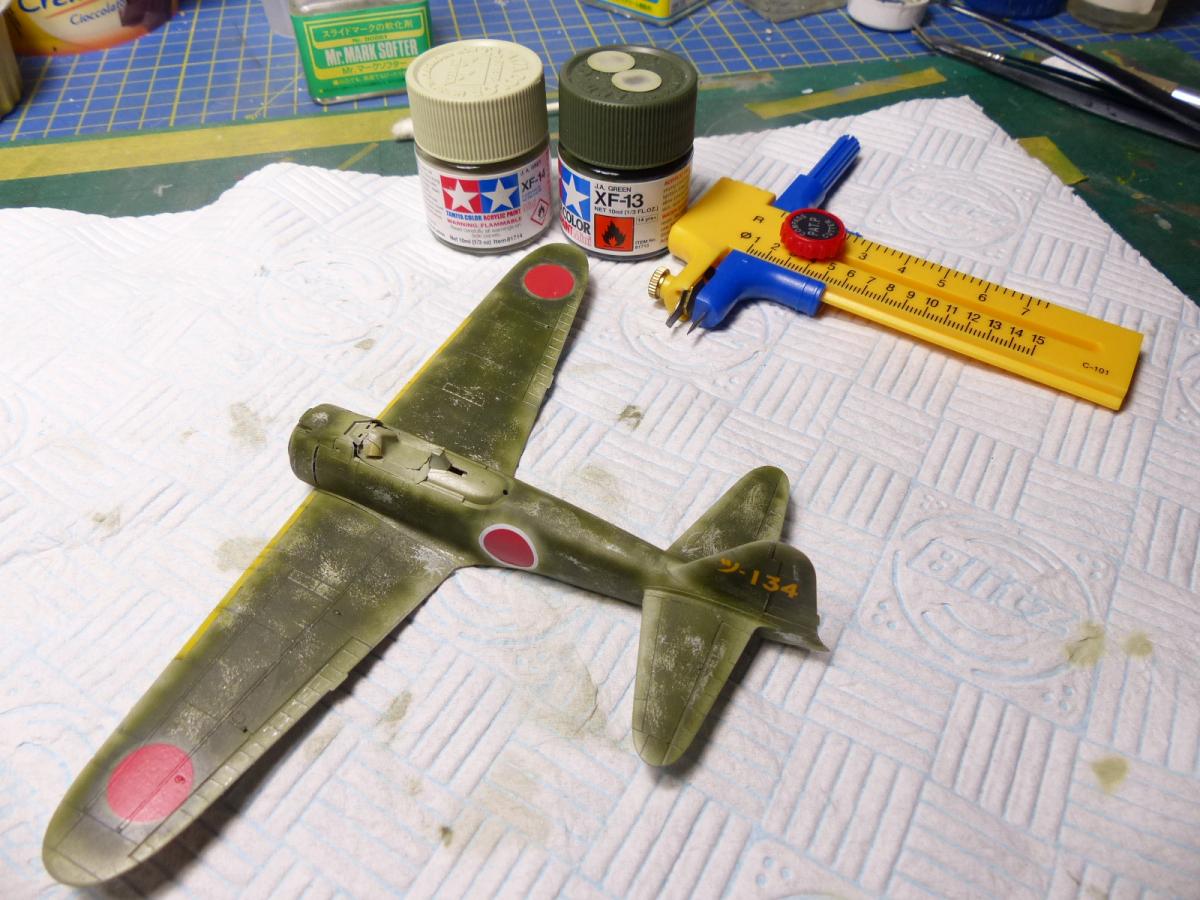
The painting job continued on the Tamiya kit with the "Salomon isalnds" camo, airbrushing a coat of JN Green by Tamiya. This camouflage had to been applied in a very rough way, like it happened on the field. On my reference article it was done on a much larger scale kit, but because the airbrush is my favored part of the hobby, i was no scaried to push my skill to the limit and replicate it on a 1/72 scale. Also for this green was used the hairspray chipping.
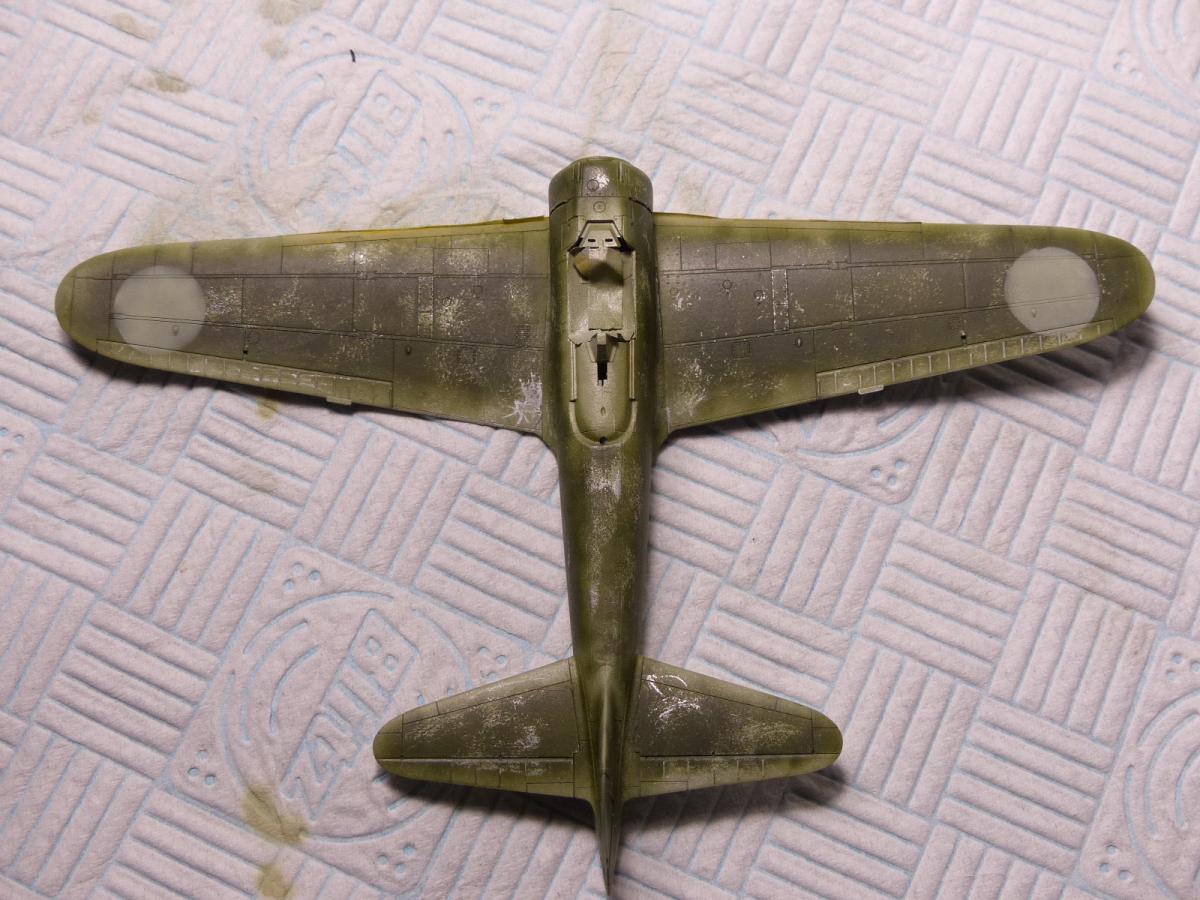
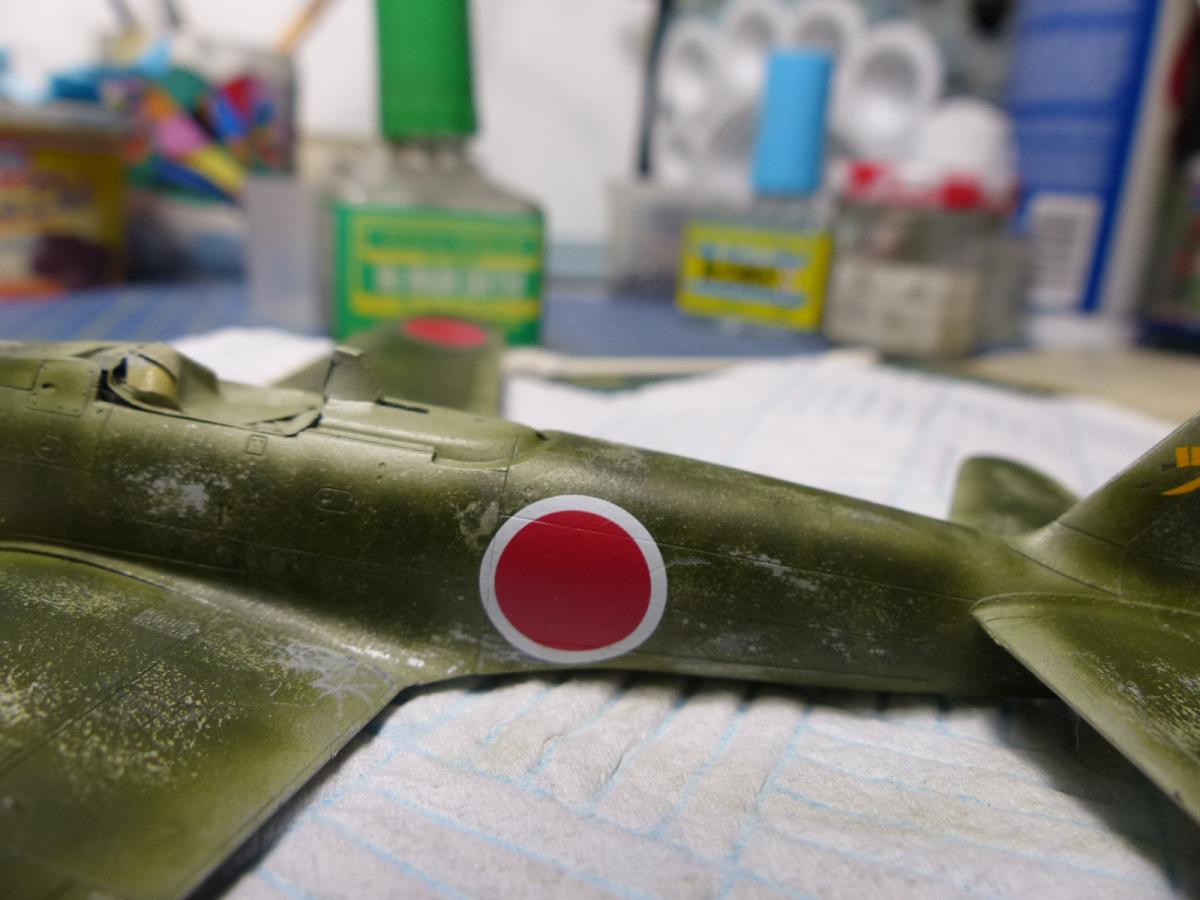

On my references the red roundels were applied not straight on the dark green, because this had a sor of halo around, made with the background shade. So i made a negative mask with Tamiya tape, sprayed back the JN grey, removed the mask, and softened the borders with the JN green: this on the wings.
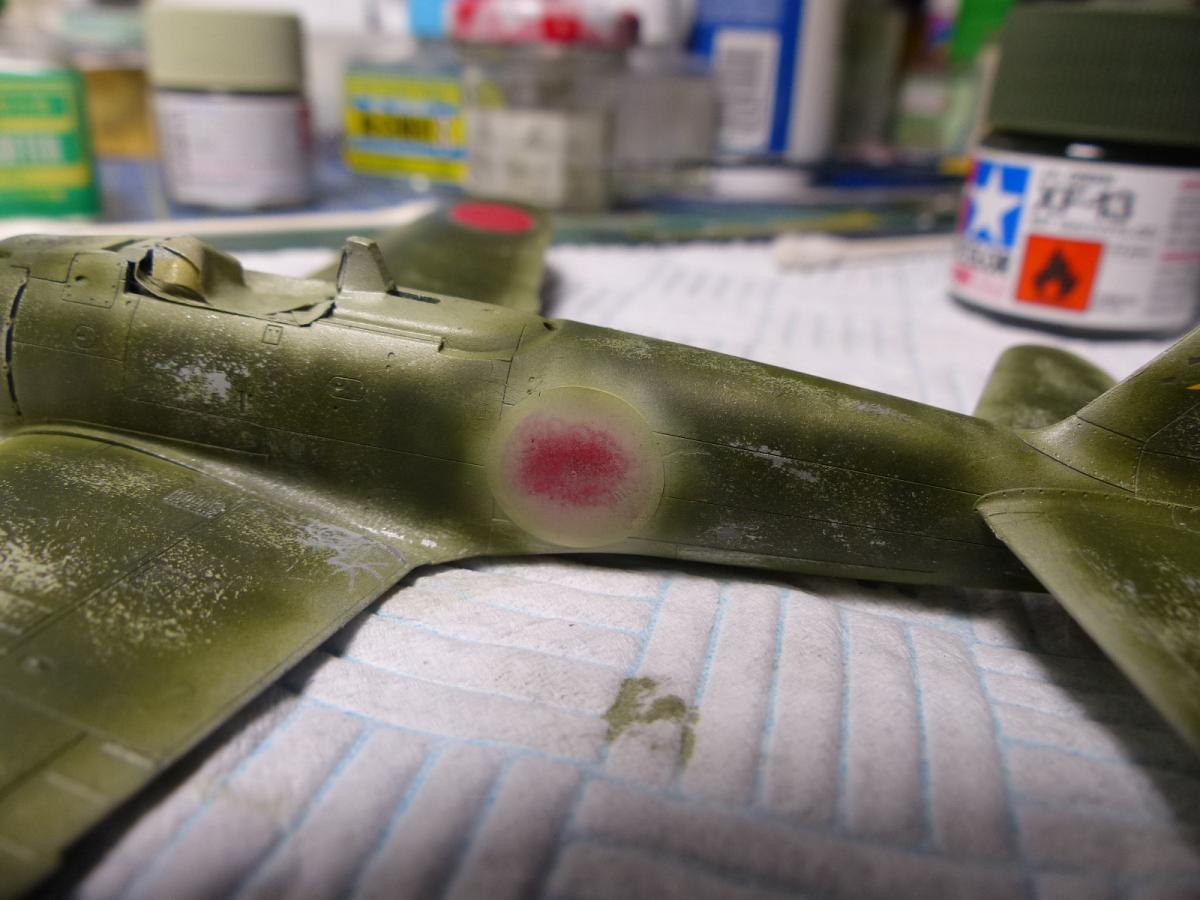
On the fuselage... i forgot to to that before to apply the decals, damn it !!!
To fix it, i made a postive mask, this time with very low tack Frisket mask, and sprayed the JN grey around the roundels.
At the end i was happy with the result.
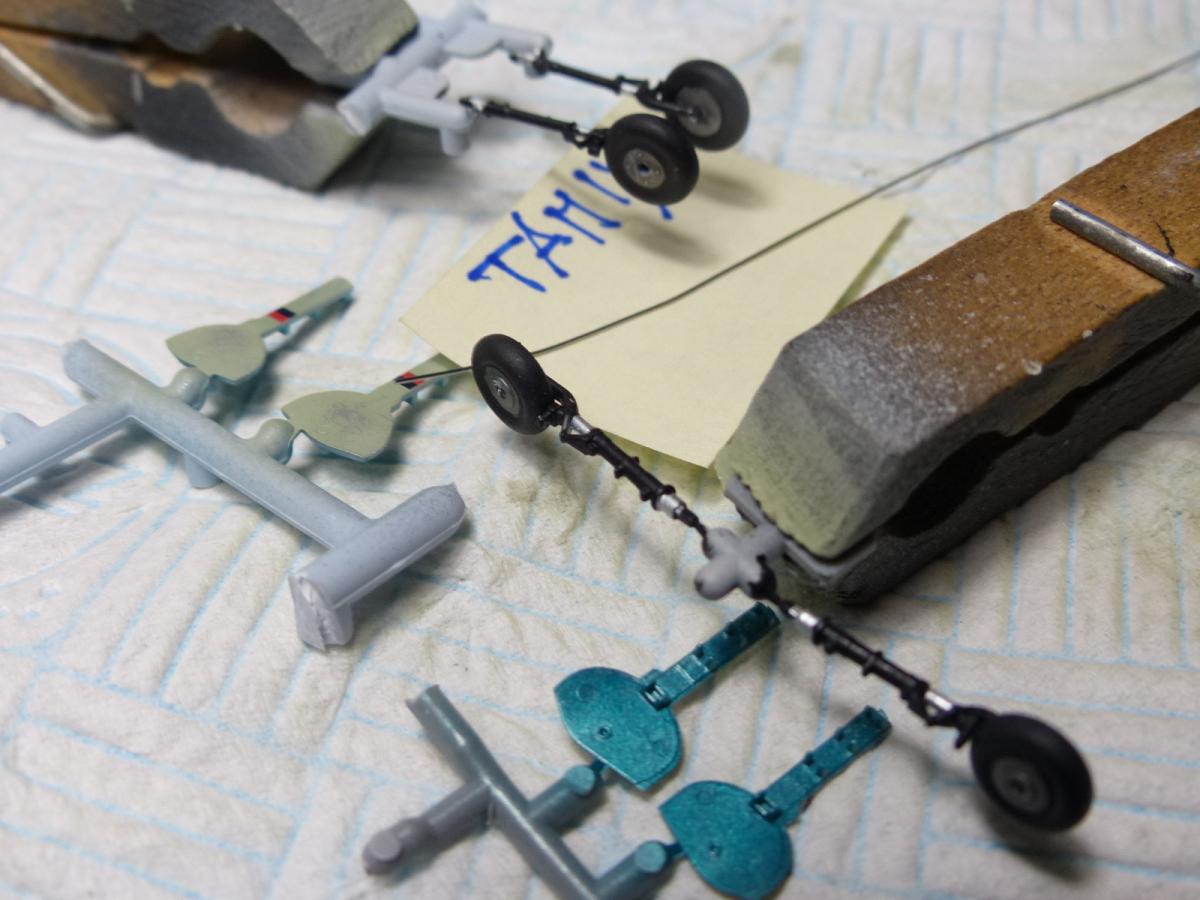
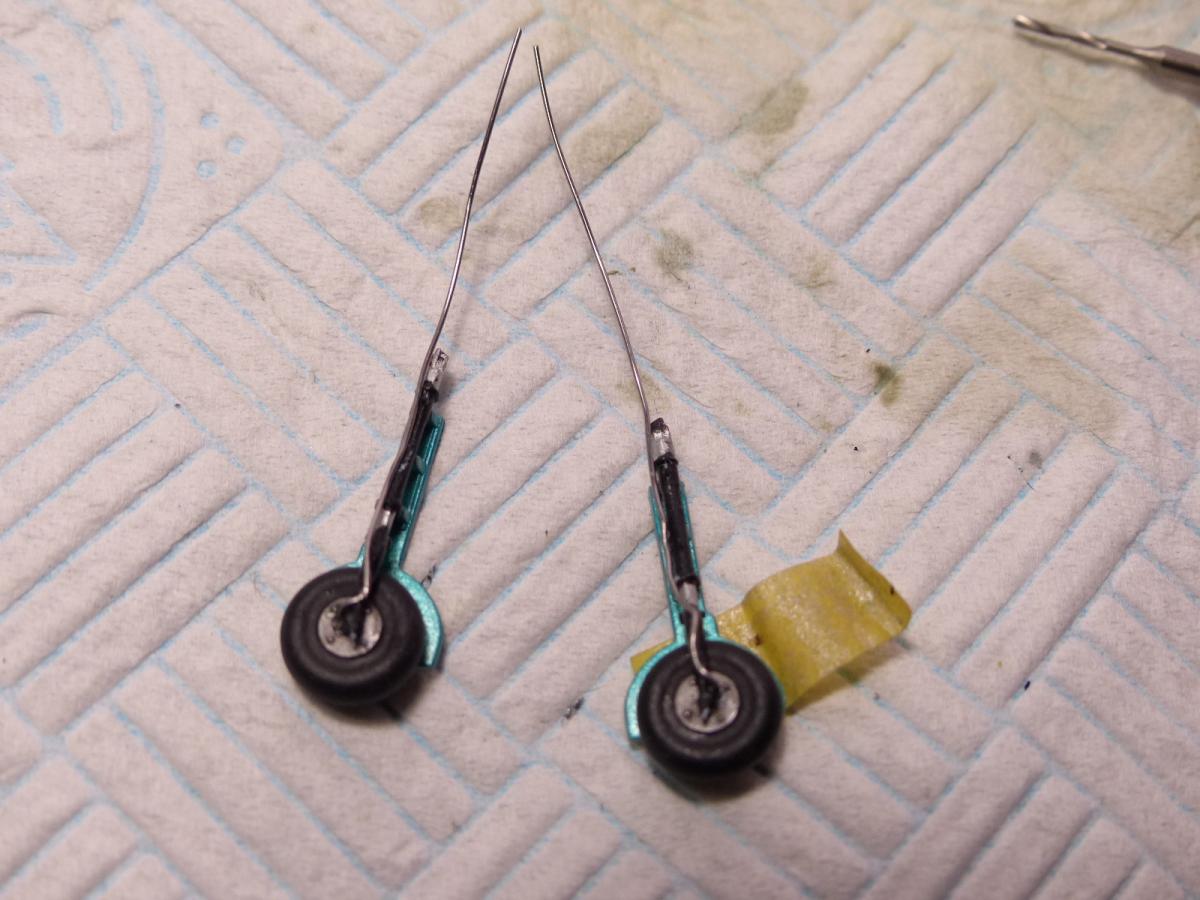
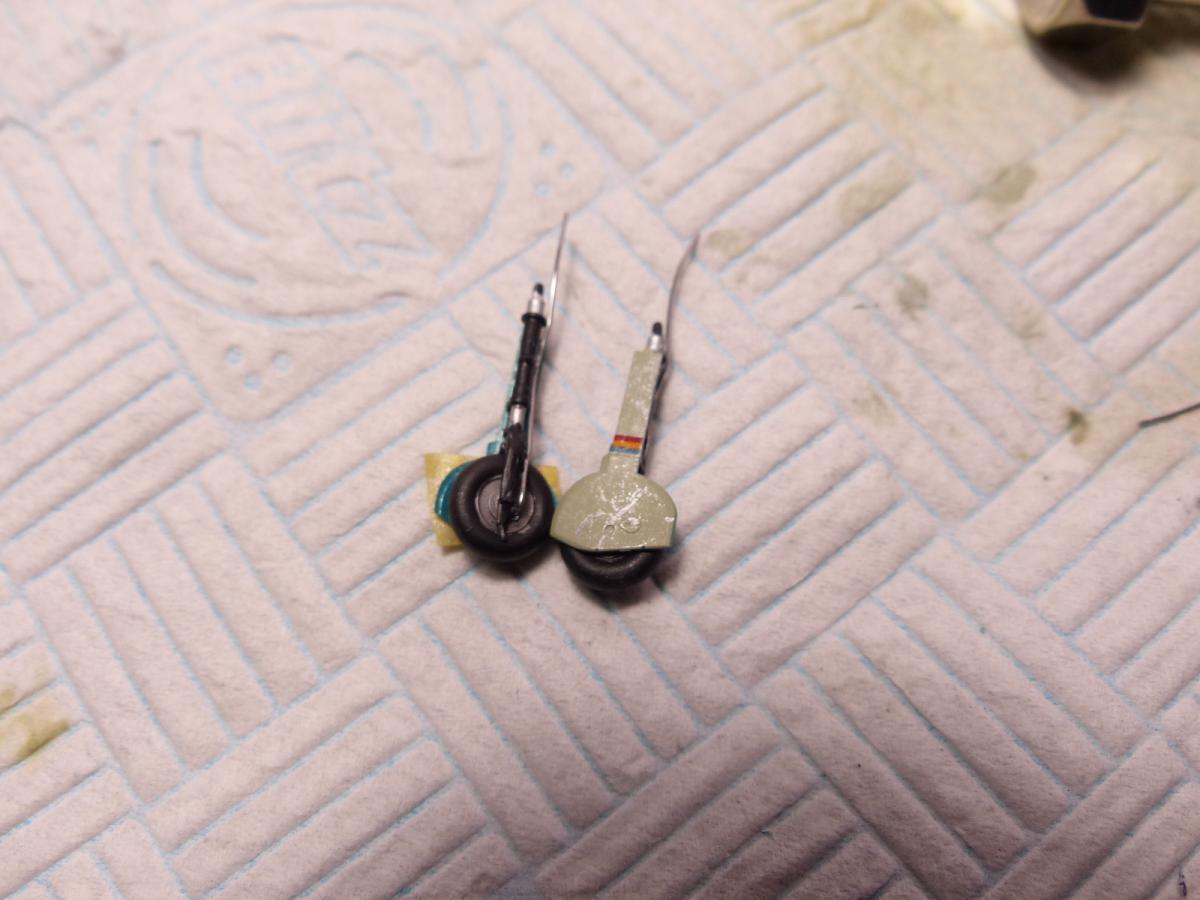
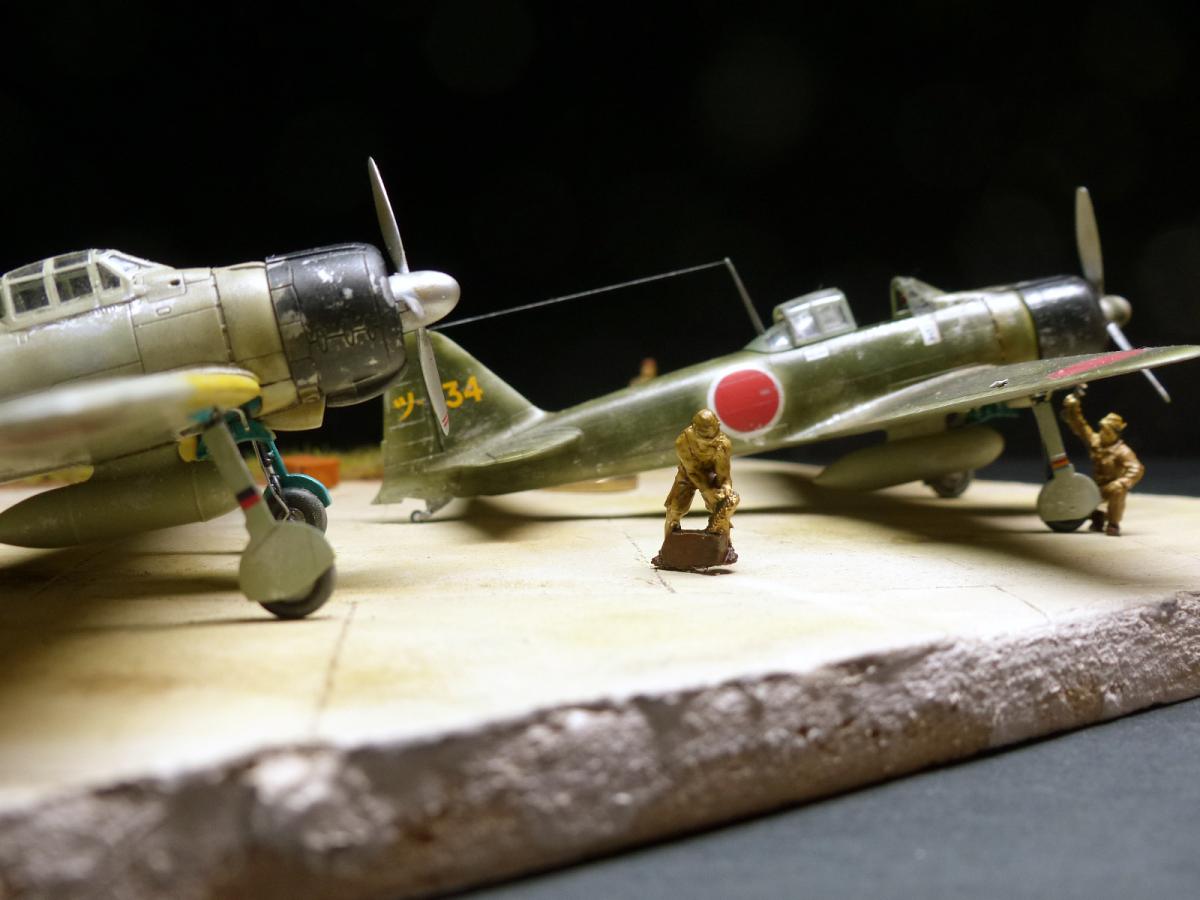
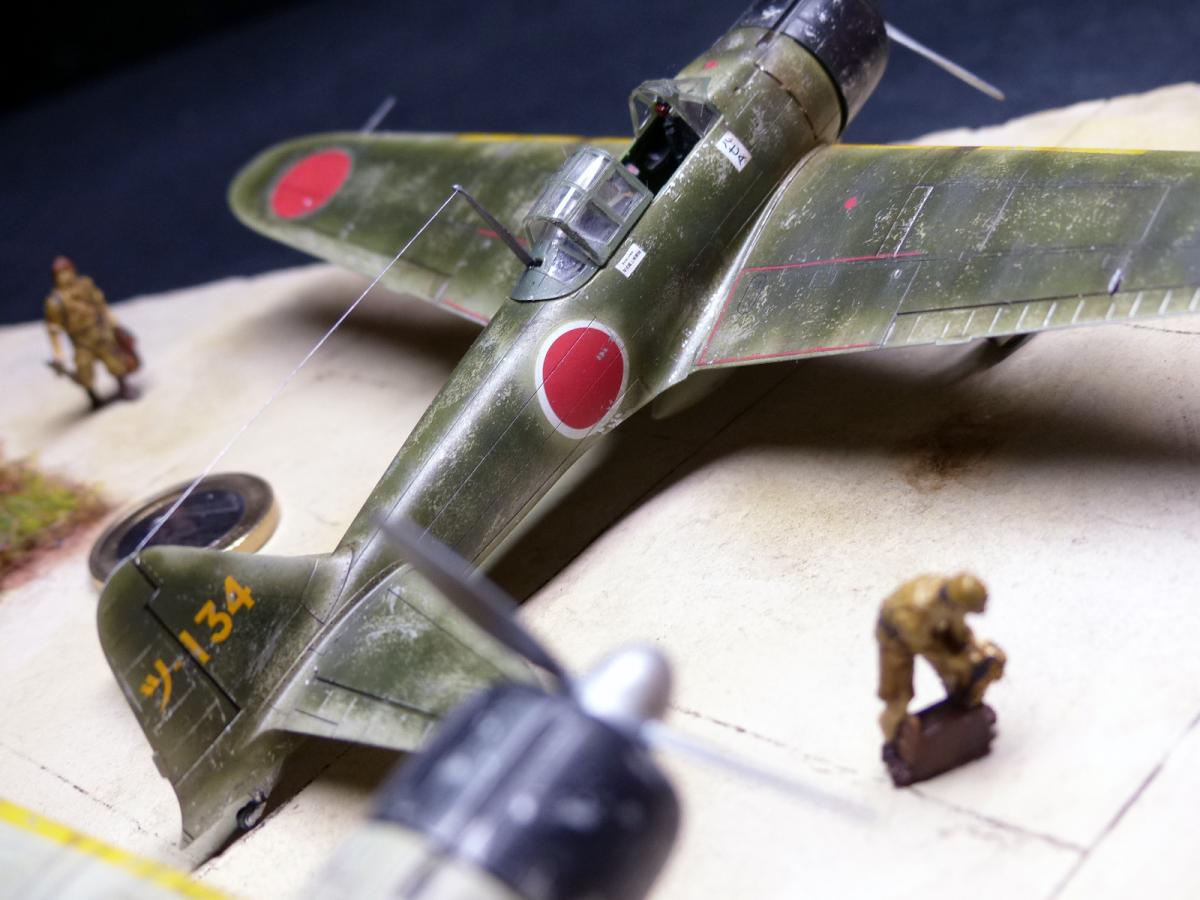
Landing gear and wheels have a good level of details on both the kits, but i added some more, sctrachbuilding the oloes.
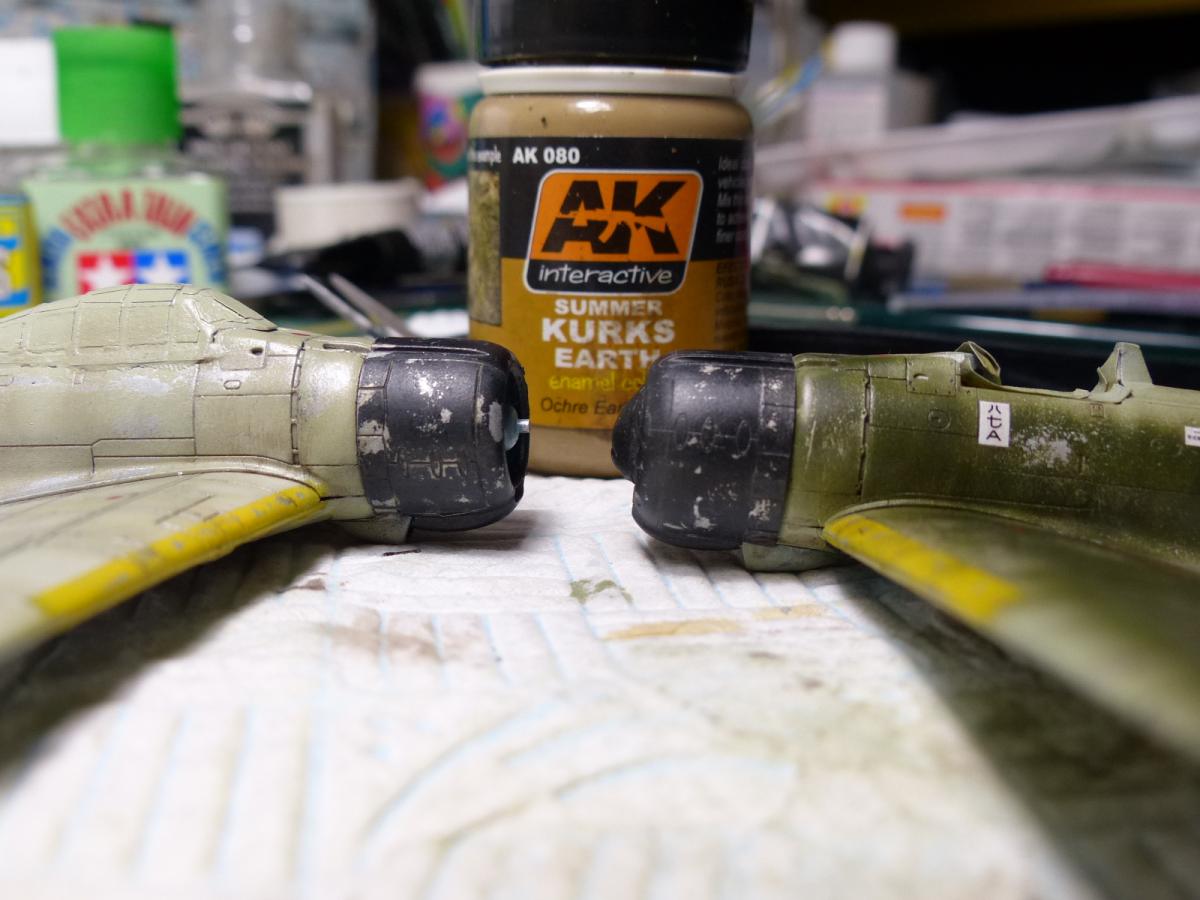
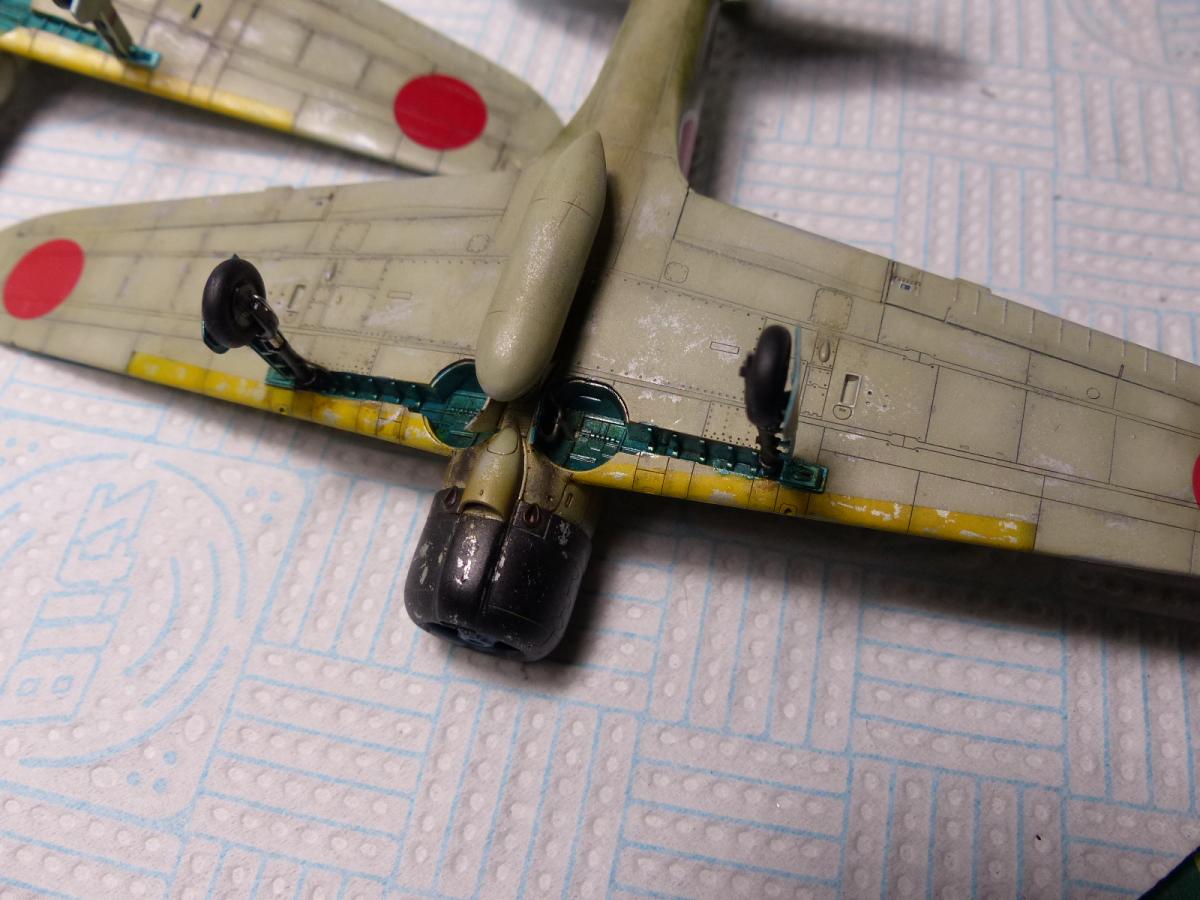


Weathering time: for both the models i used a black/brown oil wash, brushing it very roughly along the panel lines, and then removing it with a brush just damped a little with turpentine, following with the brush the airflow. The process vas repeated more times, until i was happy with the result. For the engine cowling i instead used a brown wash, from the AK range (Kusk earth).
The final reveal