

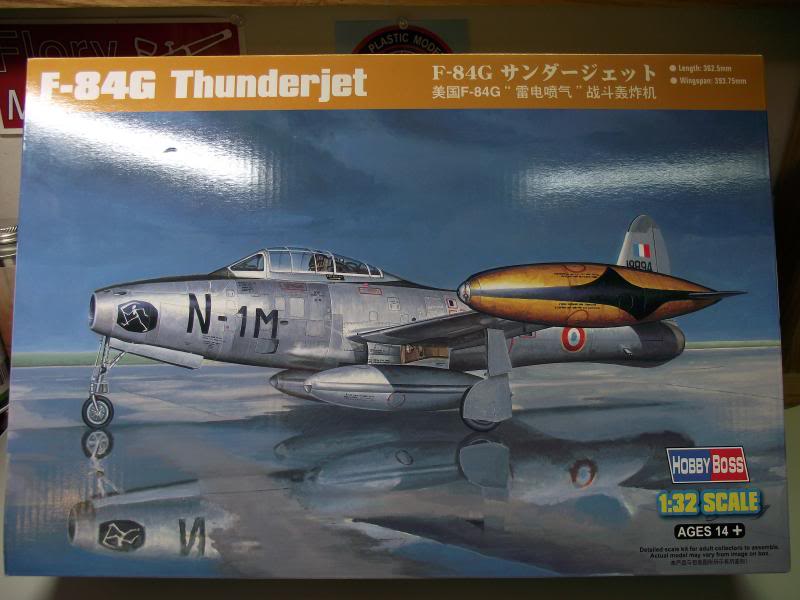
Model, text and images by Travis Offenberger
First impressions are that this is a nice looking kit with a lot of fine detail and tons of potential. I have a few goodies to go into the build as well...
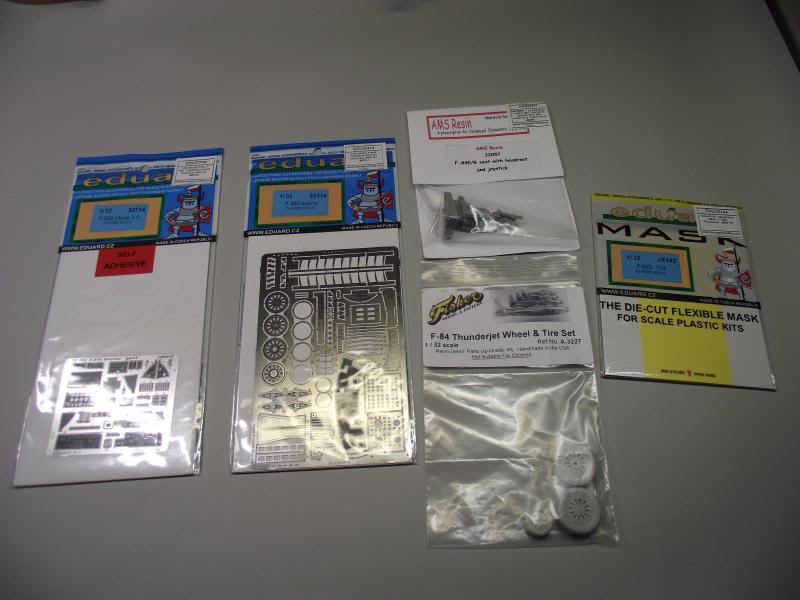
Eduard Interior and Exterior PE
Eduard Canopy masks
AMS resin ejection seat and control stick
Fisher Models resin wheels
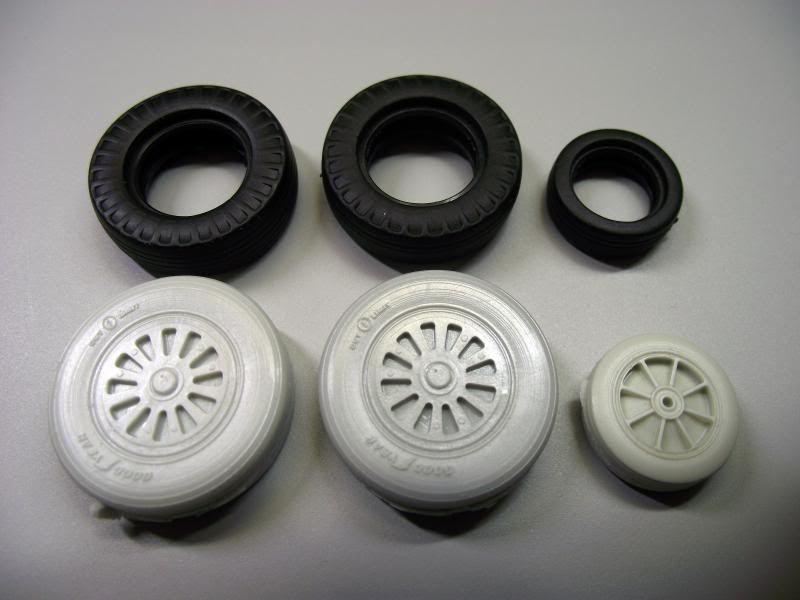
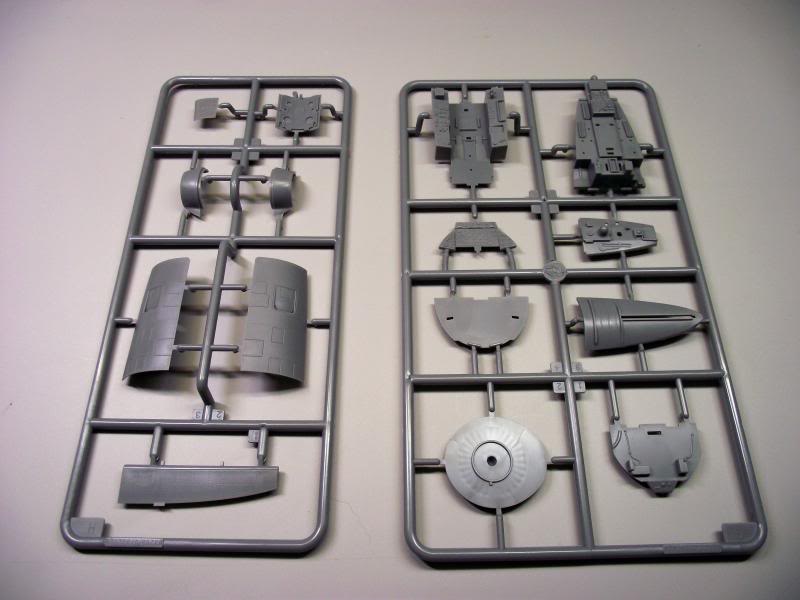
The original F-84 with the markings I am planning to do is ensconced just an hour's drive away from me in the USAF museum in Dayton, Ohio. My plan is to do this build as she is presented in the museum with a very glossy metal finish utilizing Alclad Polished Aluminum. When done you should be able to spot her from a mile away. A look at the Fisher wheels next to the kit supplied rubber ones. Normally I don't mind rubber wheels but the kit ones in no way resemble the real thing.
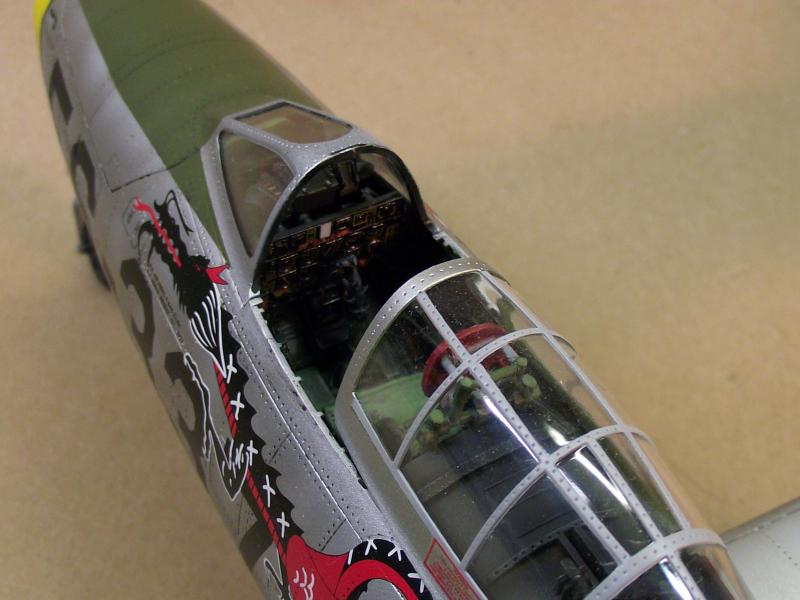
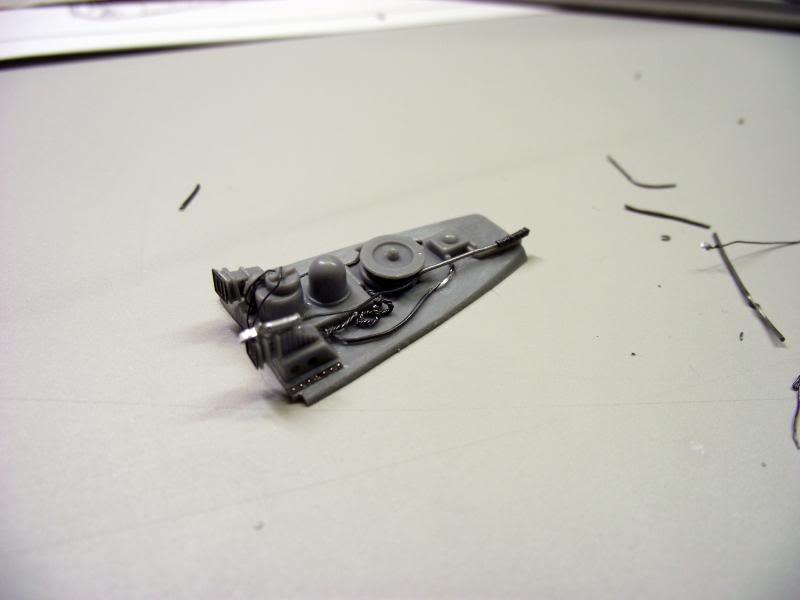
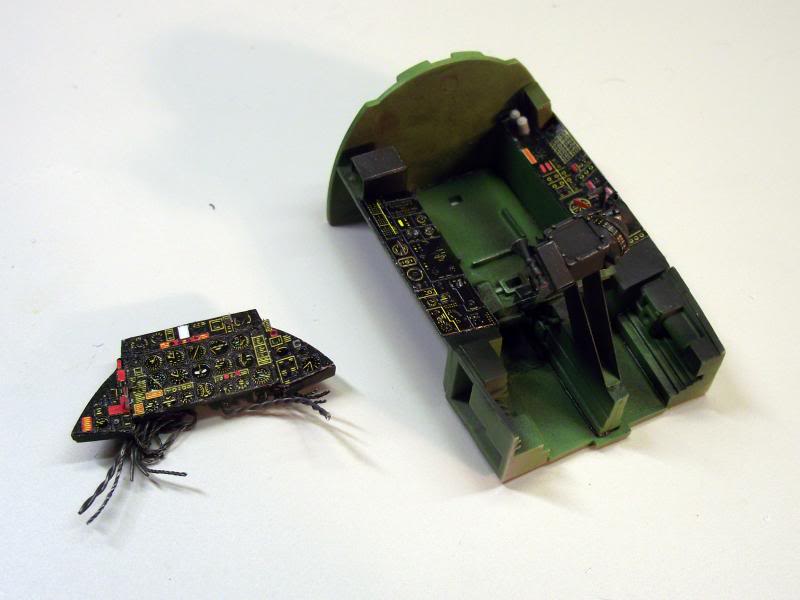
I started with adding some detail behind the cockpit to the canopy pulley mechanism and some of the doodads back there. This is a very visible spot and a bit of wire goes a long way.
There are some differences in the fuselage sides between the F and G model and Hobbyboss depicts this with some inserts. The fit is just OK and will need a bit of cleanup.
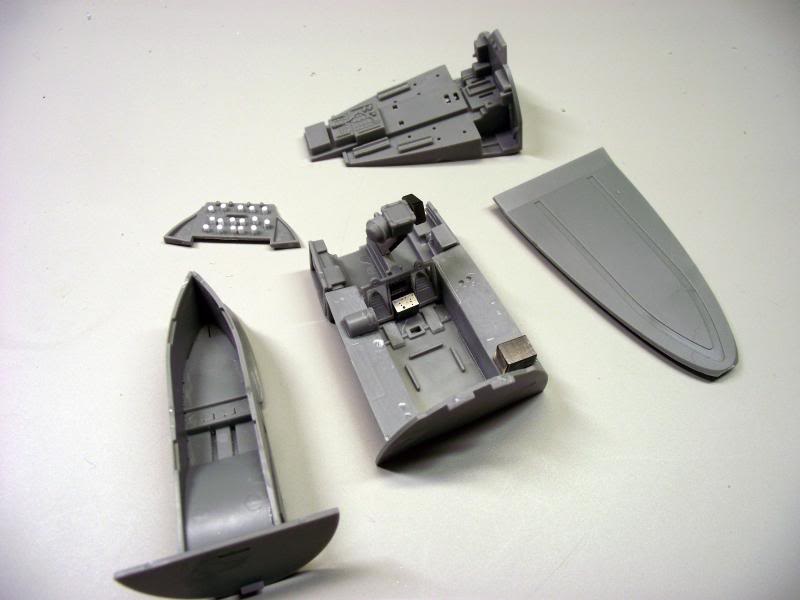
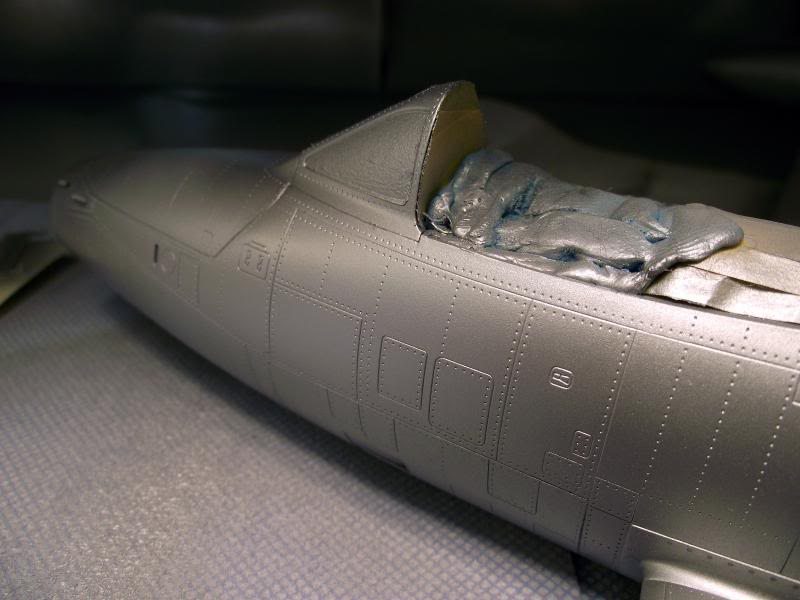
Banging around on the cockpit, nose wheel well and gun bay. There is no provision to display the gun bay open so I will probably use the space to add some extra weight (F-84 kits are notorious tail sitters). The Eduard PE really kicks things up a notch by adding detail and accuracy to the area behind the IP and turns a bunch of blobby looking console switches into something much nicer. The PE also adds a whole chunk of console instruments in front of the IP that Hobbyboss missed completely. My F-84 Detail and Scale book from Squadron is paying for itself today!

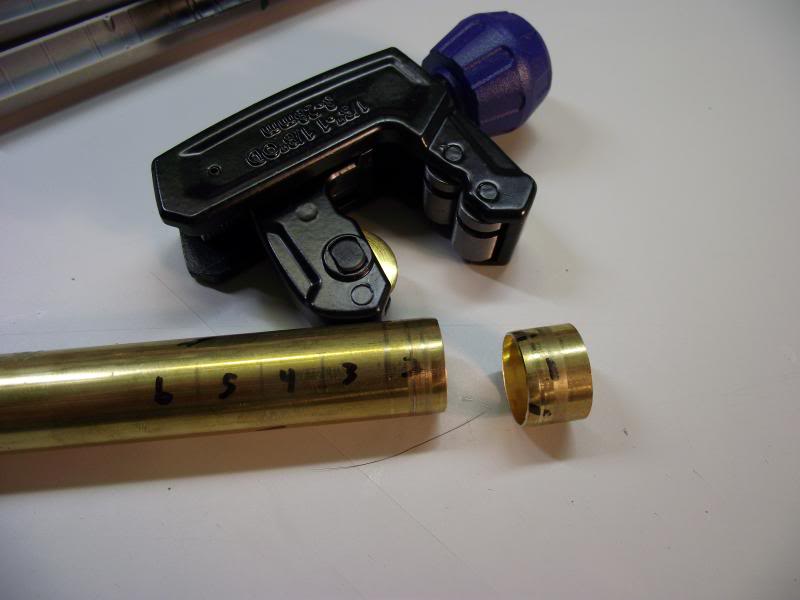
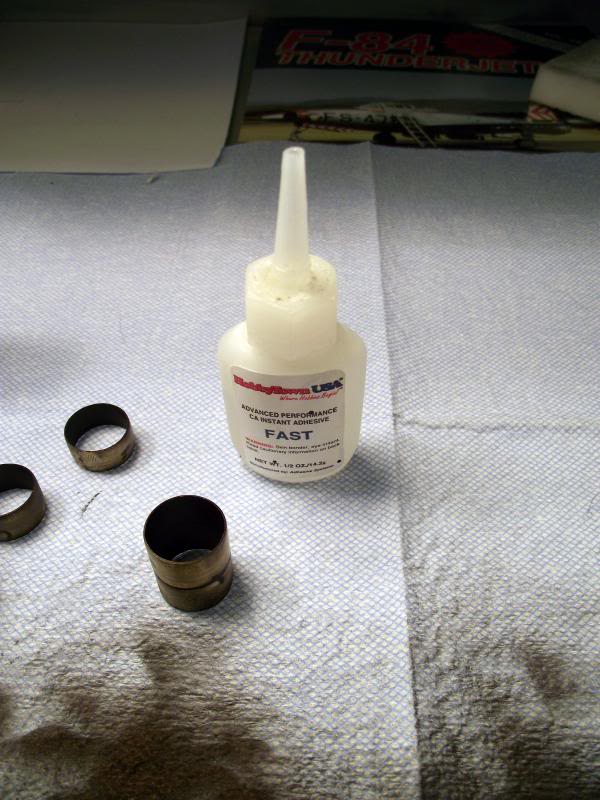
I got to looking at the exhaust pipe and really didn't like what was in the box. There is no resin replacement available so I was pretty much resigned with what I had. It was going to be impossible to remove the two long seams on the top and bottom and still keep the "ribbing" detail. Then I got an idea....brass tube.
I visited my friendly local hobby shop and got a few lengths of tube that matched the diameter of the kit exhaust (just a shade under 17mm.)
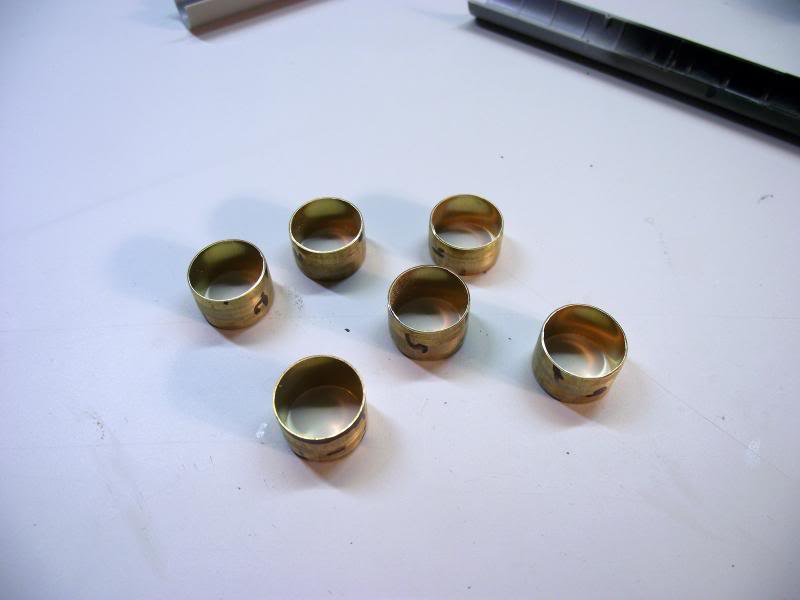
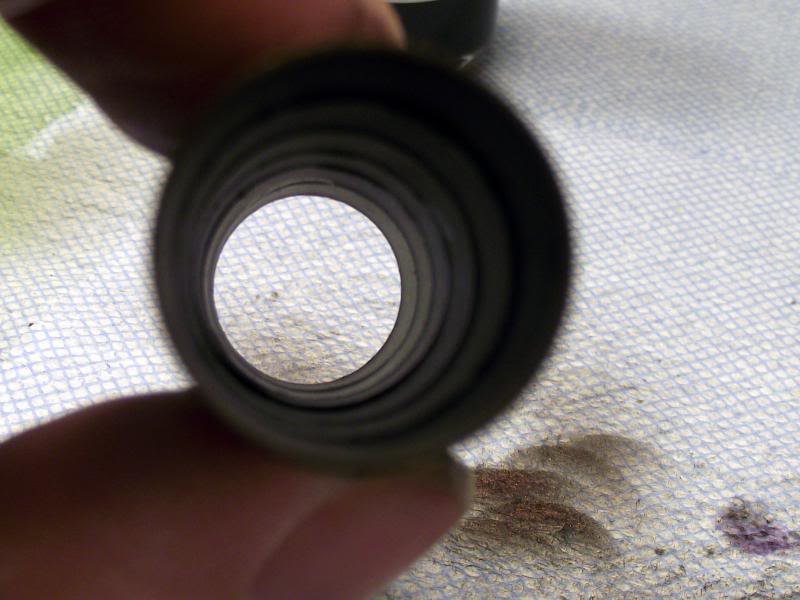
I measured off the rib detail on the inside and cut six one centimeter lengths using a pipe cutter. The cutter slightly crimped the pipe at the ends giving that "ribbed" look on the interior. I sanded the lips a bit to remove any burs and smooth out any imperfections.
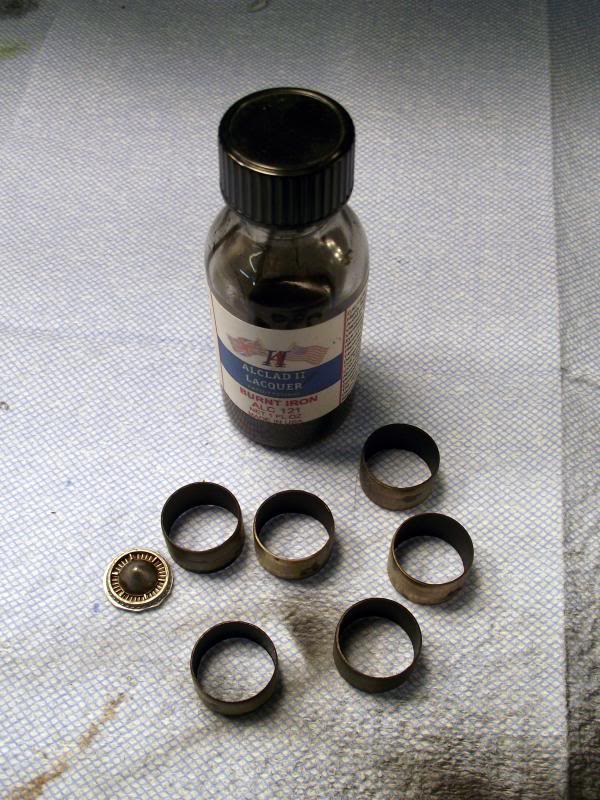
I sprayed the interior and lips of each 1cm ring with Alclad Burnt Iron and started reassembling them in order. They were glued together using VERY thin super glue and given a shot of kicker (careful not to get any on the alclad on the inside. I basically treated this stuff like Tamiya Extra Thin and let the capillary action do the work on the exterior of the rings.
And here we have it...once scratch built, to scale, looking awesome seamless exhaust.

OK...first off, we have a change of markings. I decided to switch to the Superscale set and have an order placed.
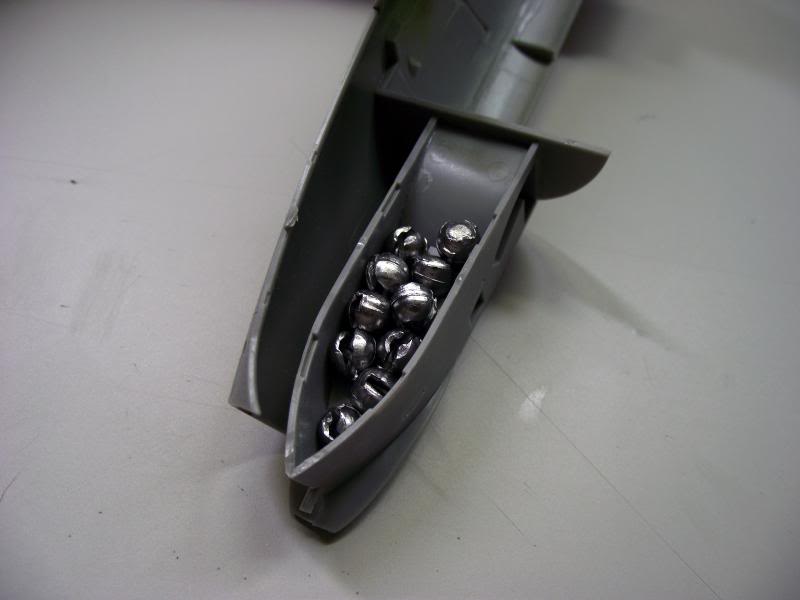
With all of the extra weight in the back from the brass exhaust pipe I really need to pack in all the extra weight into the nose that I can. I need to strike a balance between...well...balance, and not overloading the spindly nose gear. There is some space in a cavity between the gear well and gun bay. The first load of weight went in here. I will add more to the gun bay later
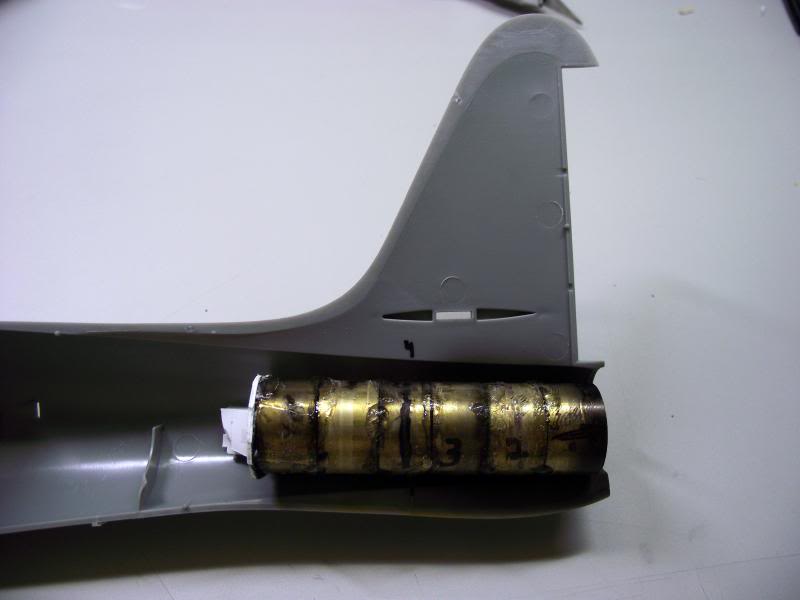
The tail pipe is in place. I had to eyeball this in. There is a cap that goes over the end of it with some Eduard PE detail on the inside that has to fit over the pipe and clear the interior of the plastic sidewall. (Hope that makes sense).
Ready to seal up the fuselage. I did a dry fit and the two halves snap into place with no issues. The main seams are taken care of. I started with a thin coat of Mr. Surfacer 1000 on the top and bottom seams and sanded that off once dry. With this being a natural metal finish I figured I needed to go the extra mile to make the seams disappear and did a second coat using super glue with talcum powder mixed in. This was then sanded off with a very worn sponge and the surfaces were polished up again using even finer sponges.
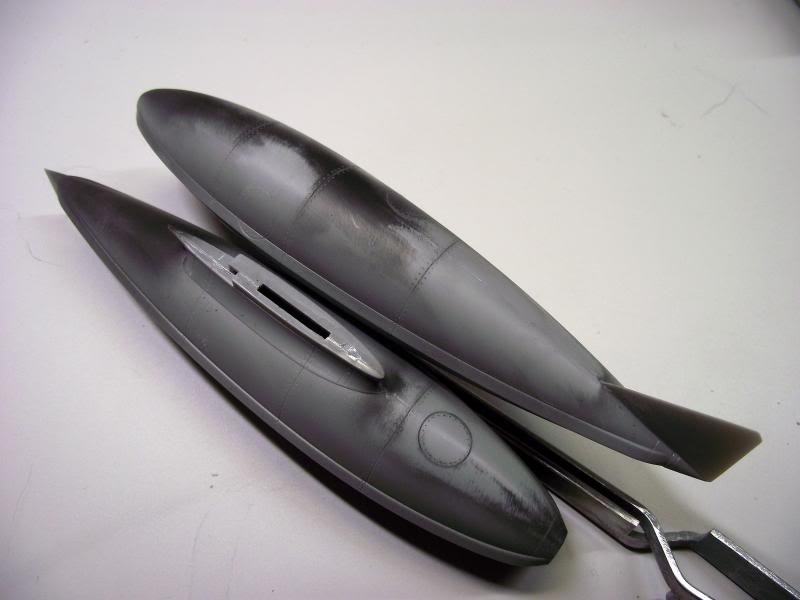
I checked the seams over and over using flat black paint and refilling, sanding and rescribing where necessary. The trick is to sand away the seams without causing flat spots on the rounded surface. In the end, I'm pretty happy with the results. Fuel tanks got the same treatment.

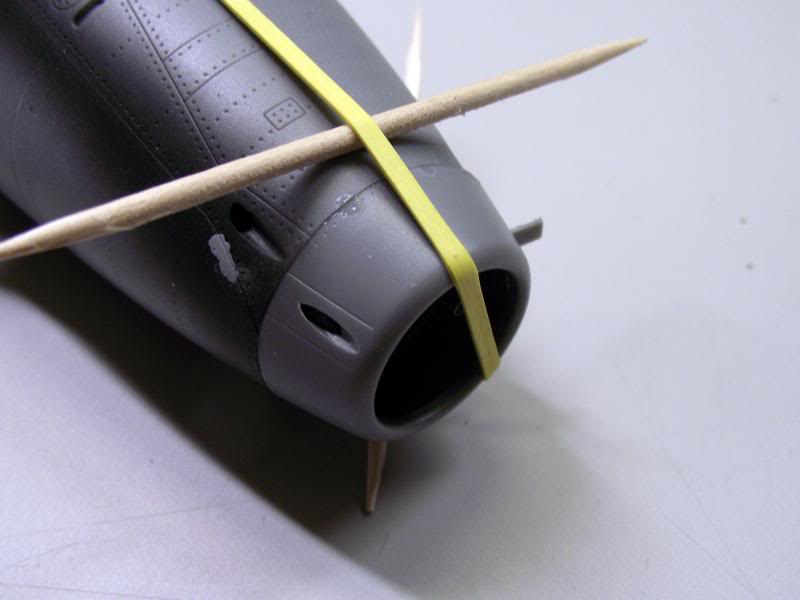
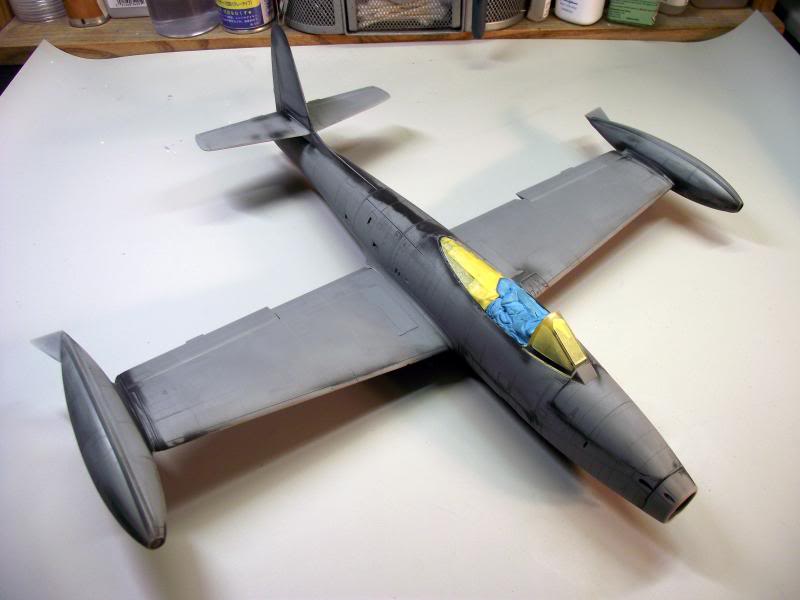
The nose went on with no fuss. I'm going to put some hollow tubing in the gun ports later on.
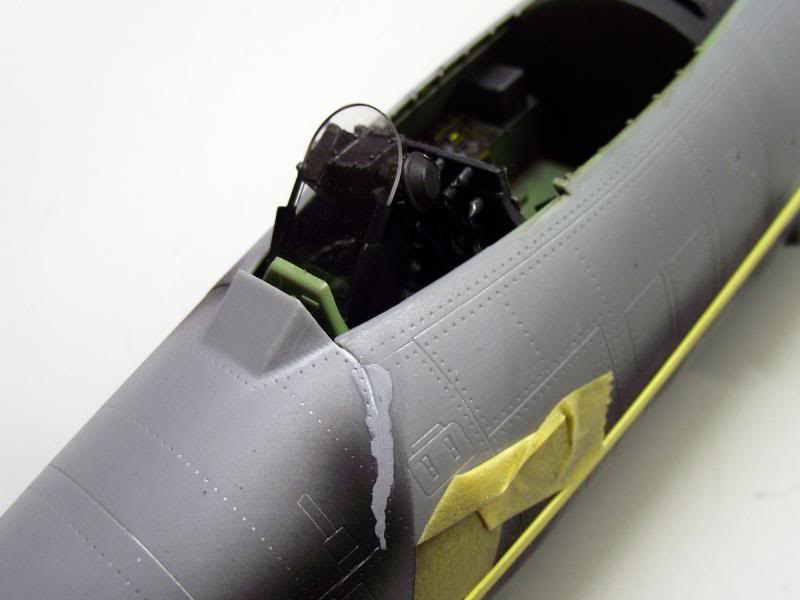
This part made me nervous. The gun bay cover went on with a few gaps here and there. I got around the worst of it by gluing the starboard side first and letting it dry over night. I was then able to glue the port side the next day and get it manipulated into position. There are still a few seams that need reworked though. However, it's mostly fine.
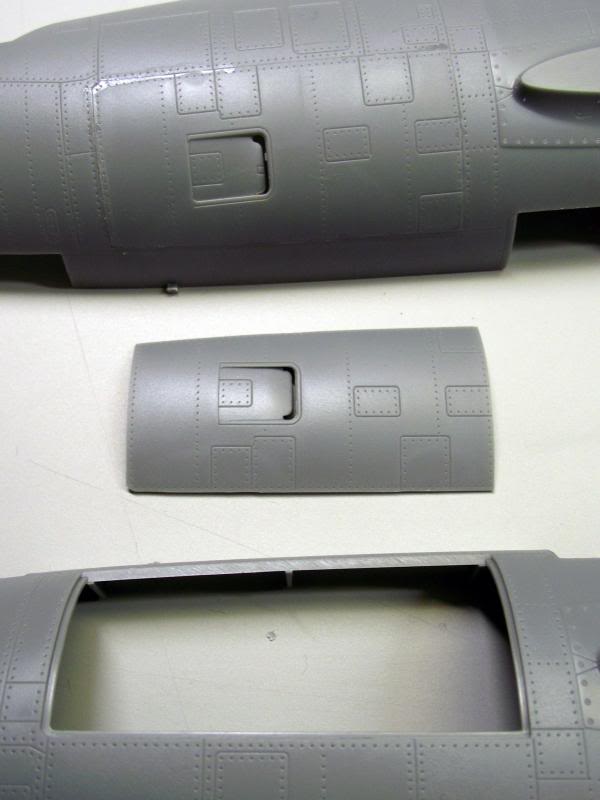
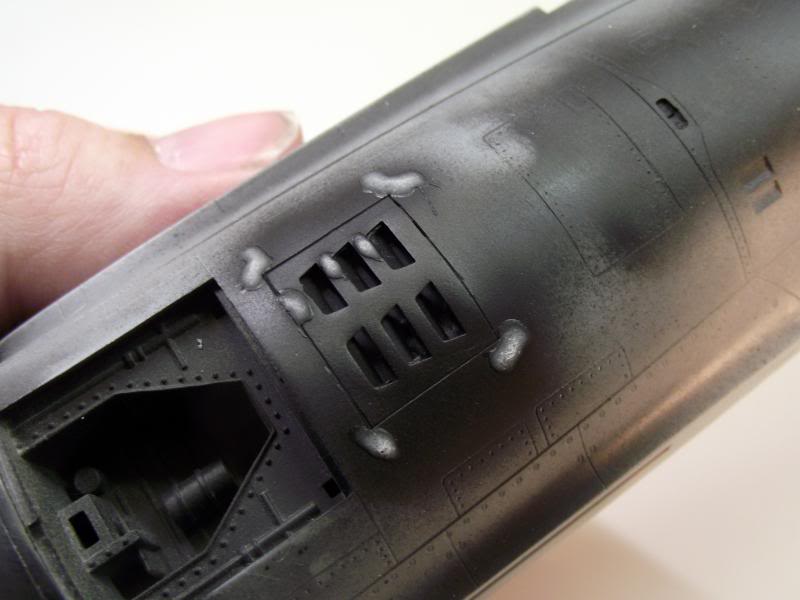
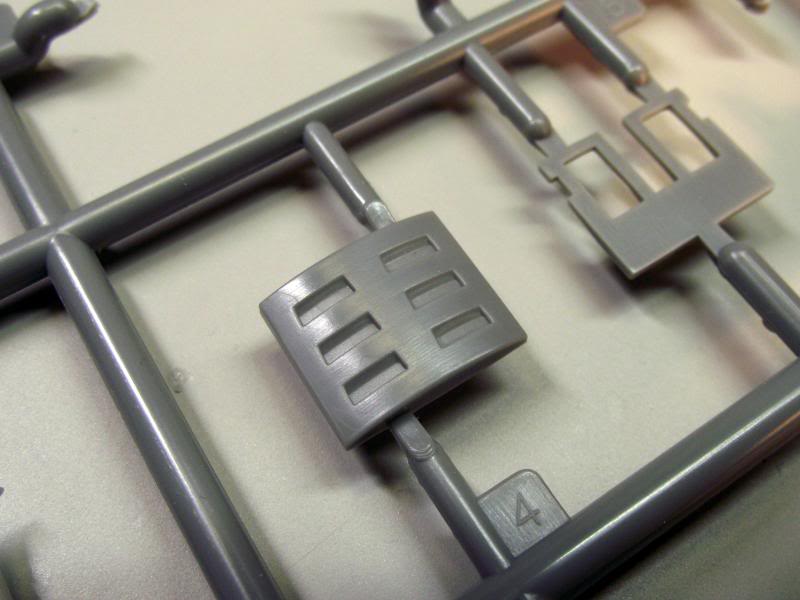
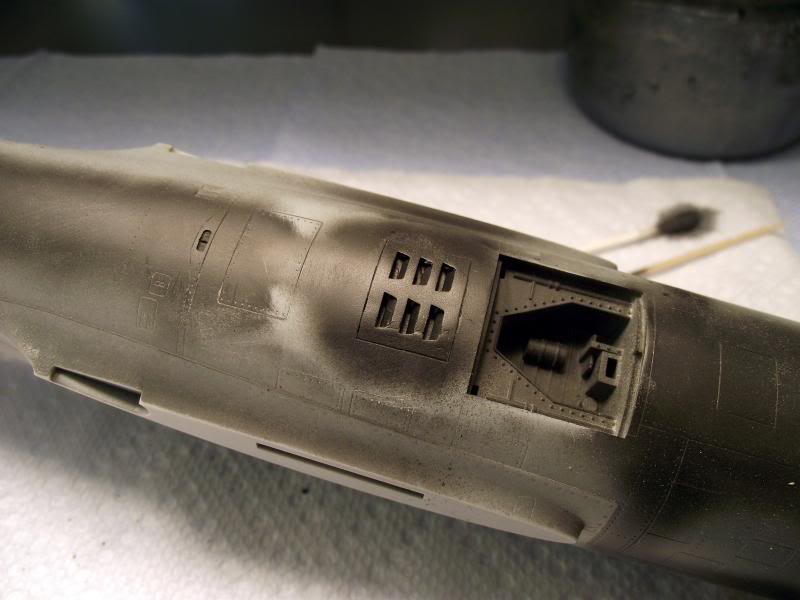
So the Eduard exterior PE set has a bit that I waffled back and forth on using. It replaces this blobby little gem of plastic.
If I used the PE replacement I knew I would be in for a bit of work. It was unlikely to conform to the shape of the fuselage right which meant a lot of glue and sanding and rescribing. I weighed that against the benefit of leaving it alone and did it anyway.I got the PE part roughly in place and sealed down the edges with superglue. I then sanded it flush, reapplied more glue, this time with talc as a softening agent and sanded again. I kept respraying the area black to check for gaps, refilled where needed and kept at it. I then rescribed the edges, cleaned THAT up with more filling, rescribing and polishing and wound up with something that looks 1000% better than the kit plastic. Totally worth it...
(how I managed to do all of that sanding and not misshape the contours of the fuselage I will never know...)
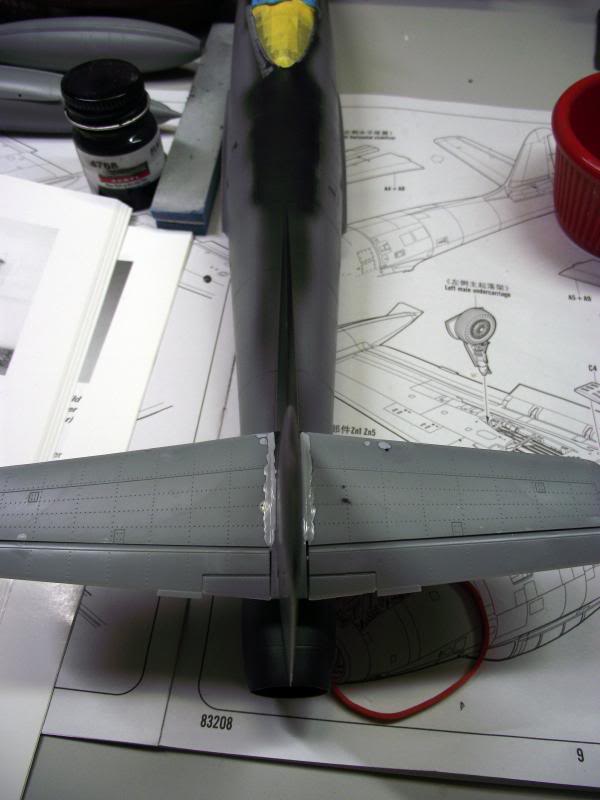
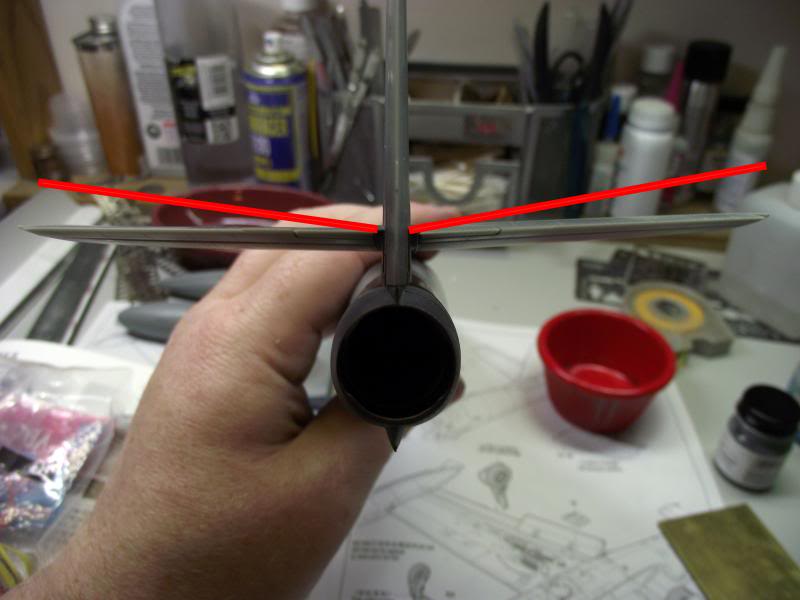
The horizontal tail is a rancid fit. I mean, just awful. Think of how bad it could be and then go a step worse.
In the first picture below I have the tail on and at the correct angle (according to both of my references). The red lines show about where the kit would have you place them.
To get the tail position right I had to do a bit of trimming and force them into the right position. Here I have started the process of filling the gaps. I see a lot of sanding and rescribing ahead.
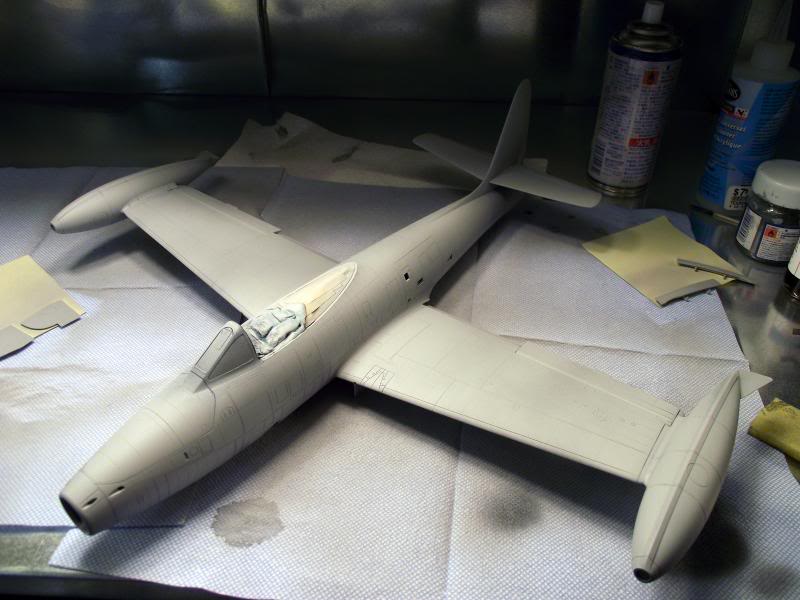
Construction is done. Final seam check and cleanup.
Primer with Mr. Surfacer 1200 from a spray can. If you use this stuff you can mask over Alclad as much as you want and nothing comes up. It also is self leveling and fixes a lot of small scratches and other finish issues.
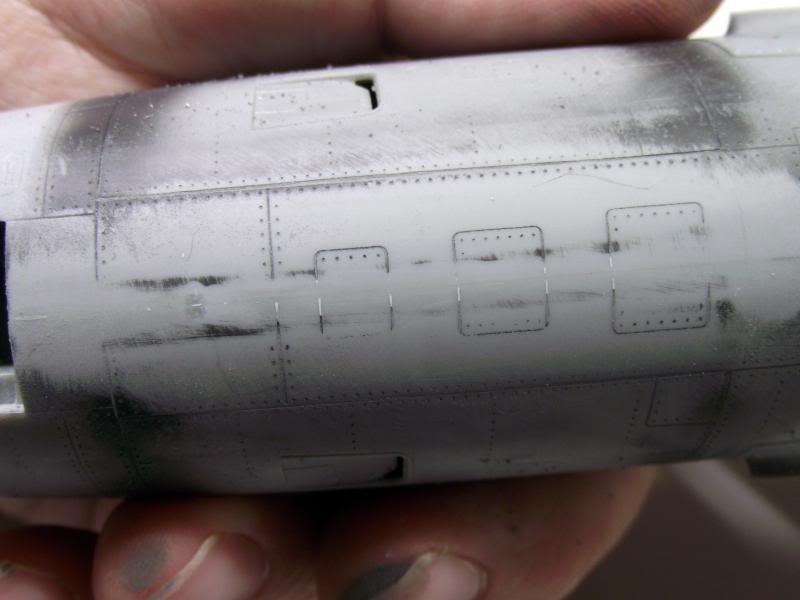
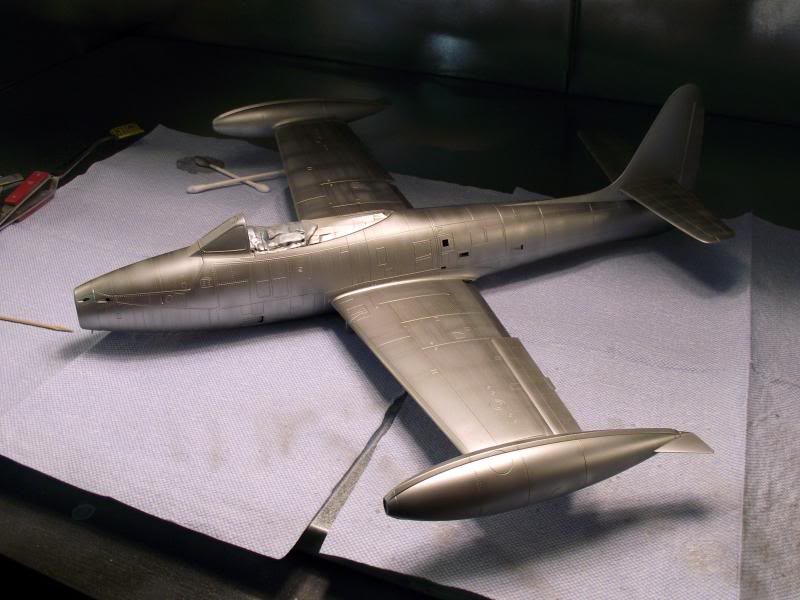
Going over the panel lines and rivet detail with Alclad Dark Aluminum.
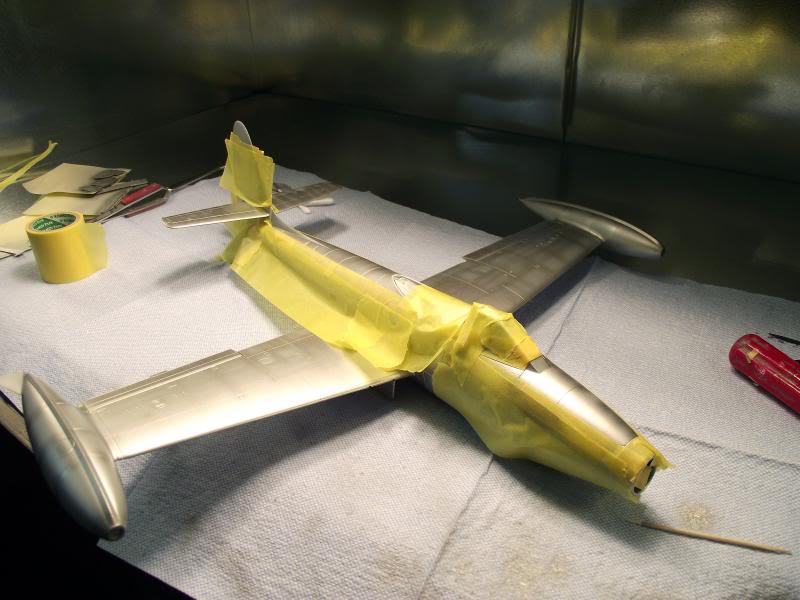
Masking up for the OD green, wheel wells and tail paint.
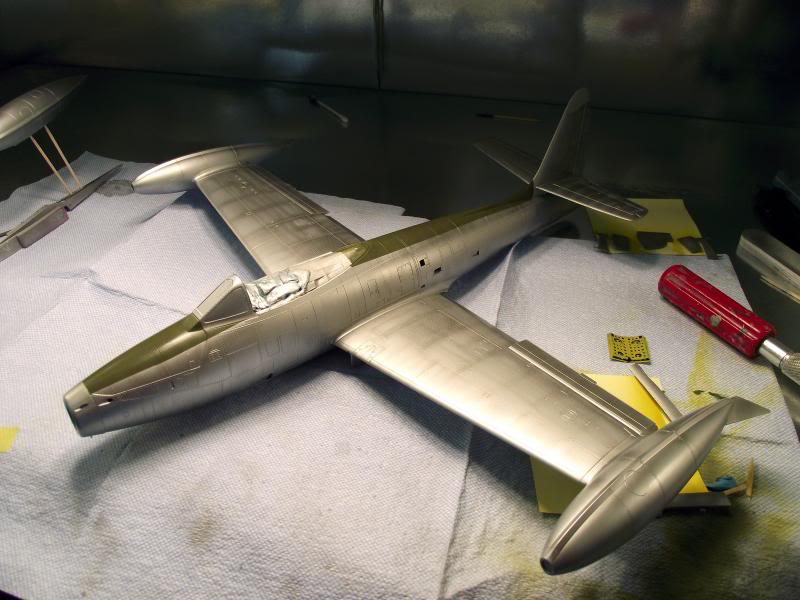
Gloss coat is on and curing over night.
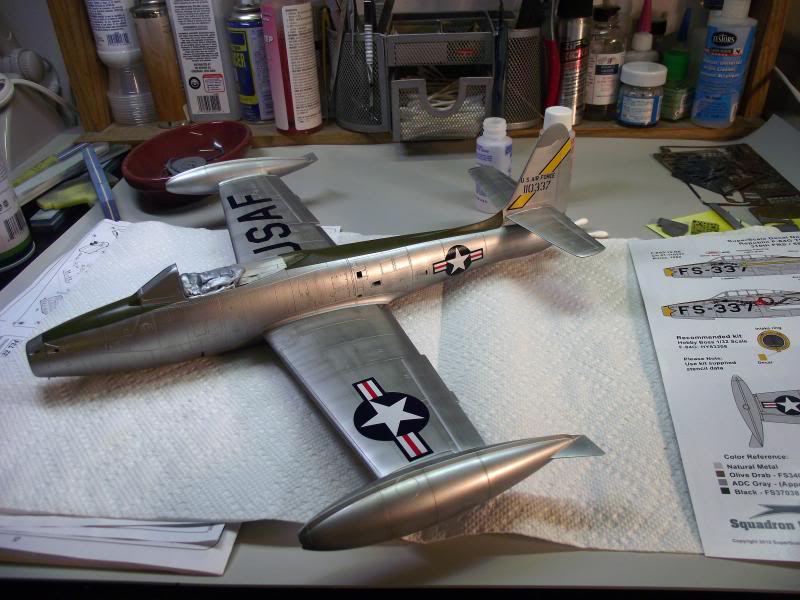
The decaling is started. These were printed by Cartograf and are going on just beautifully.
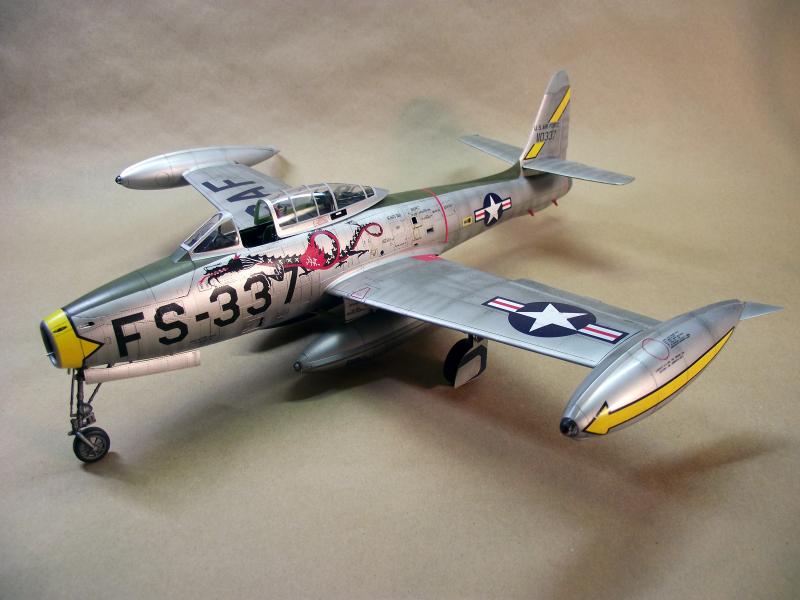
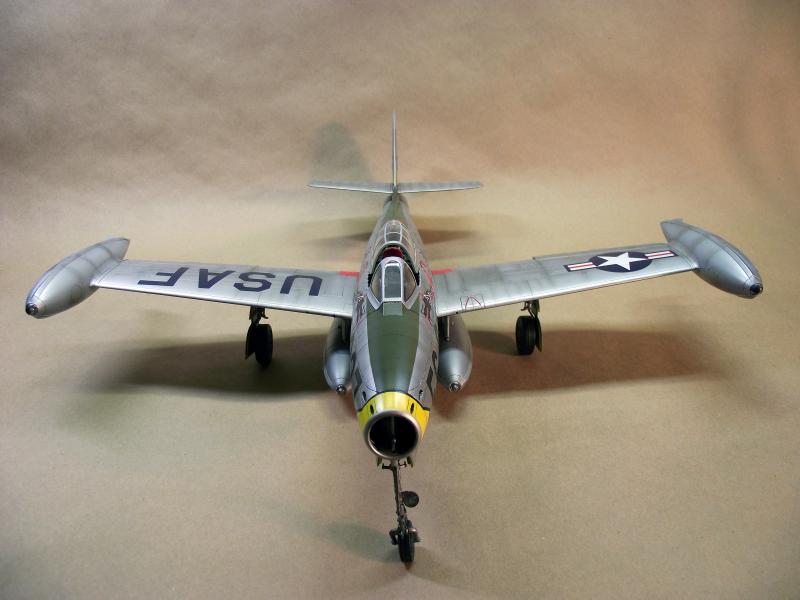
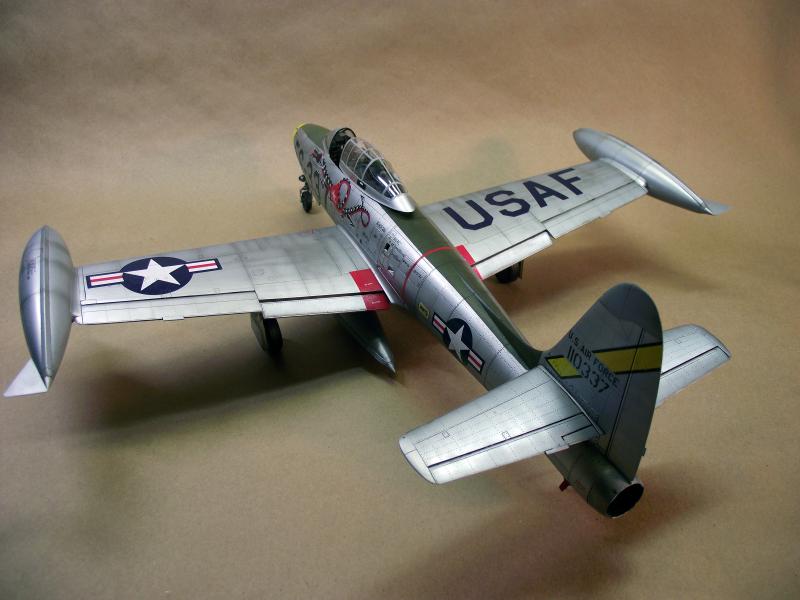
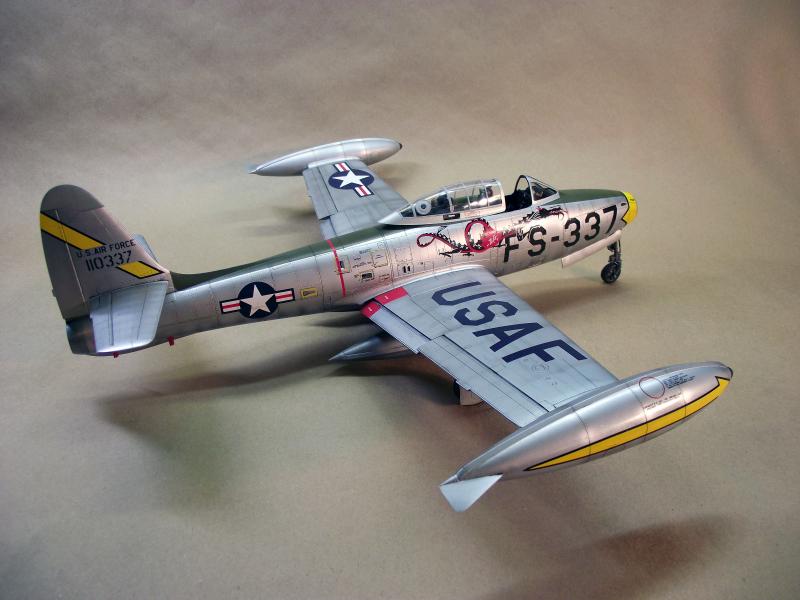
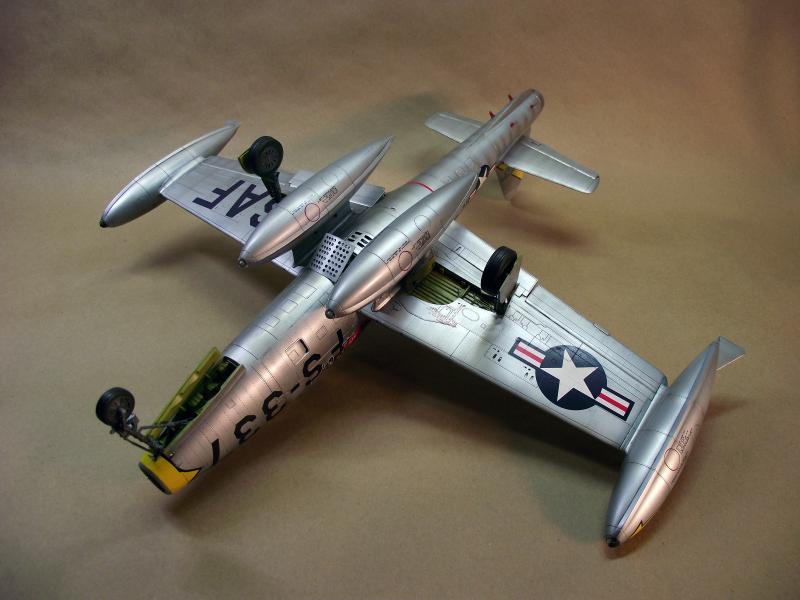
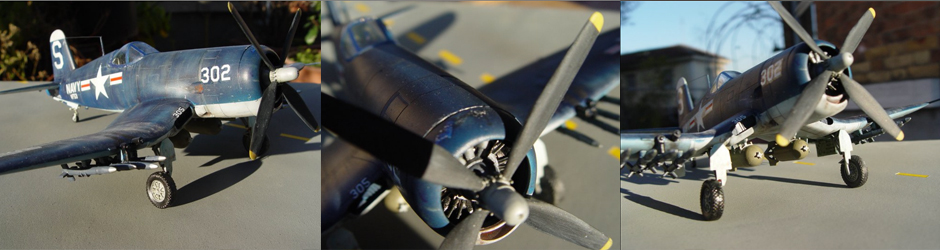
And here the completed model !