
Model, Text and Images by Luca Cinacchio
When I saw the box art of the reboxed Italer Short Sunderland MK.1 i felt in love with those lines and those colors, and i decided to build this great flying boat.
As i wrote, the kit is a reboxing of an old one, "modernized" with a new decal sheet, a small booklet printed in colors, and a small PE frette (not of good quality... they are very thick). so don't expect finesses like in the last recent kit: it is the classic old Italeri kit, with dip like a tench panel lines and some fitting issues here and there...
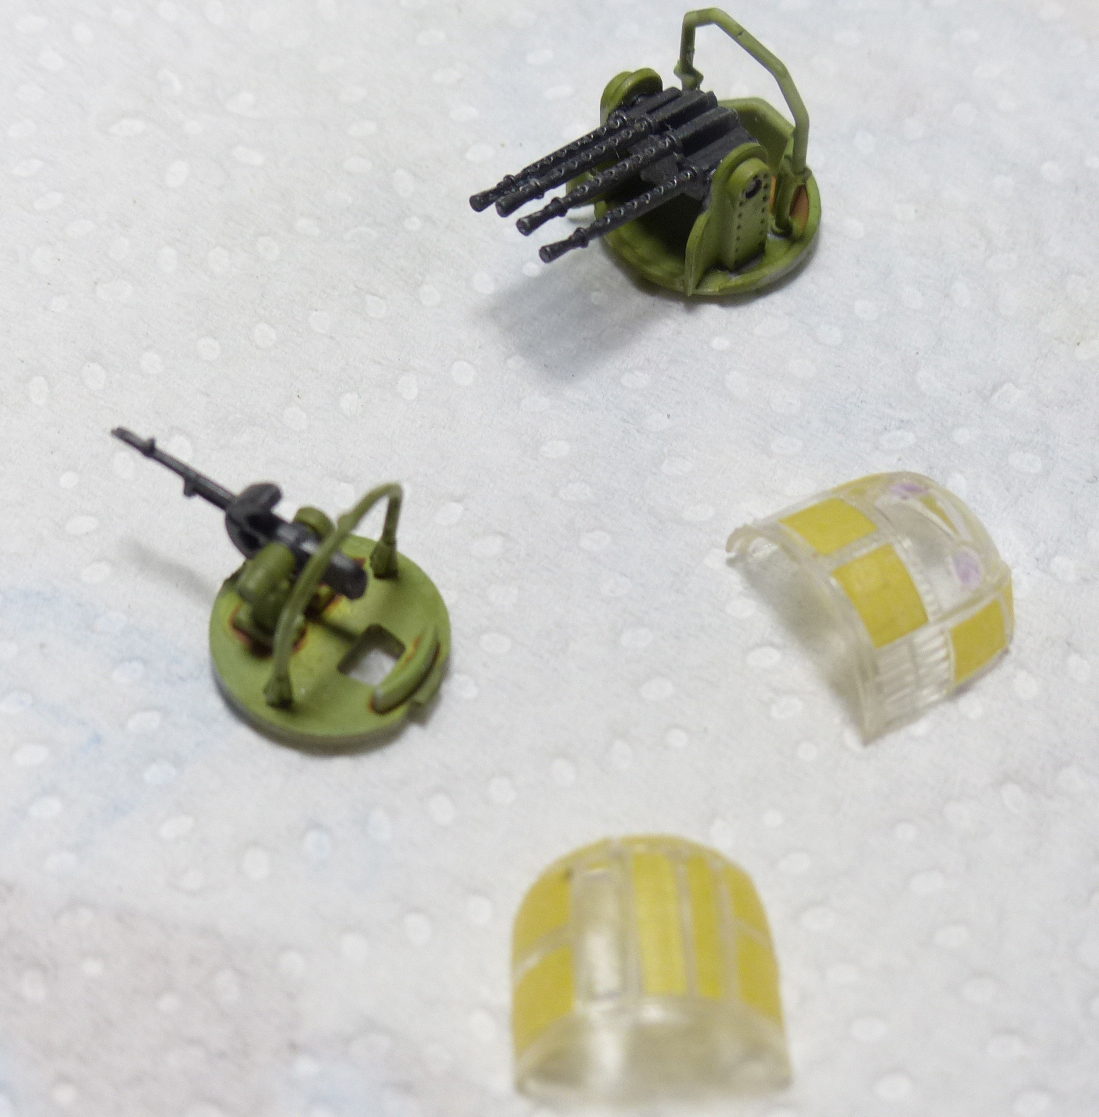
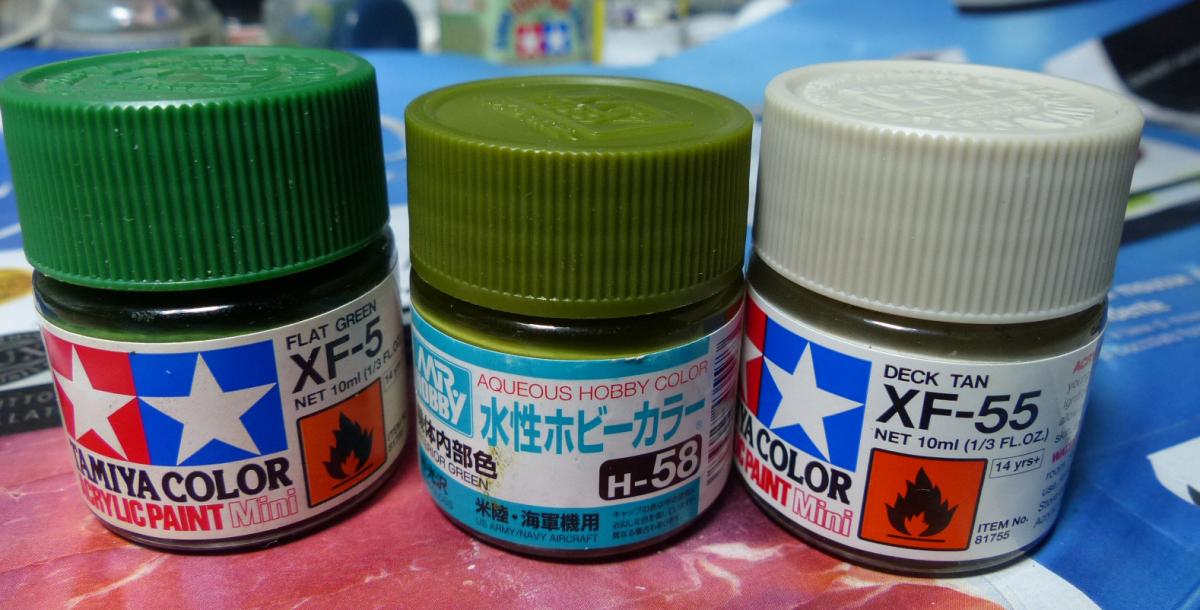
Construction start with the cockpit and the interiors: in the box you find enough materials to build some nice interiors, but of course there is a lot of space for the fans of the scratch-building. To replicate the UK interiori green i made my own mix of Vallejo AirColor (Vallejo Camo Light Green 71109, 3 part, + Vallejo White, 1 part), adding some post-shading, and some oil washes of different colors (mostly black/brown, plus some rust around the anchor).
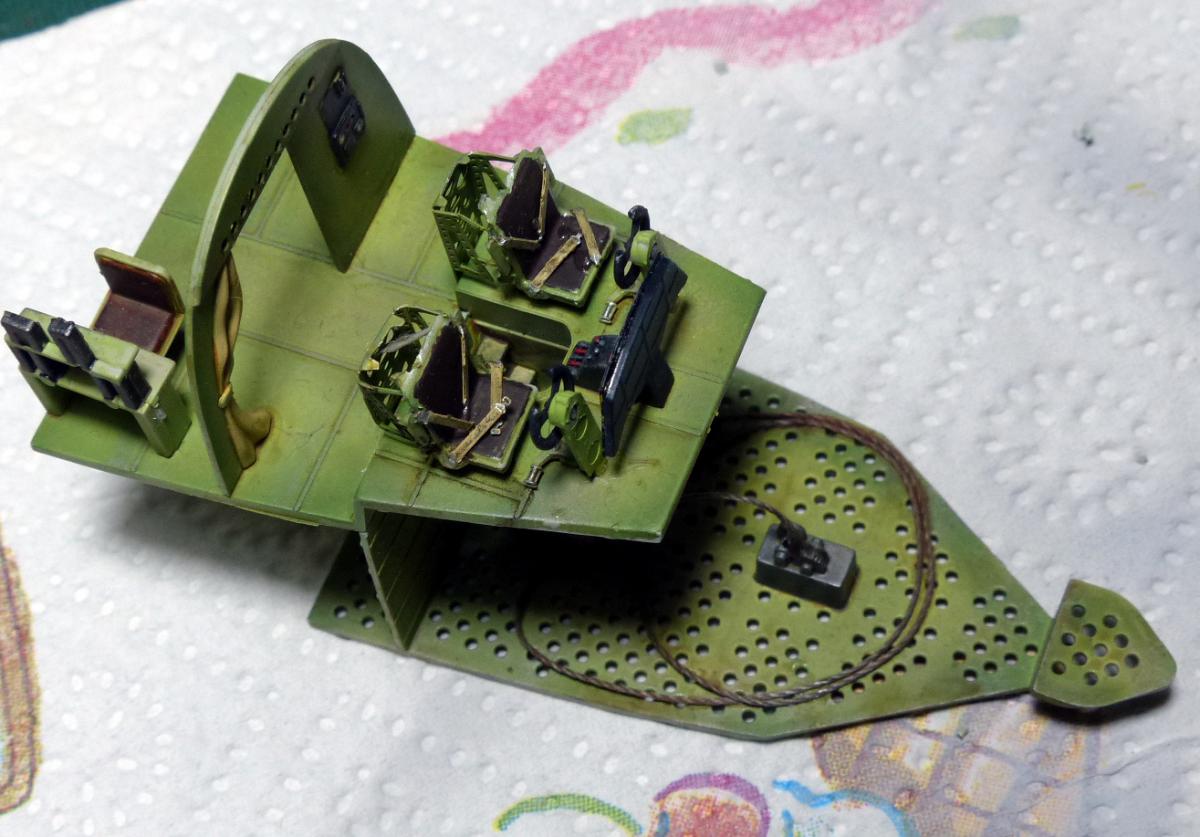
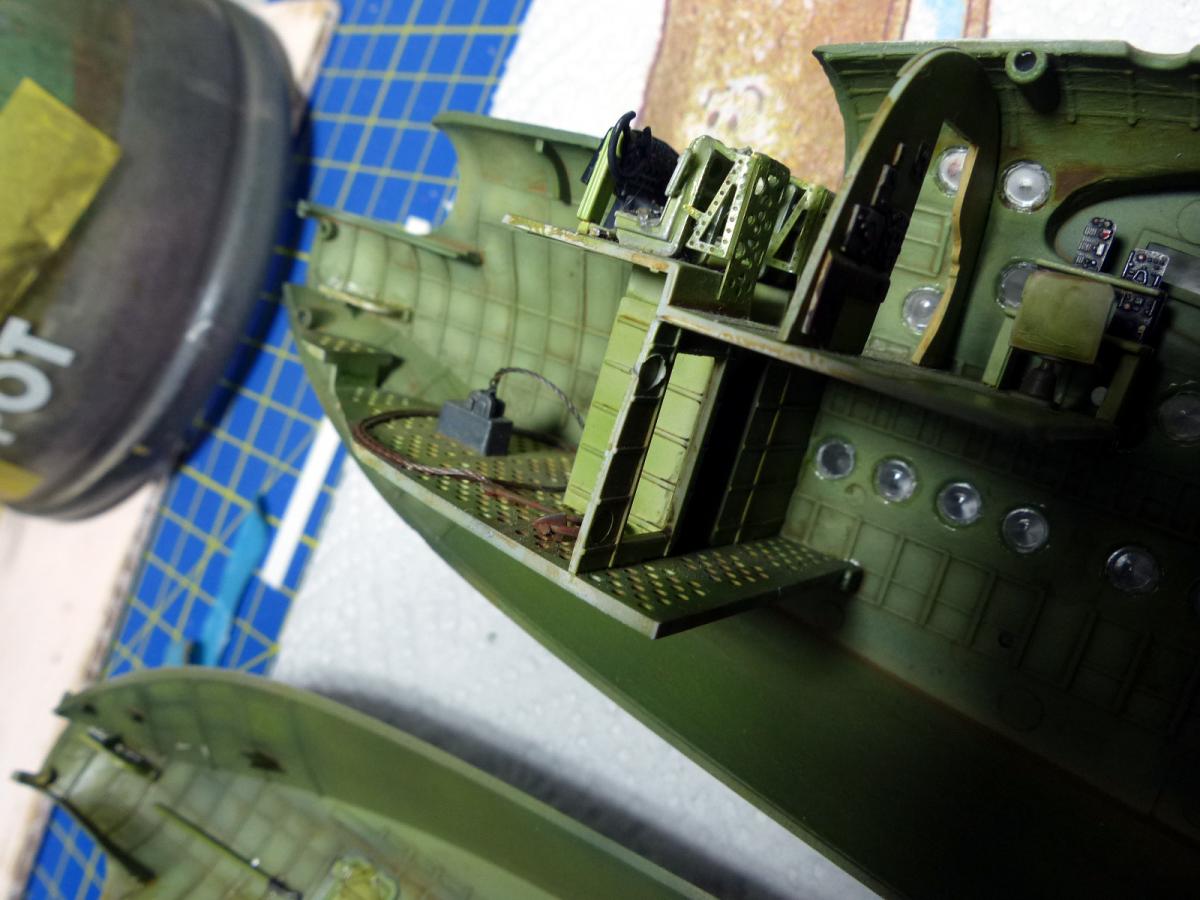
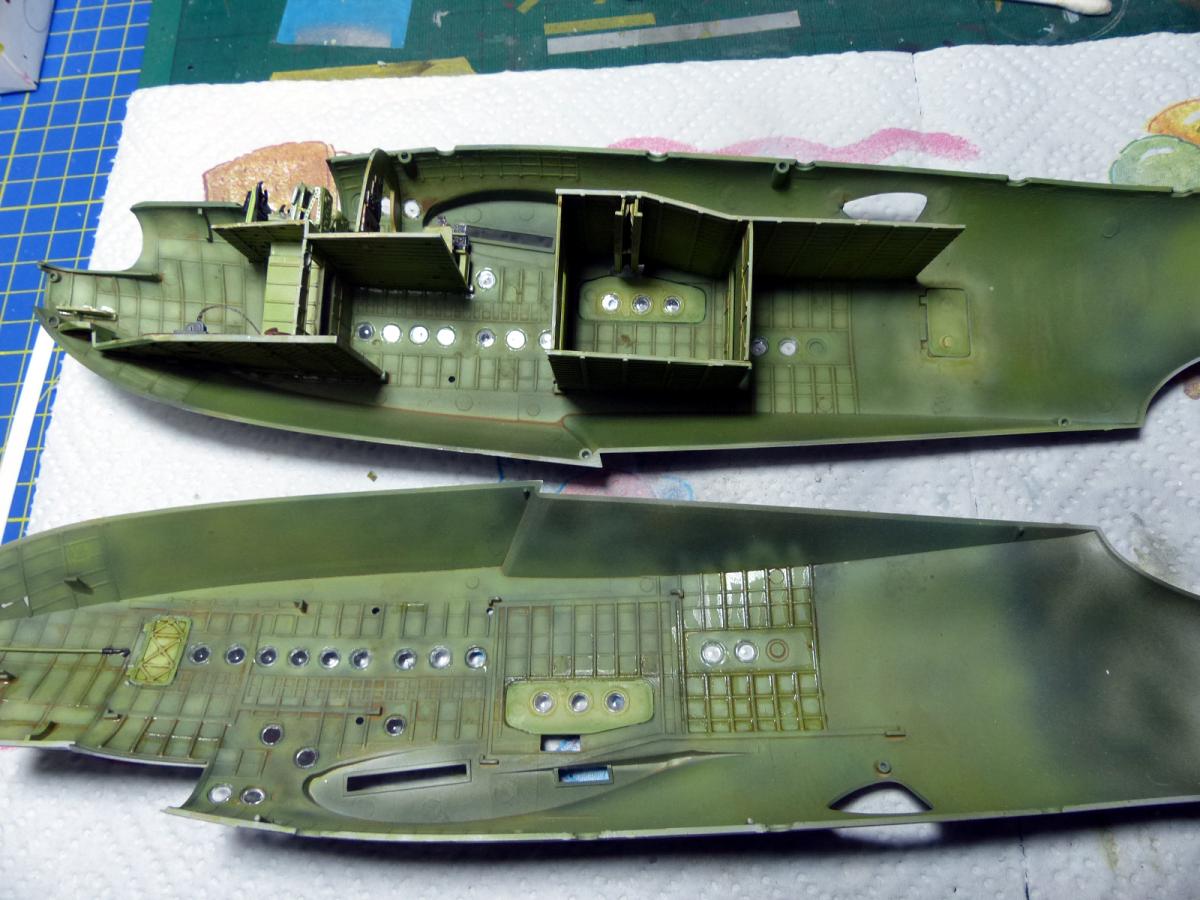
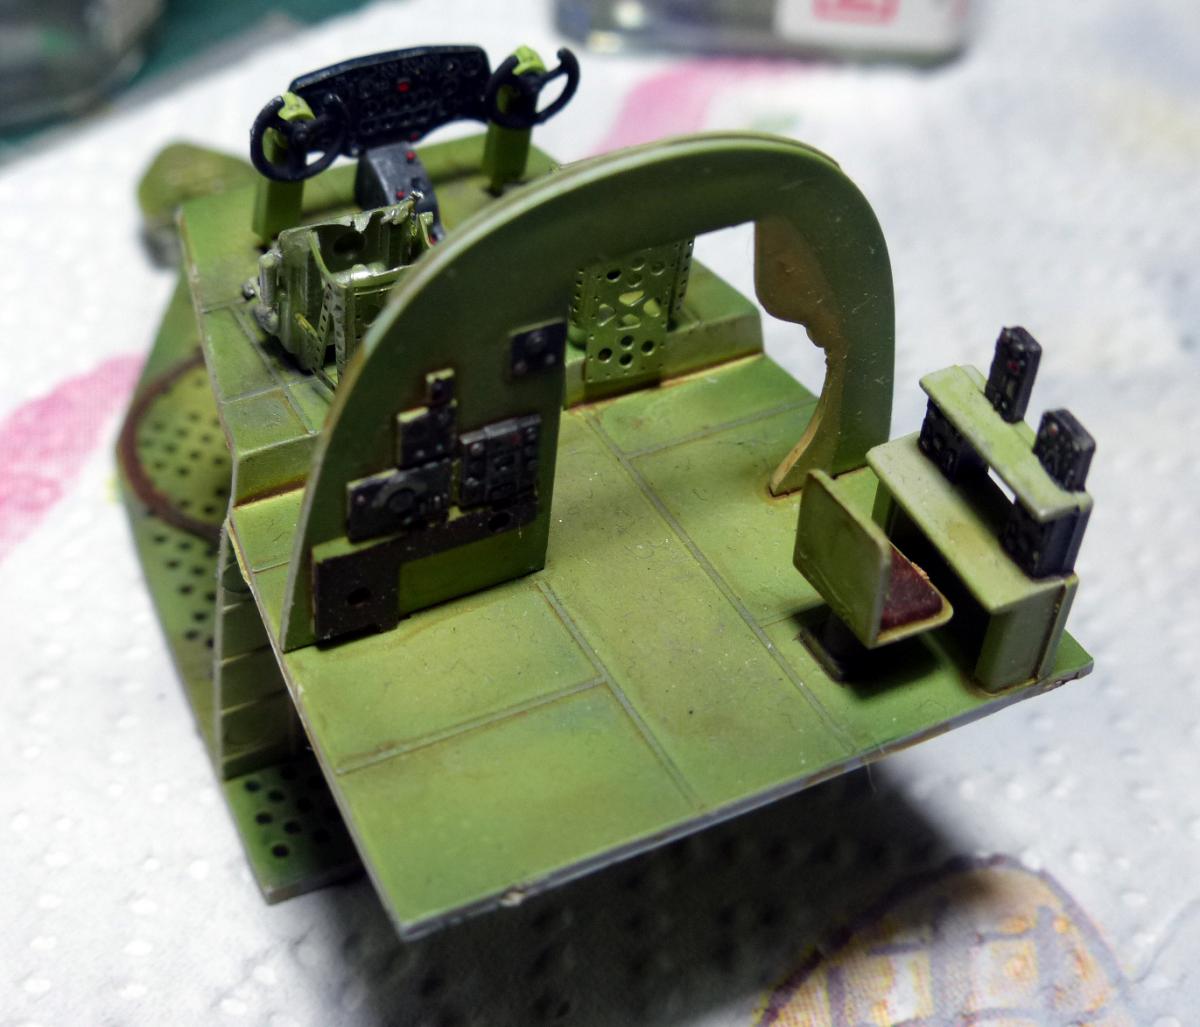
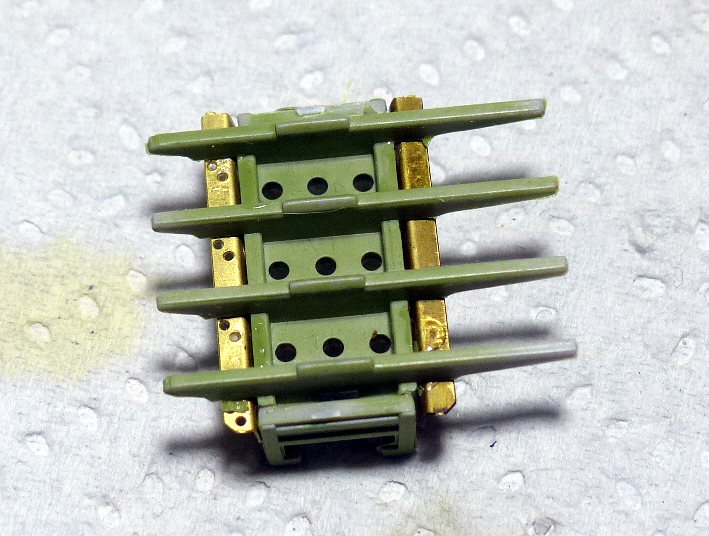
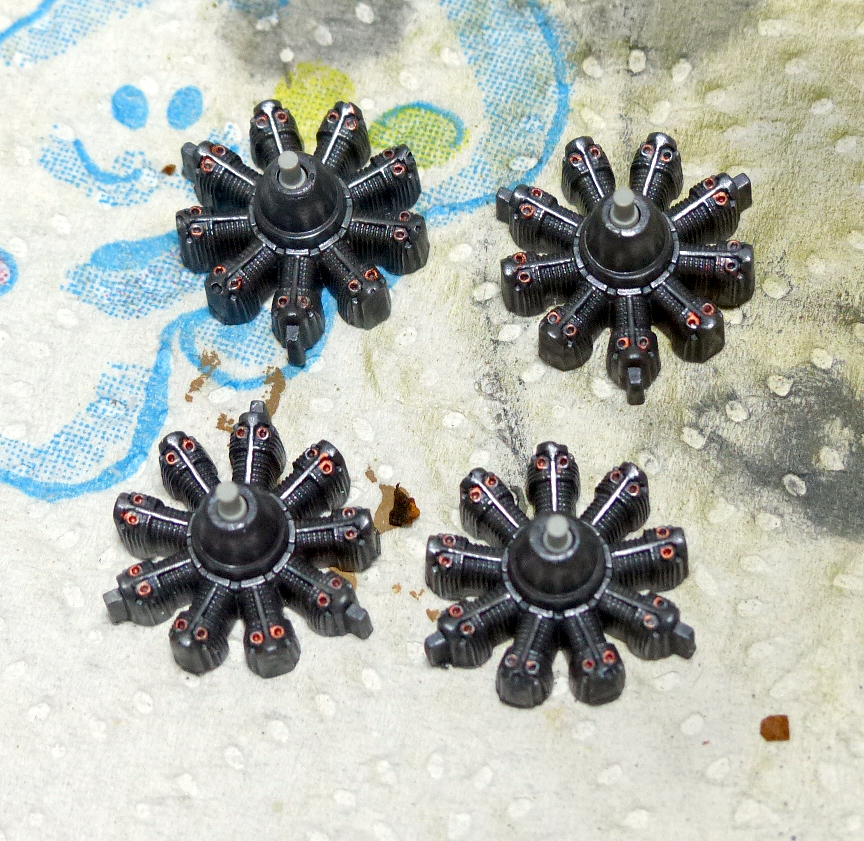
Then i painted the interior of the turret and masked them, to install them later. I assembled the attachment for the bombs, and then i worked on the engines: i did some small scratchbuilding, adding some copper rods, and then painted everything with metallic buffable colors (Model Master) in various shades, completing everything with a dark wash.
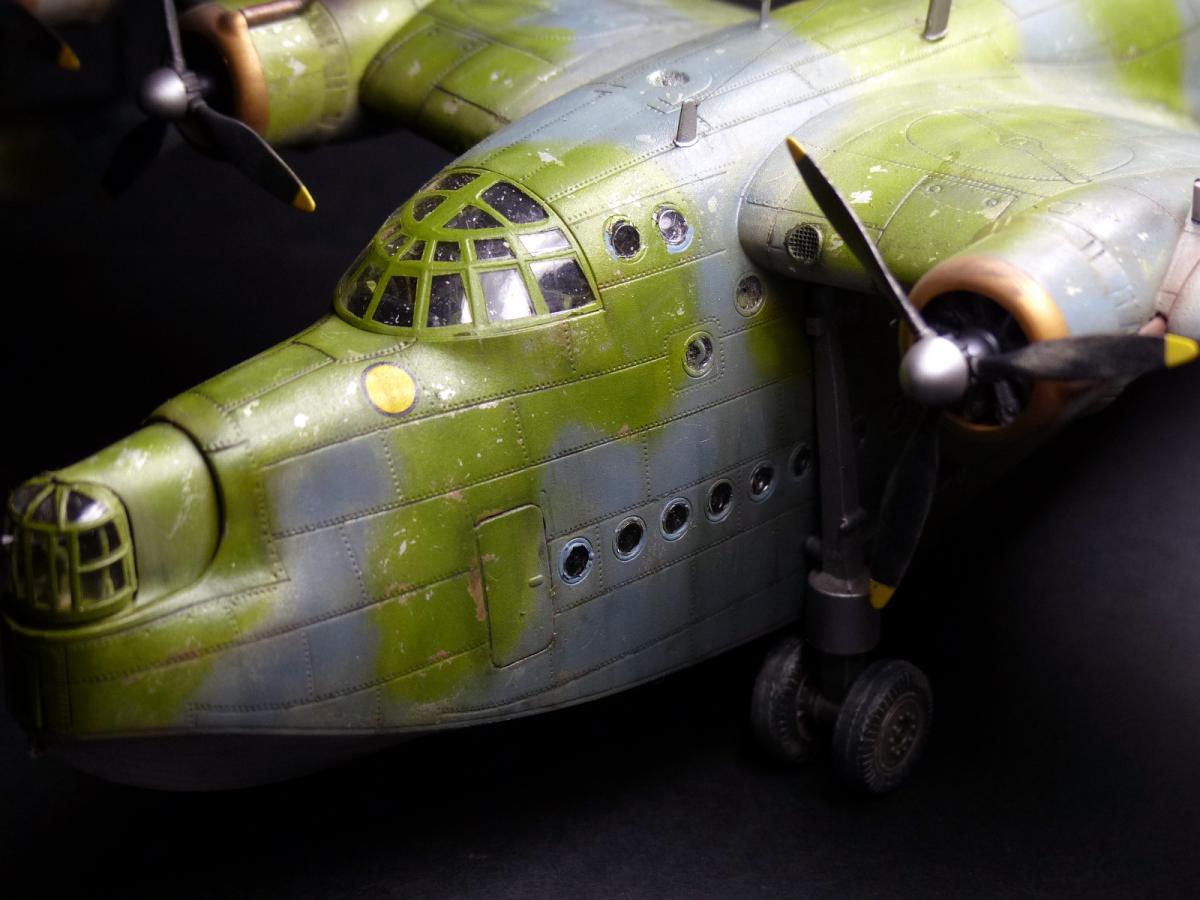
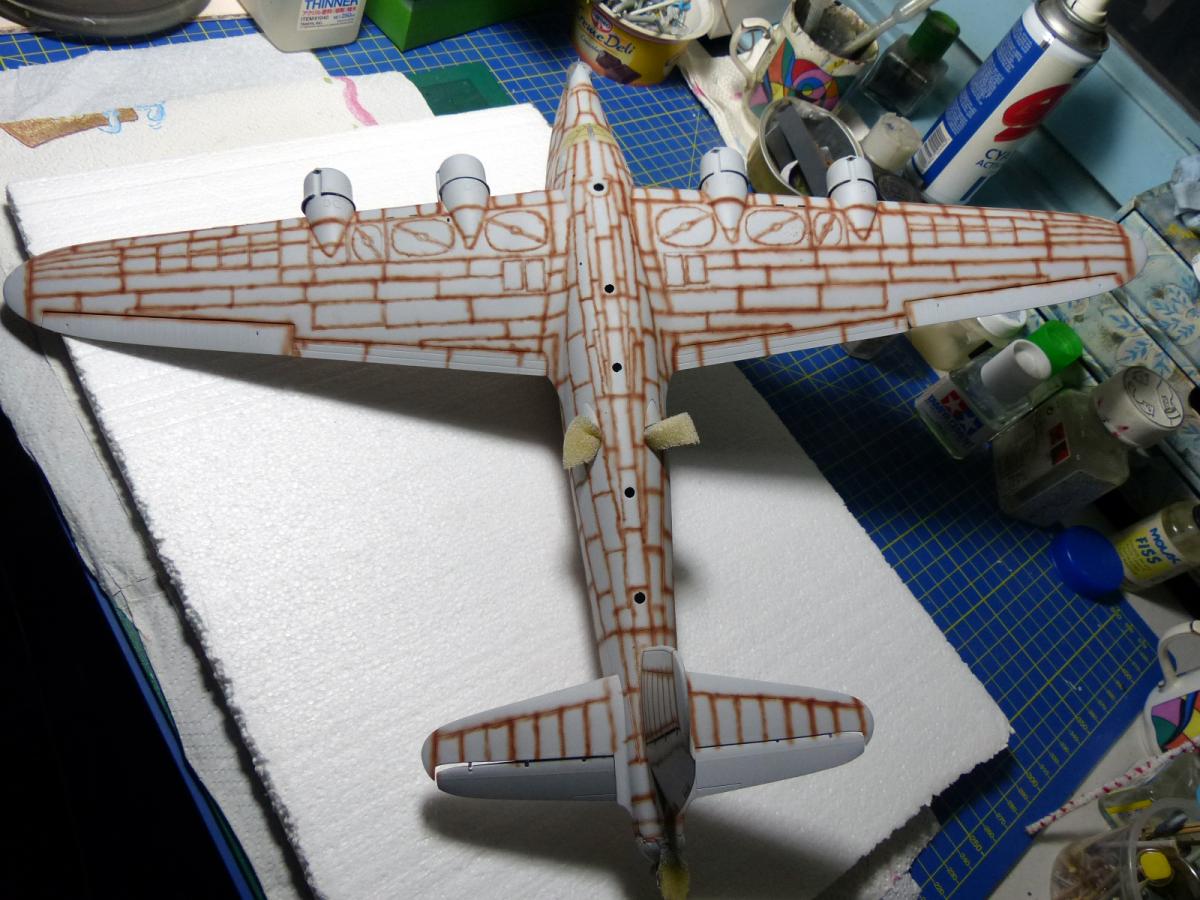
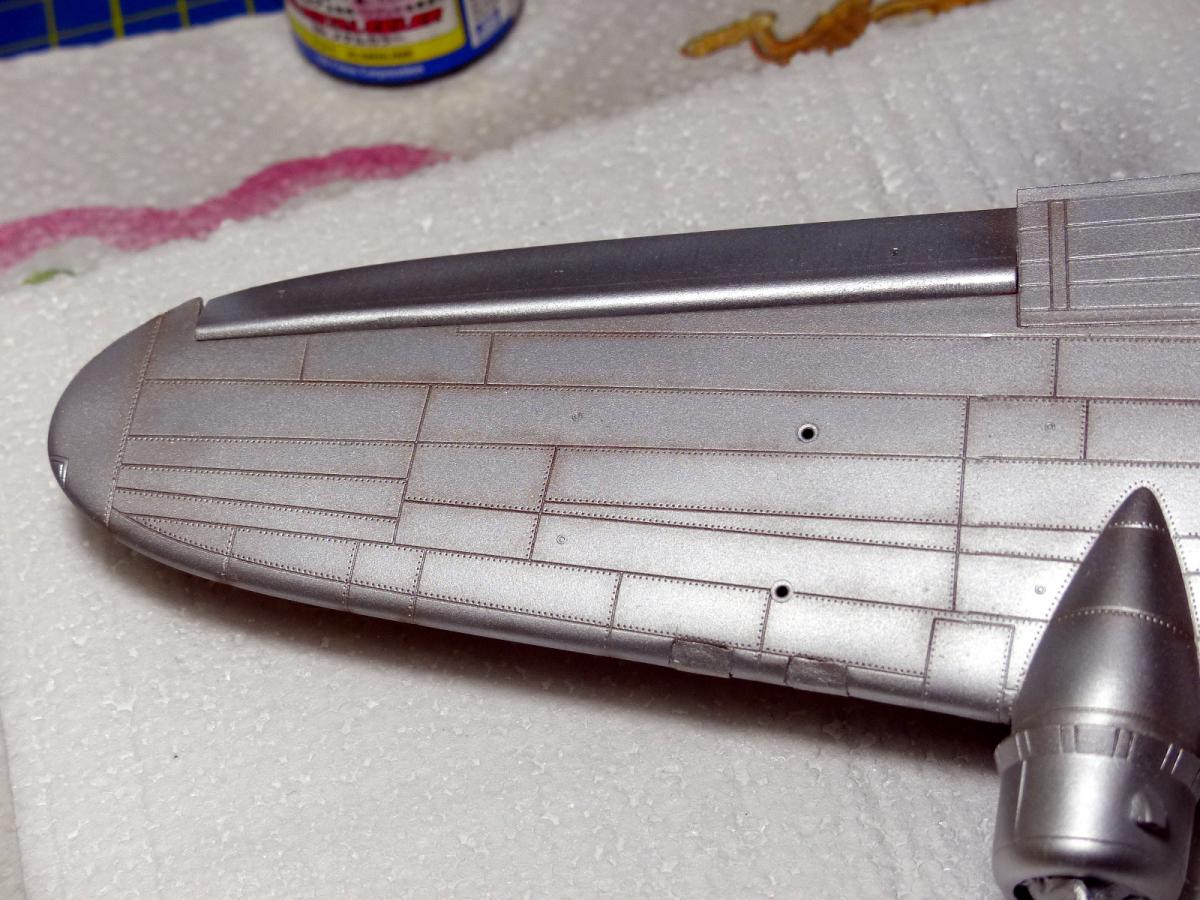
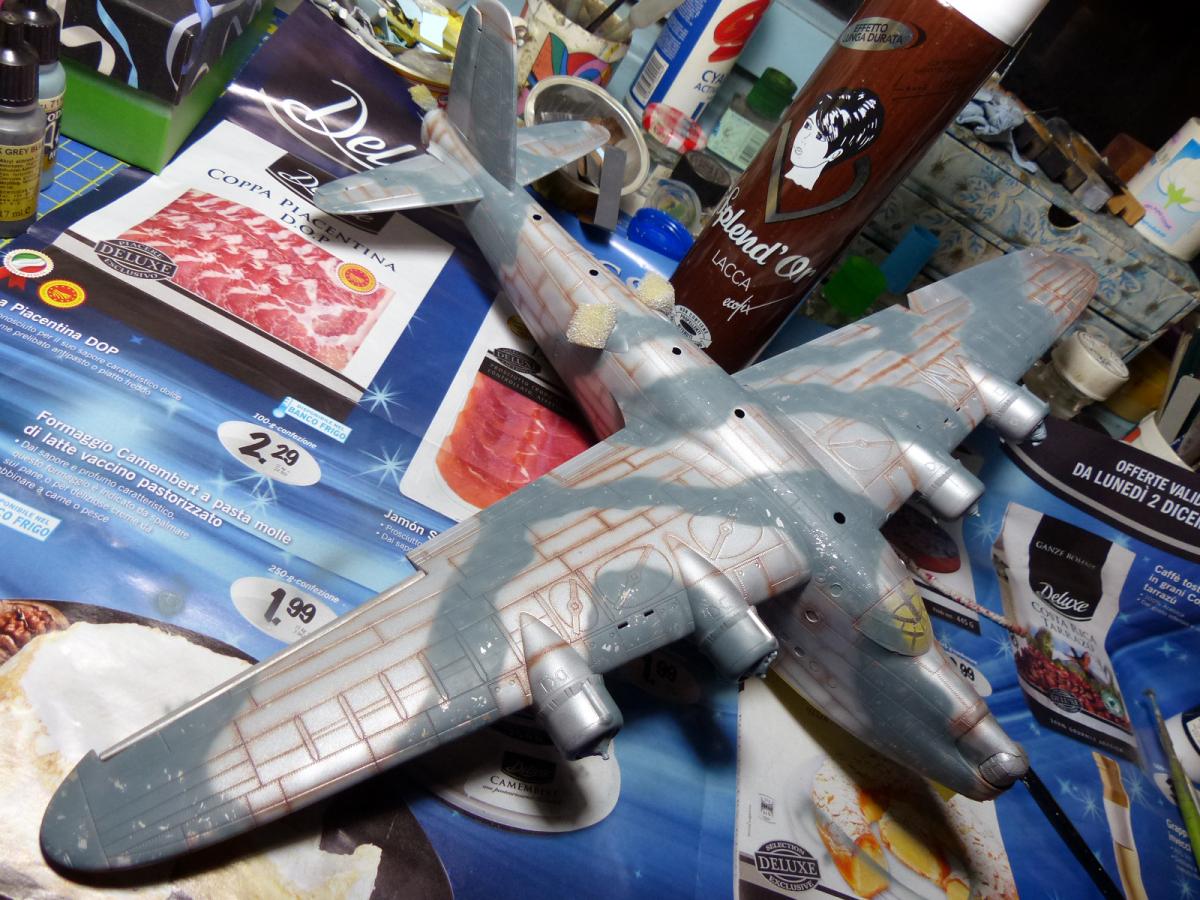
The next step was dedicated to the preliminaries to the painting. Since i was going to use the hairspray technique, first i primed the model with Vallejo gray primer, then i pre-shaed it in rust color, then i airbrushed a Vallejo Aircolor alumium inside the panels and only slightly on the pre-shaded panel lines, to tone them down a little . This allows to retain the pre-shading and have a nice base for the following steps of hairspray.
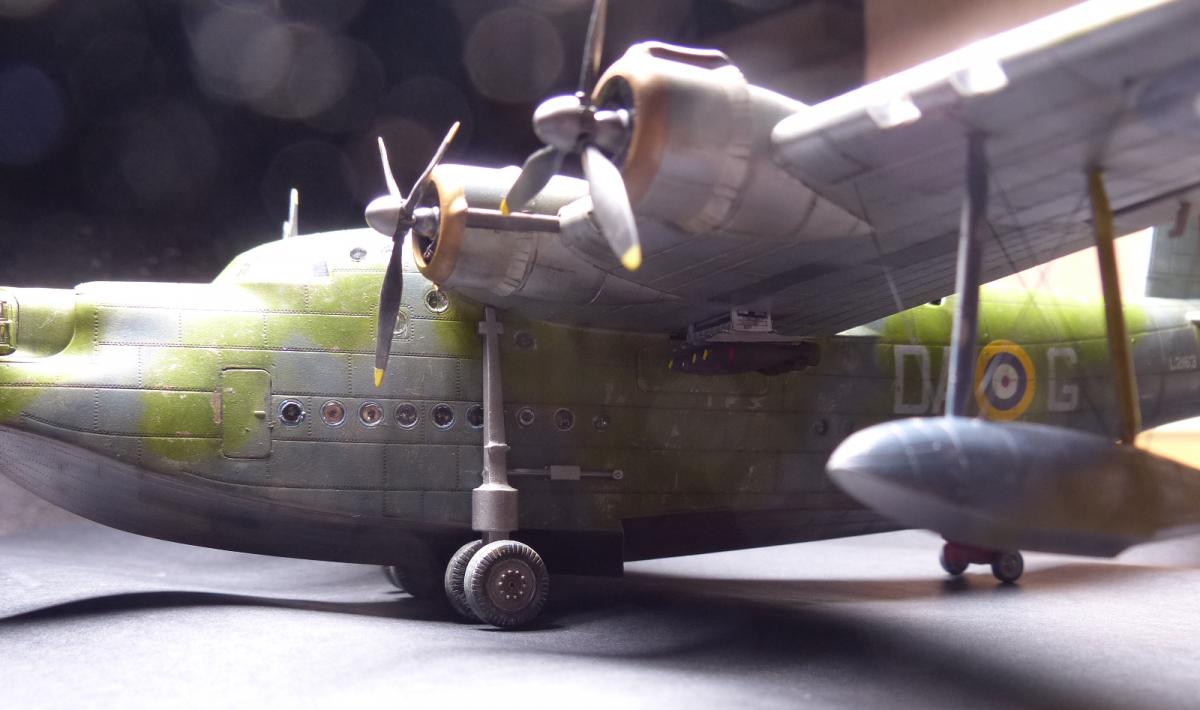
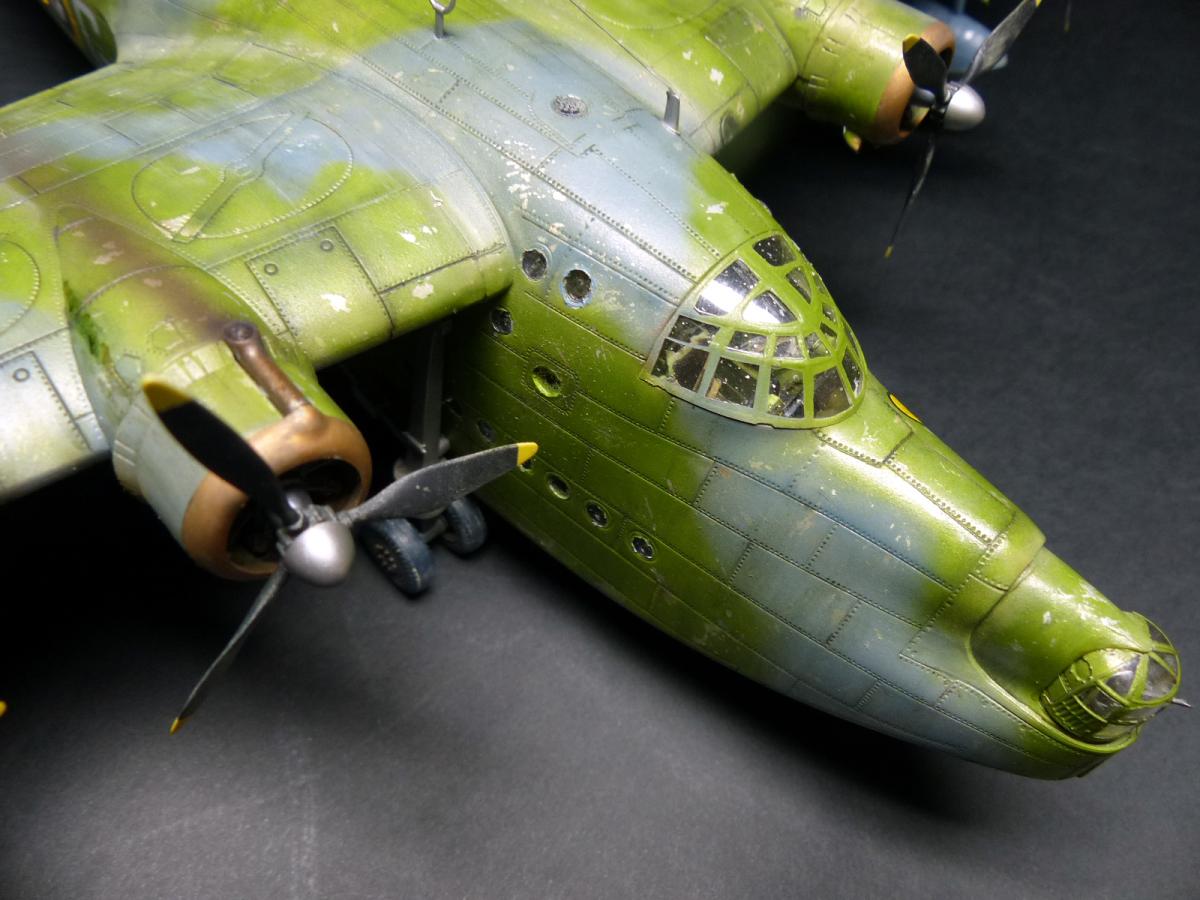
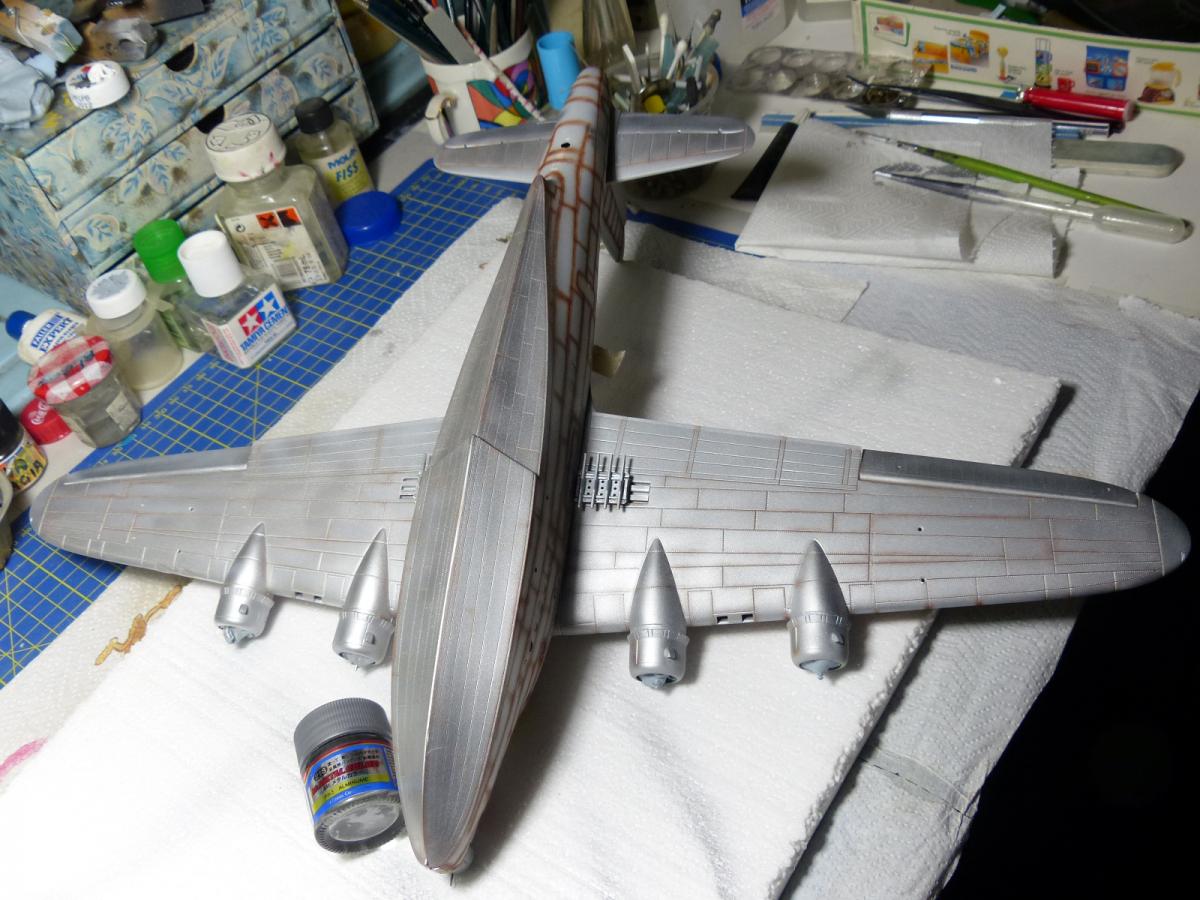
The next step was to paint the lower fuselage and lower side of the wings in MetalMaster buffable allumium color, followed by some masking with Post-it to change the color of some panels.

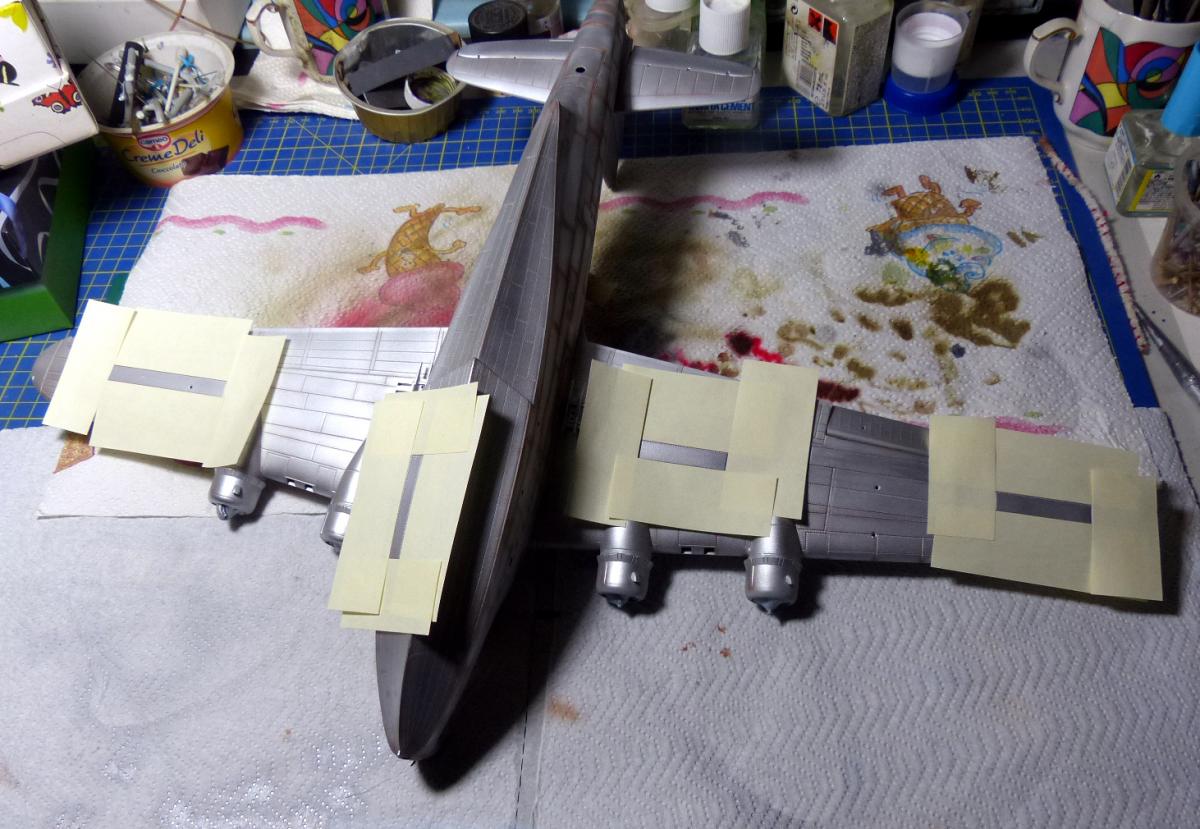
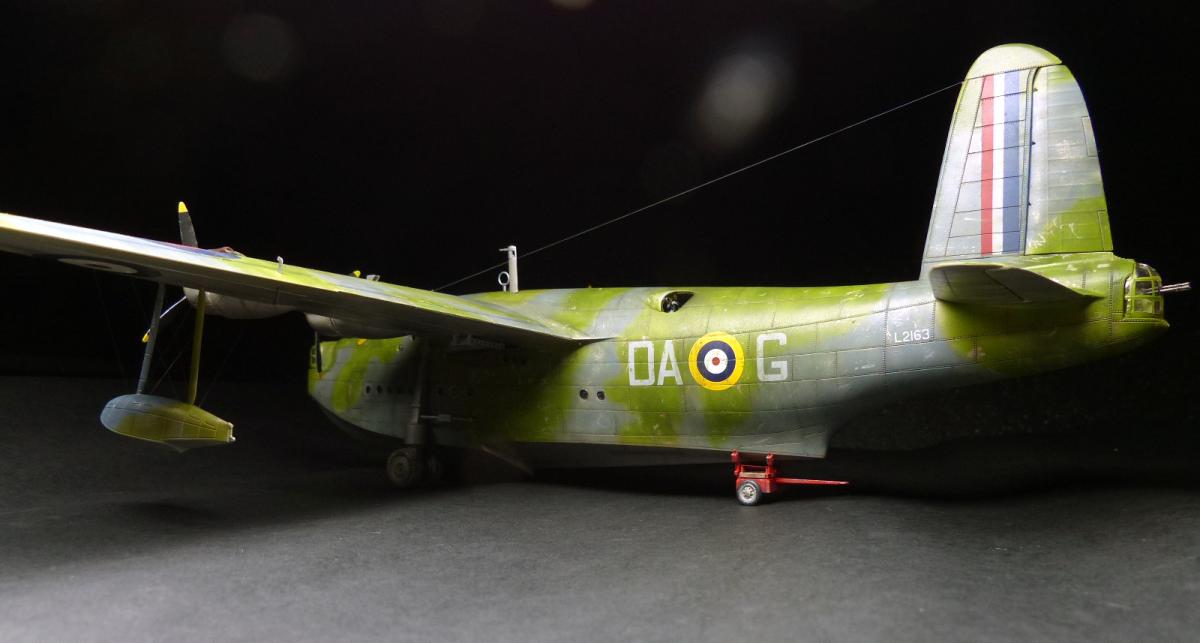
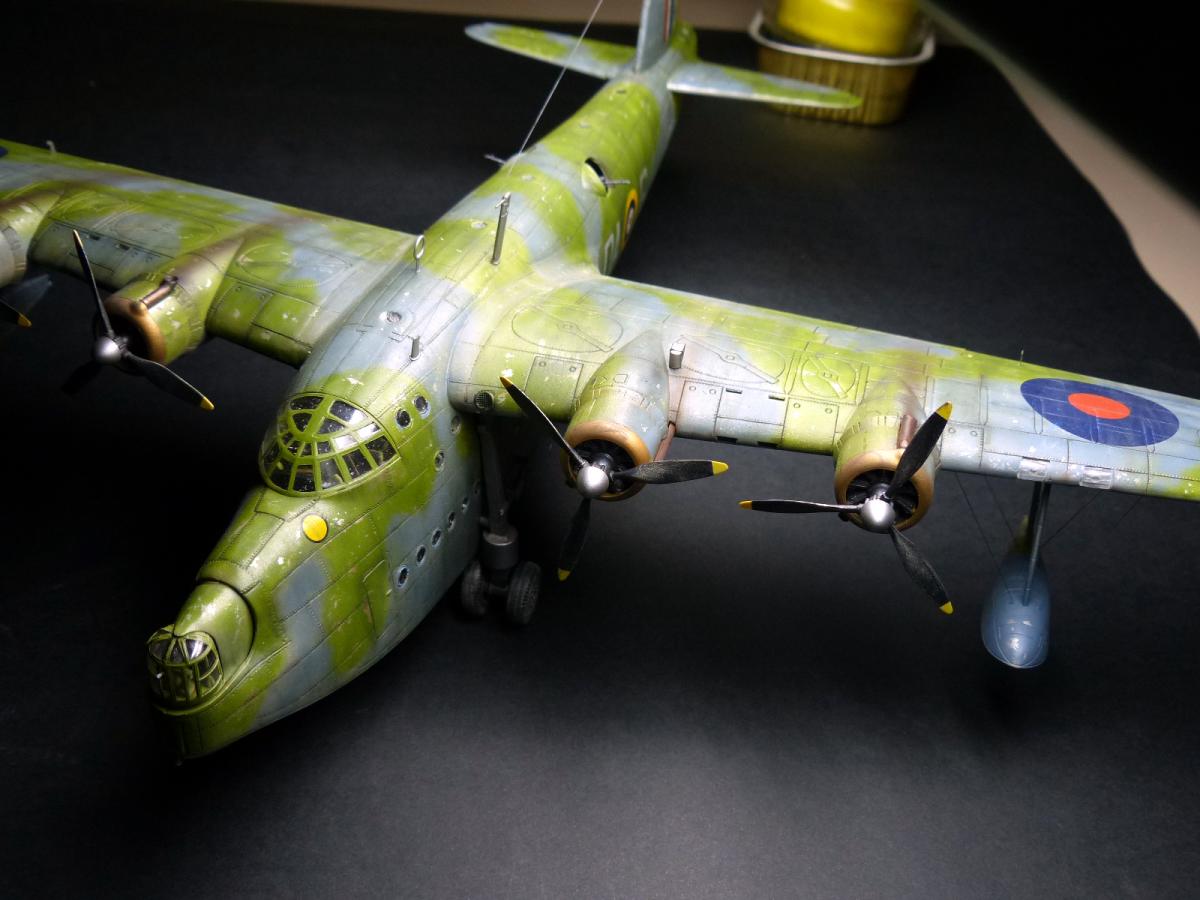
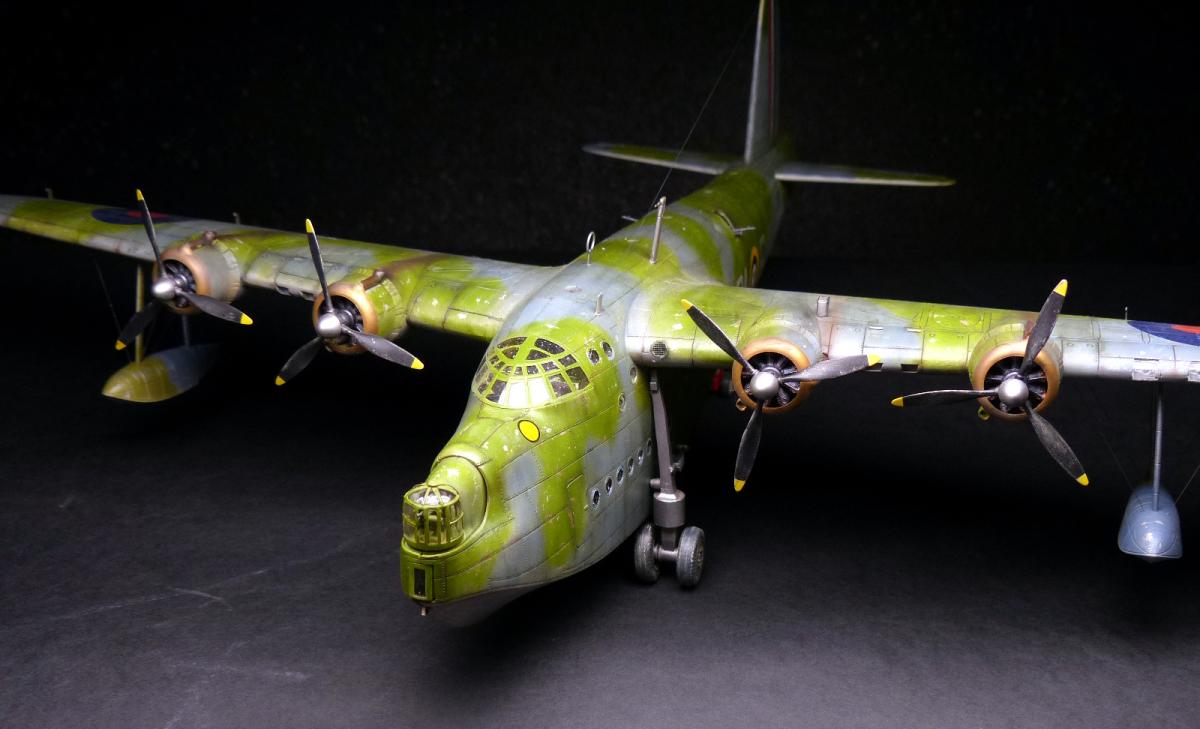
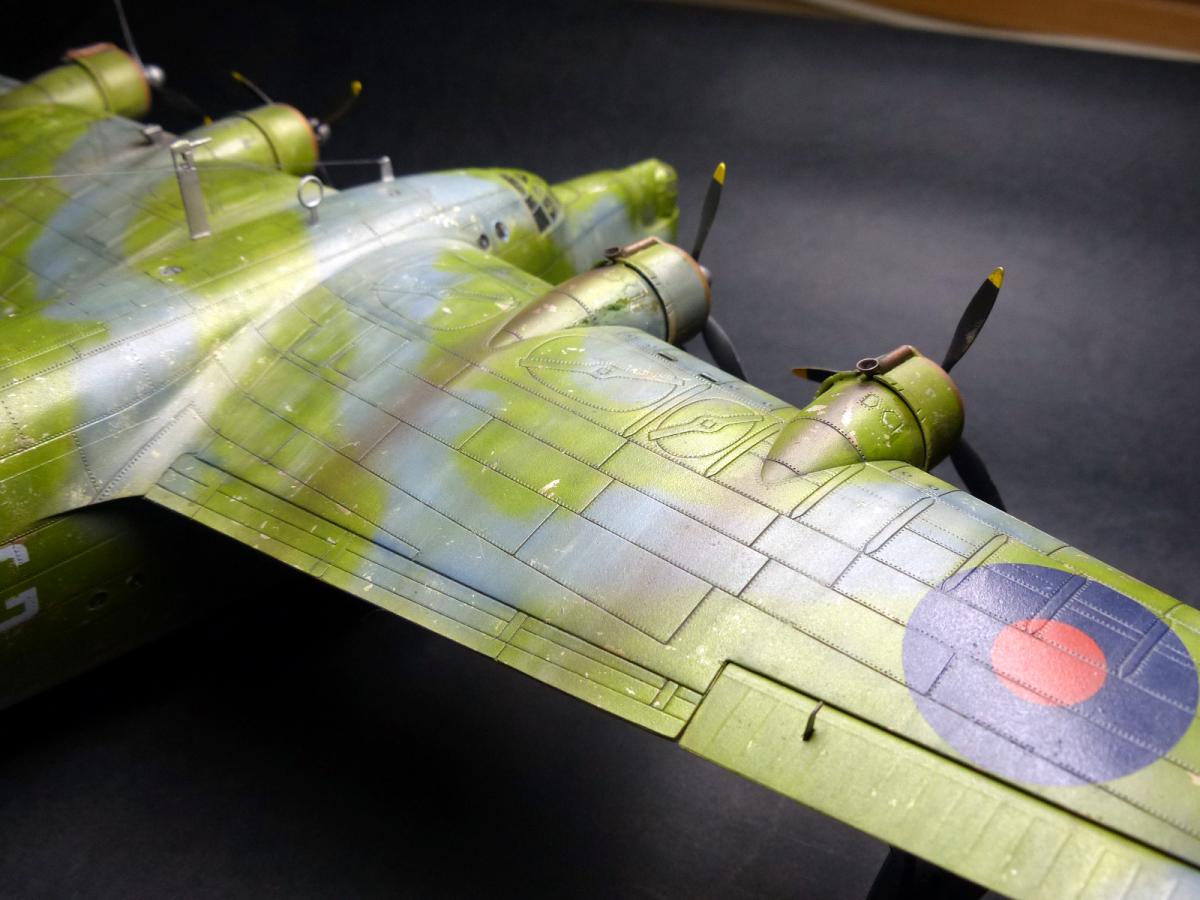
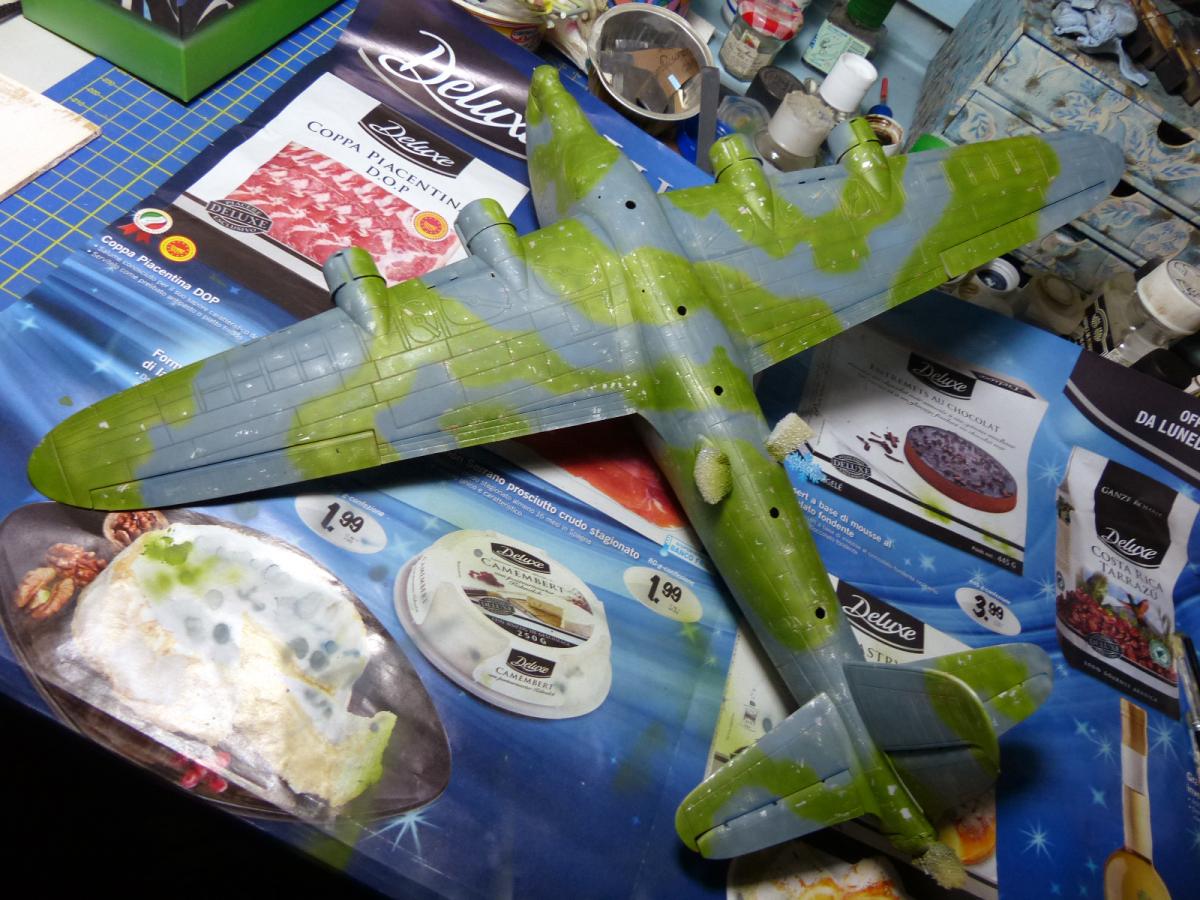
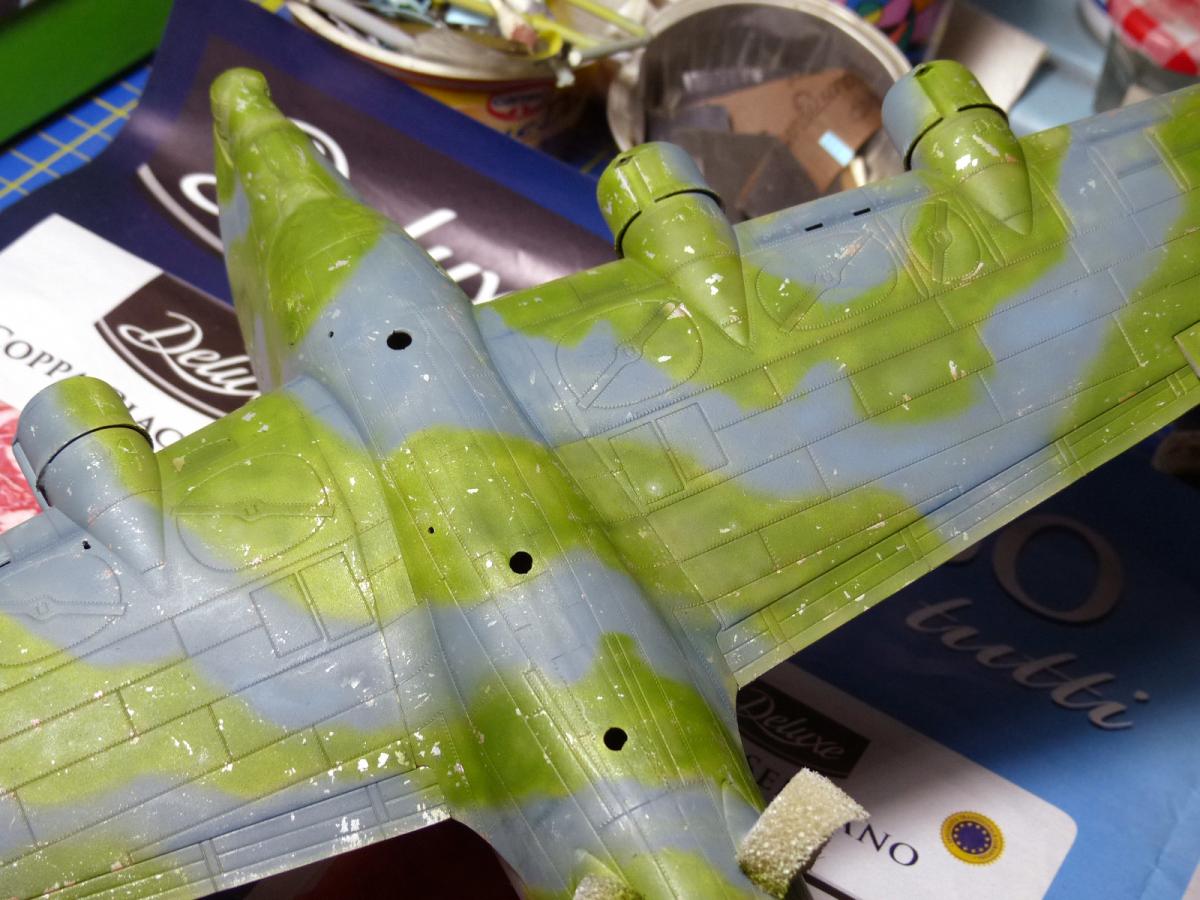
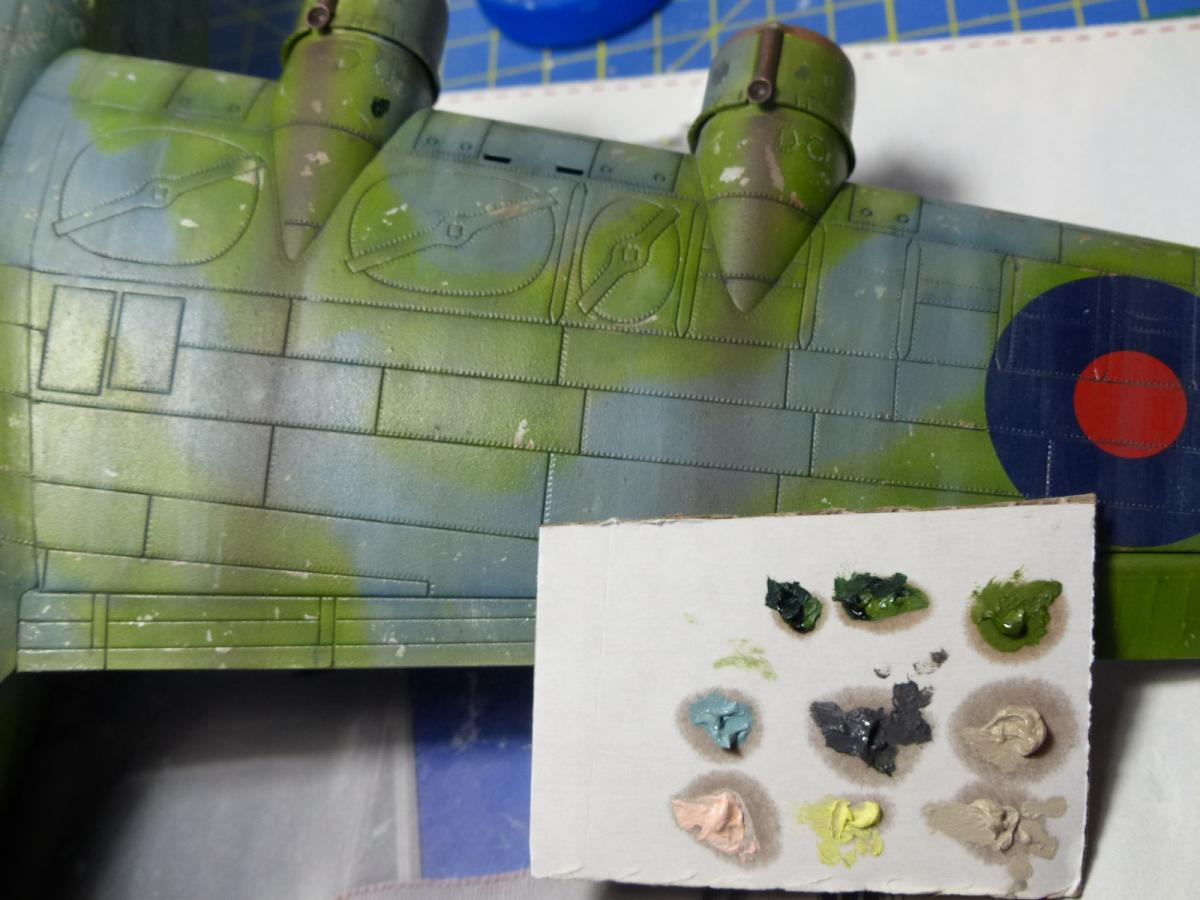
It was time to airbrush the two main colors. First the gray/blue, made with Vallejo Aircolor 71109 UK PR Blue (2 parts) + Vallejo aircolor 71054 Dark Grey Blue (1 part), airbrushed and followed by hairspray (after many tests with dedicated products, like the AK or the Vallejo chipping fluid, i still consider the old, cheap real hairspray the best medium to achieve this effects).
The green was made with Vallejo Aircolor 71006 Camo Light Green (2 parts) + Vallejo Aircolor Green Zinc Chrome (1 part) followed again by hairspray.
Everything was slightly toned down with a further misty coat (80% thinner) of different colors from Gunze Aqueos range.
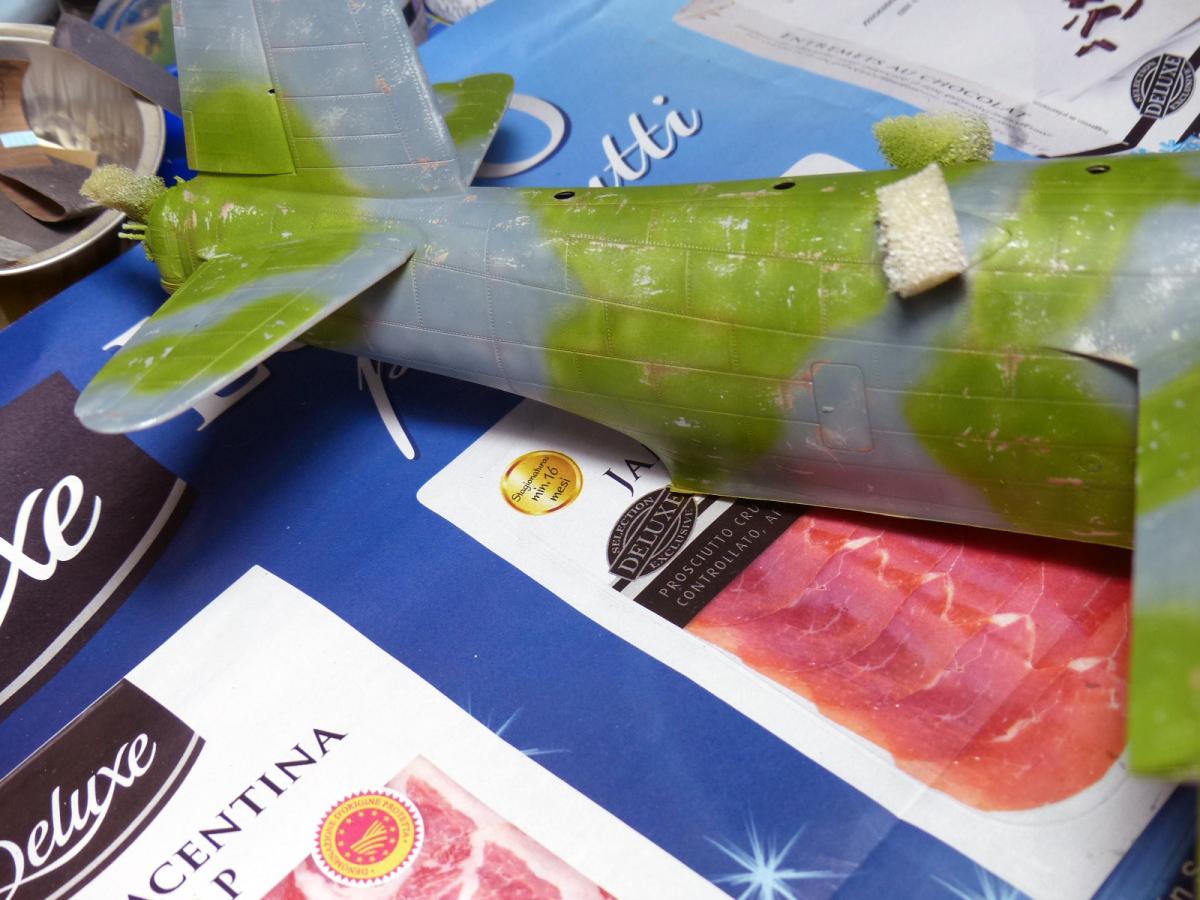
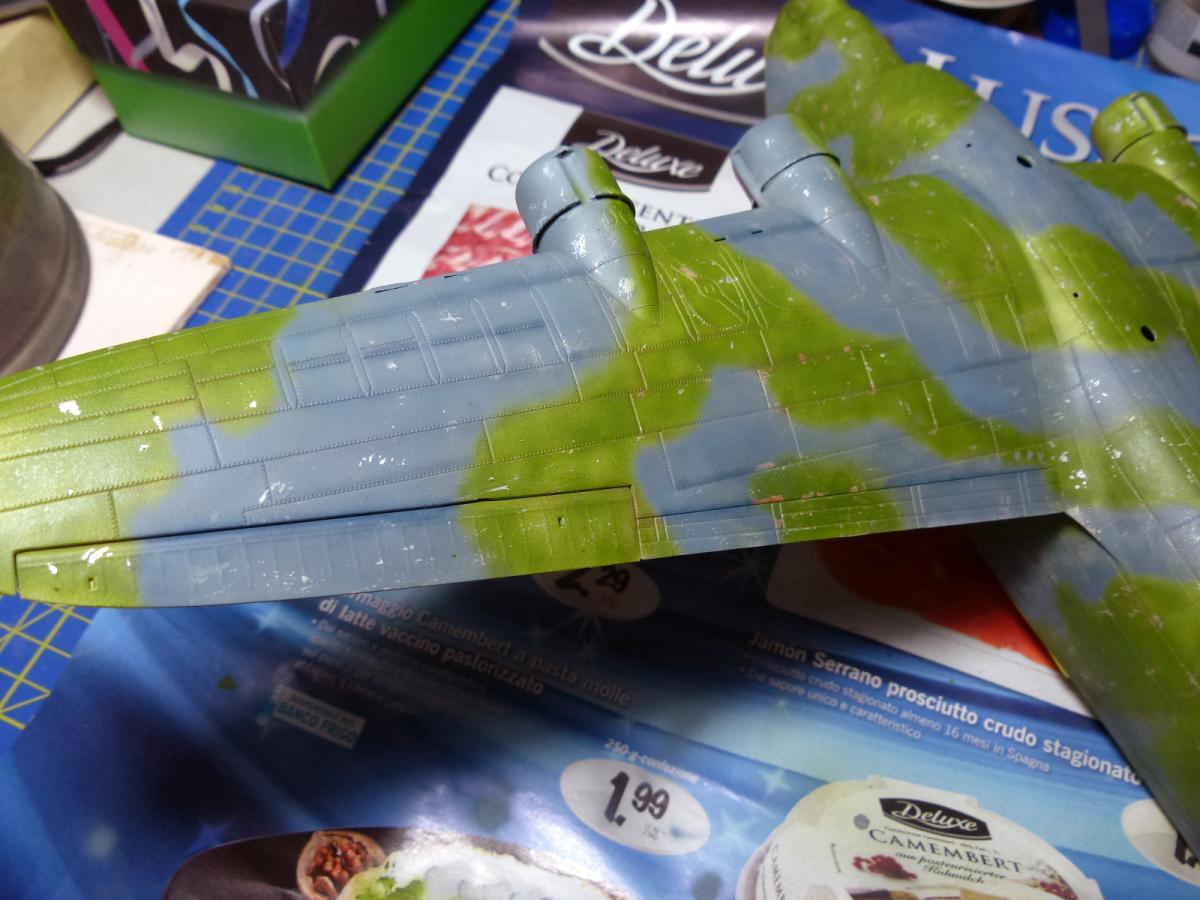
Everything was slightly toned down with a further misty coat (80% thinner) of different colors from Tamiya and Gunze Aqueos range:
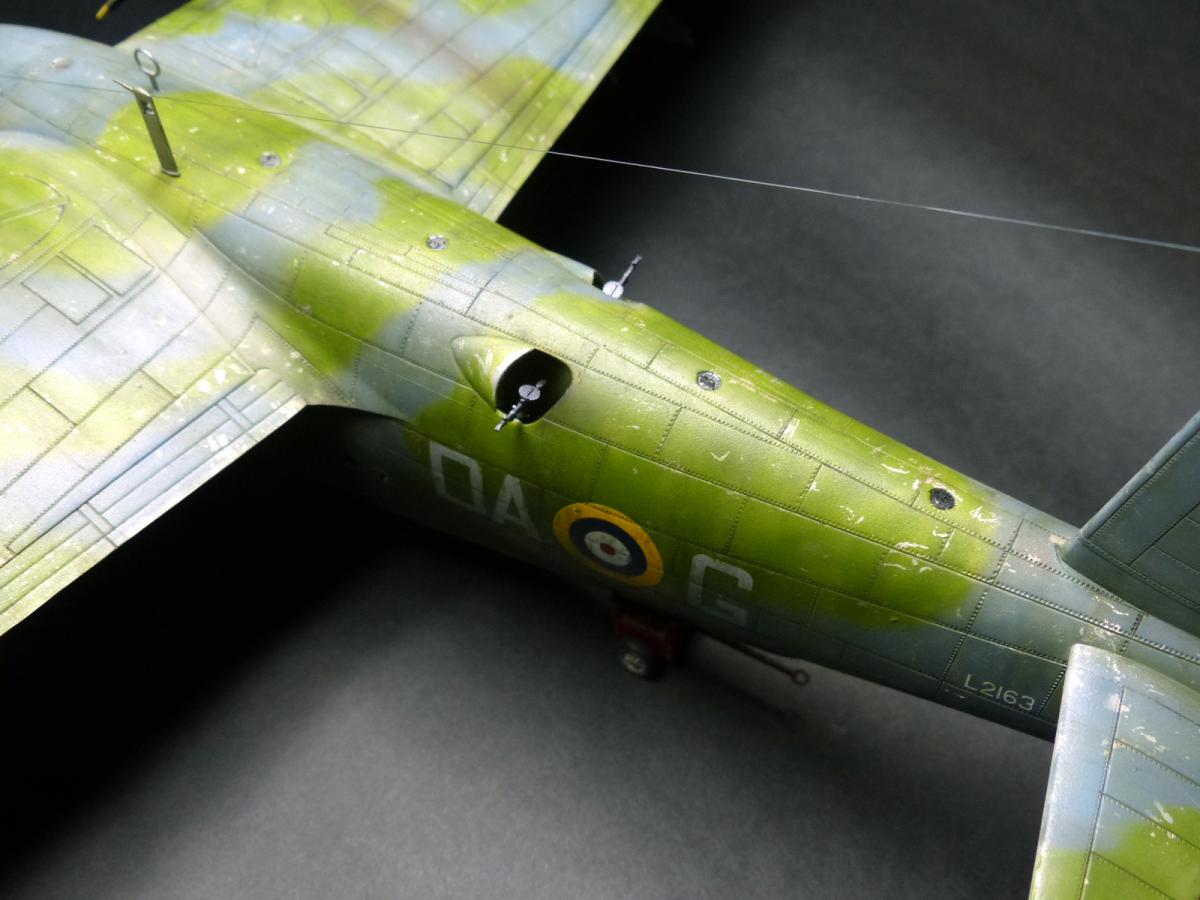
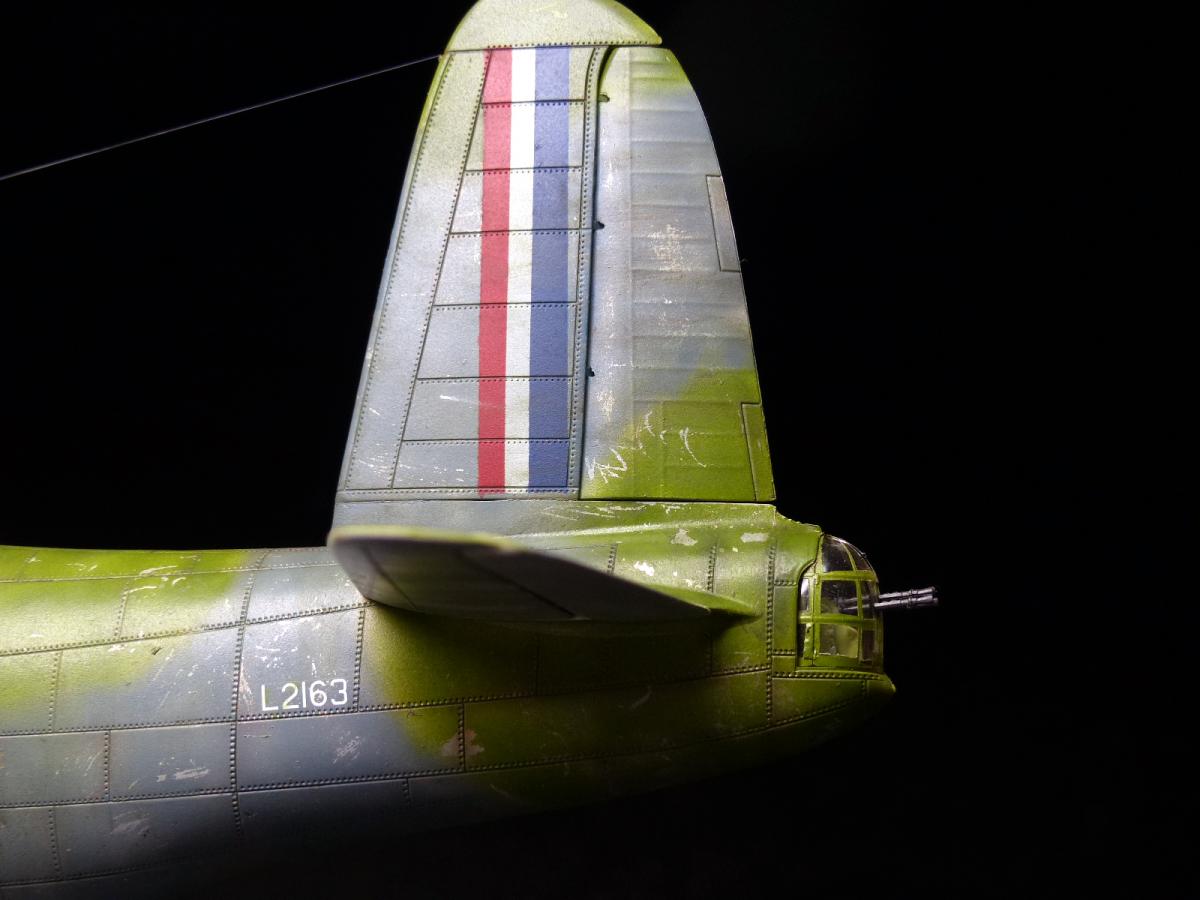
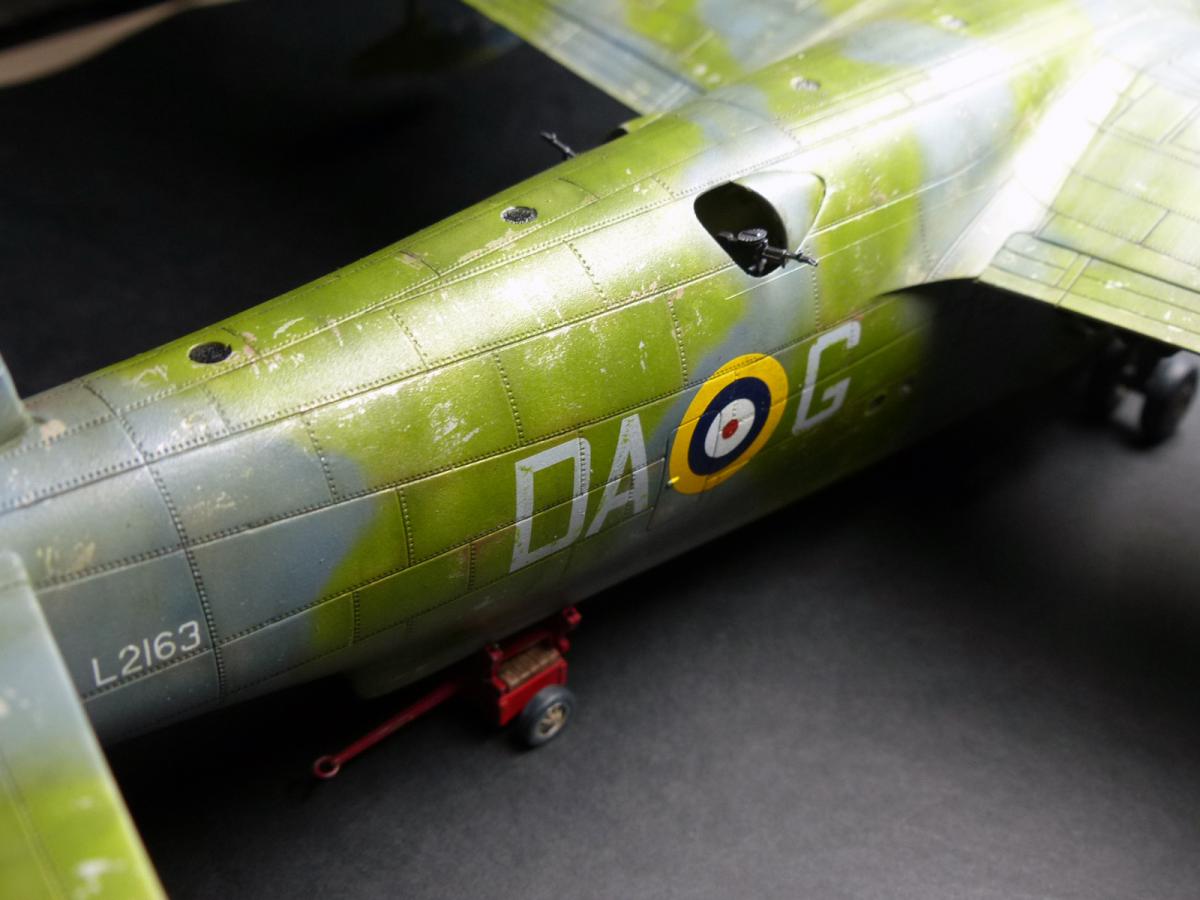
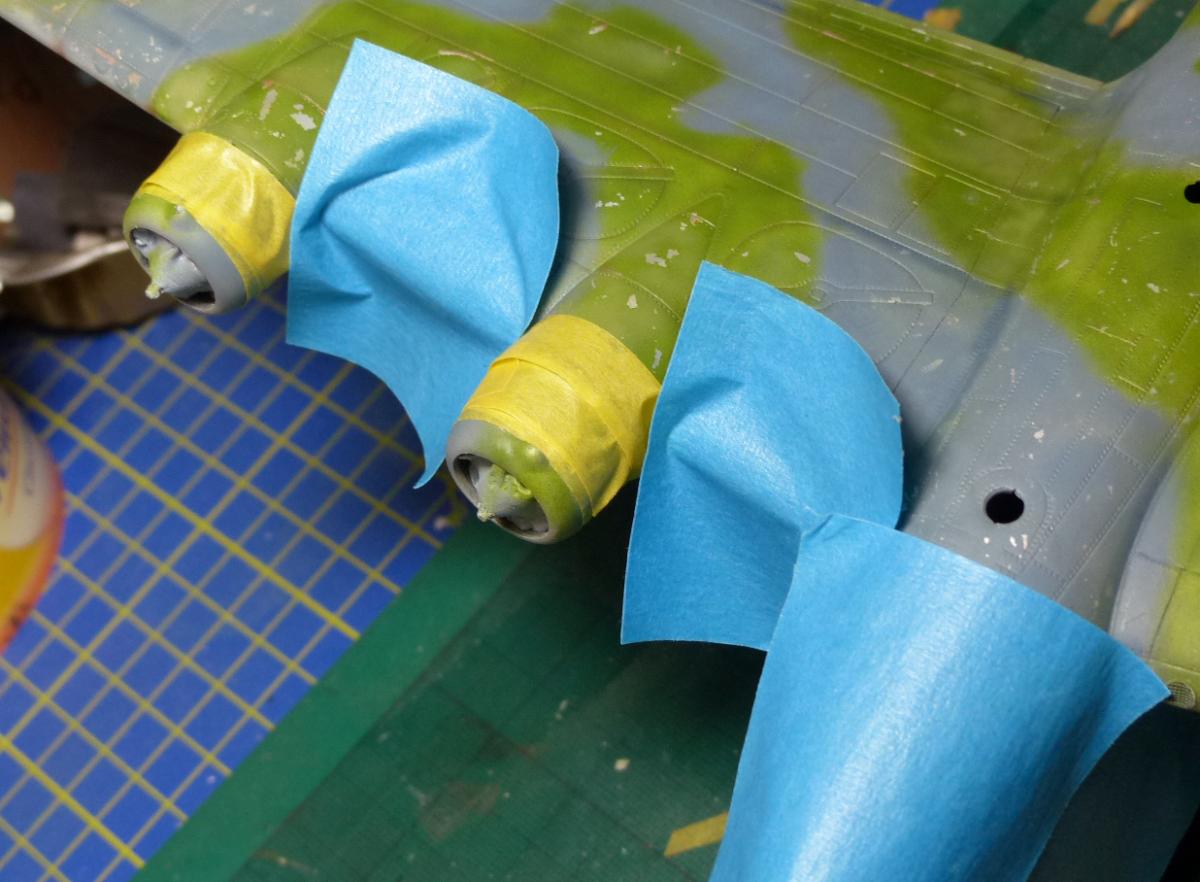
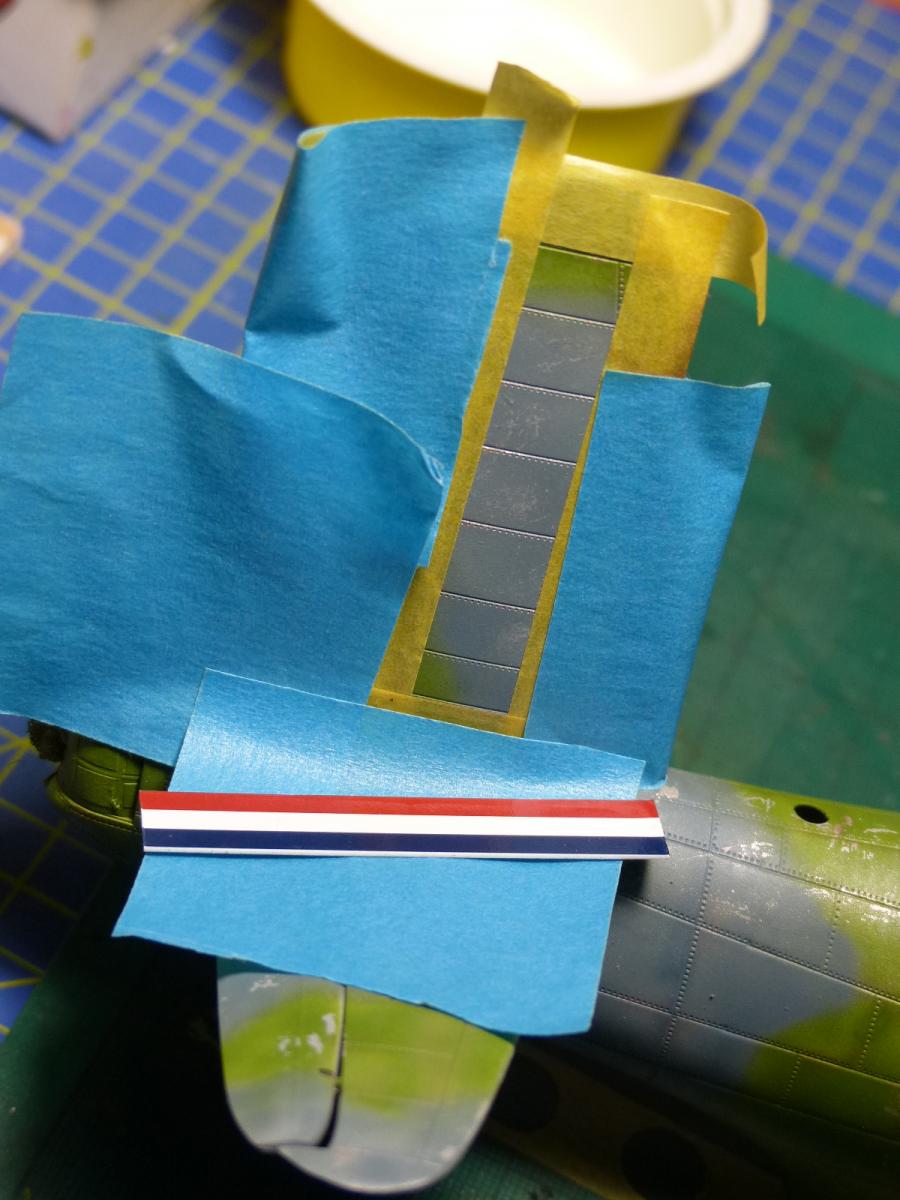
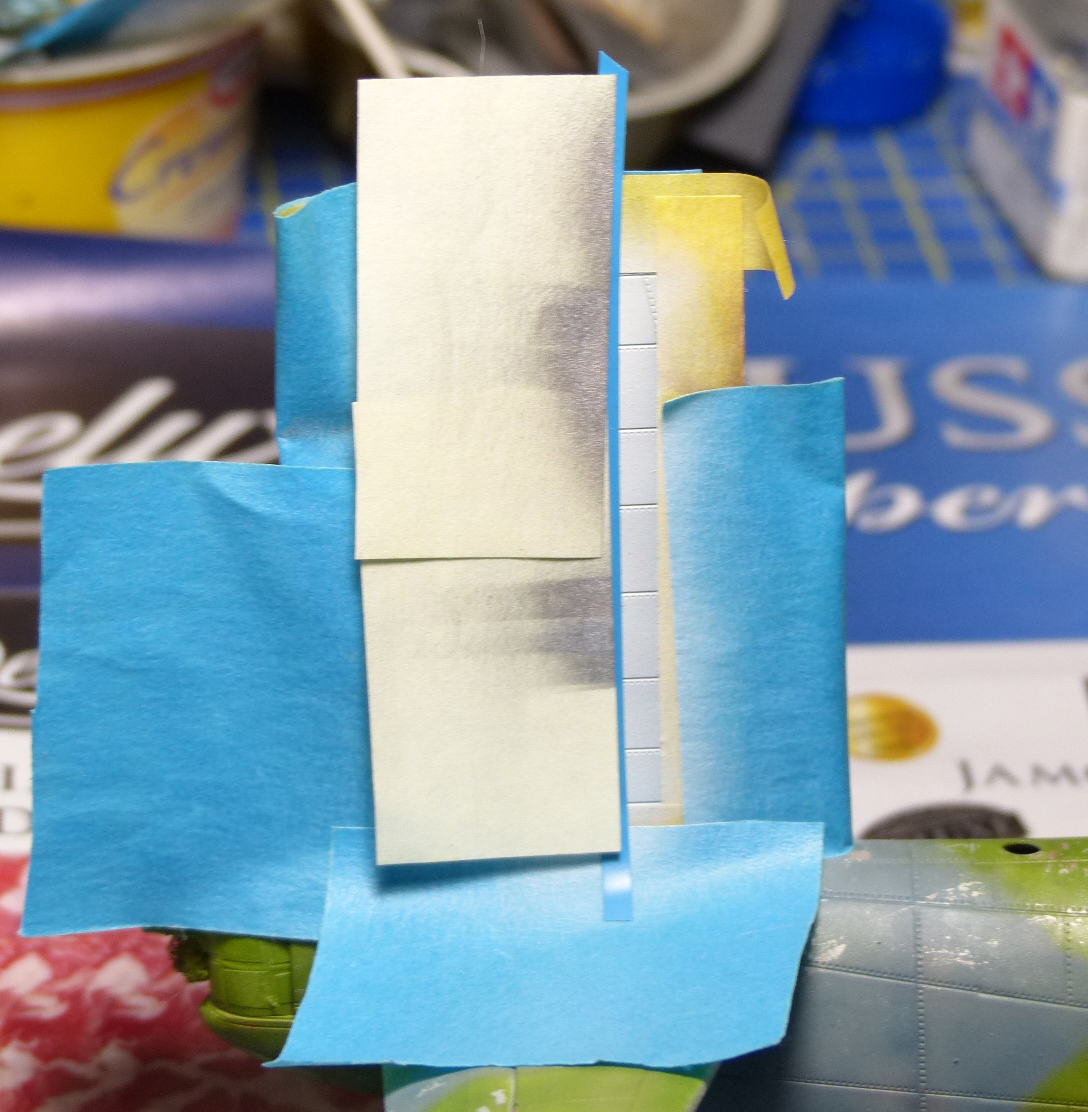
With the main painting job completed, i turned my attention to other details: the copper-color on the front engine cowling, and the tricolor insignia on the tail (I didn't want to use the provided decals for it, so i used it only as template for the mask).
Mask were applied, colors airbrushed, and then masks removed:
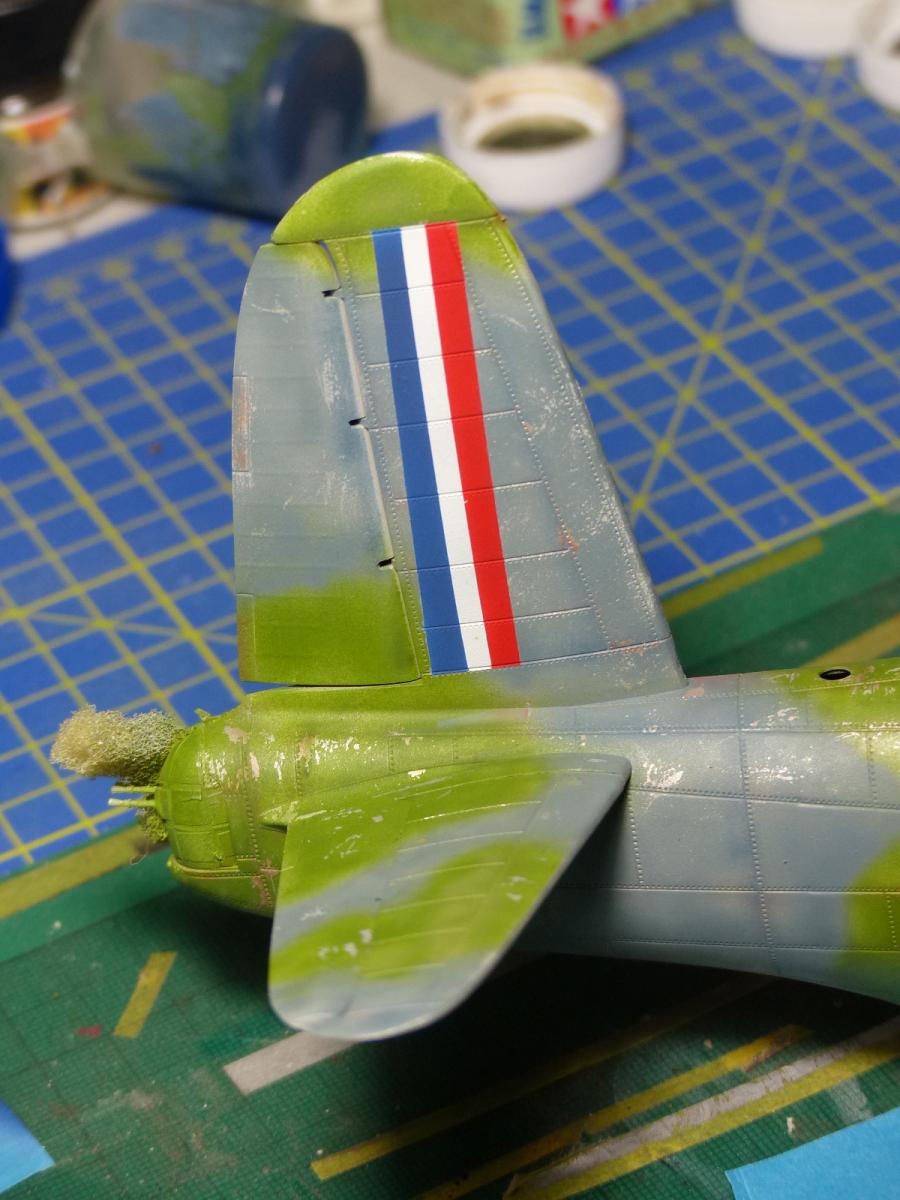
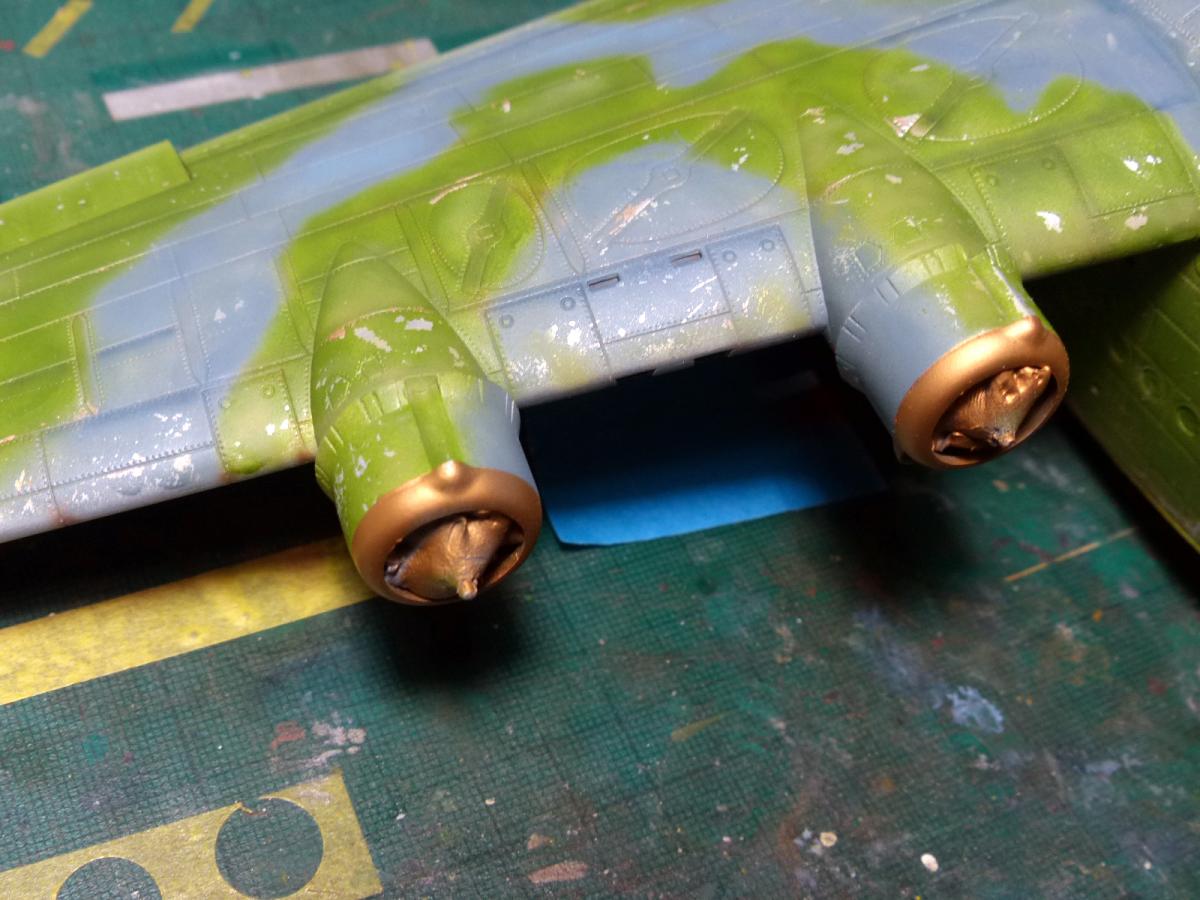
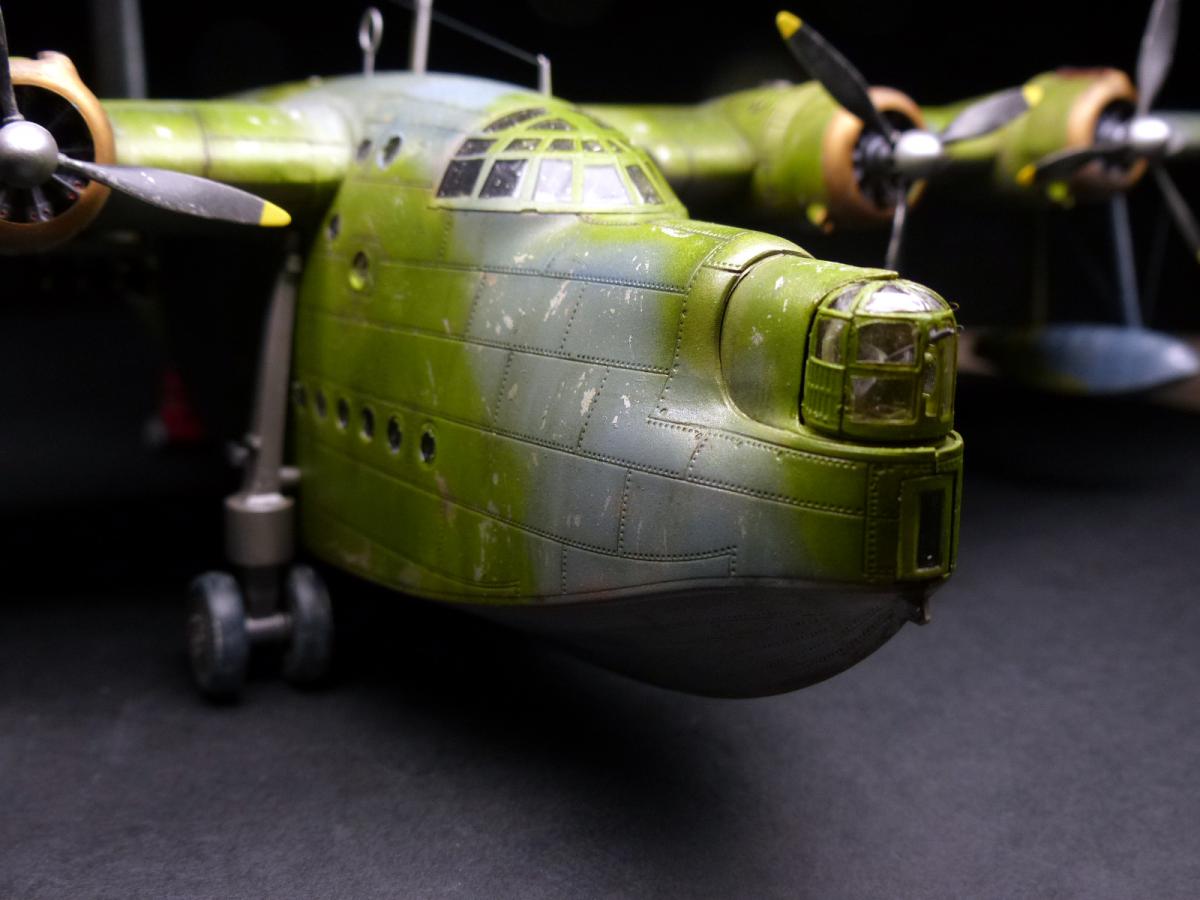
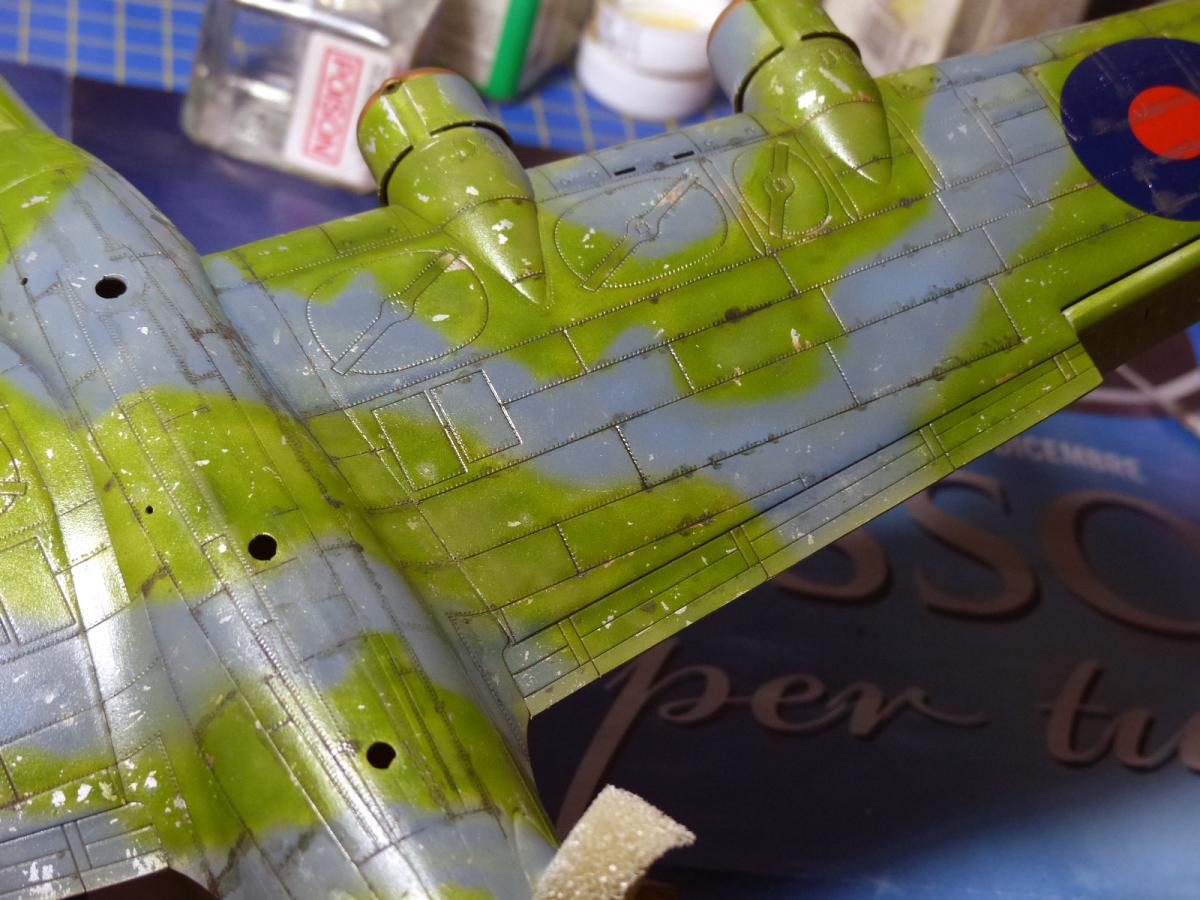
Then it started the weathering process. First no less than 3 repeated washes, using thinned AK gray/blue wash; then i airbrushed the engine streak; and finally the OPR (oil paint rendering) for more streaks and subtle tones changes...
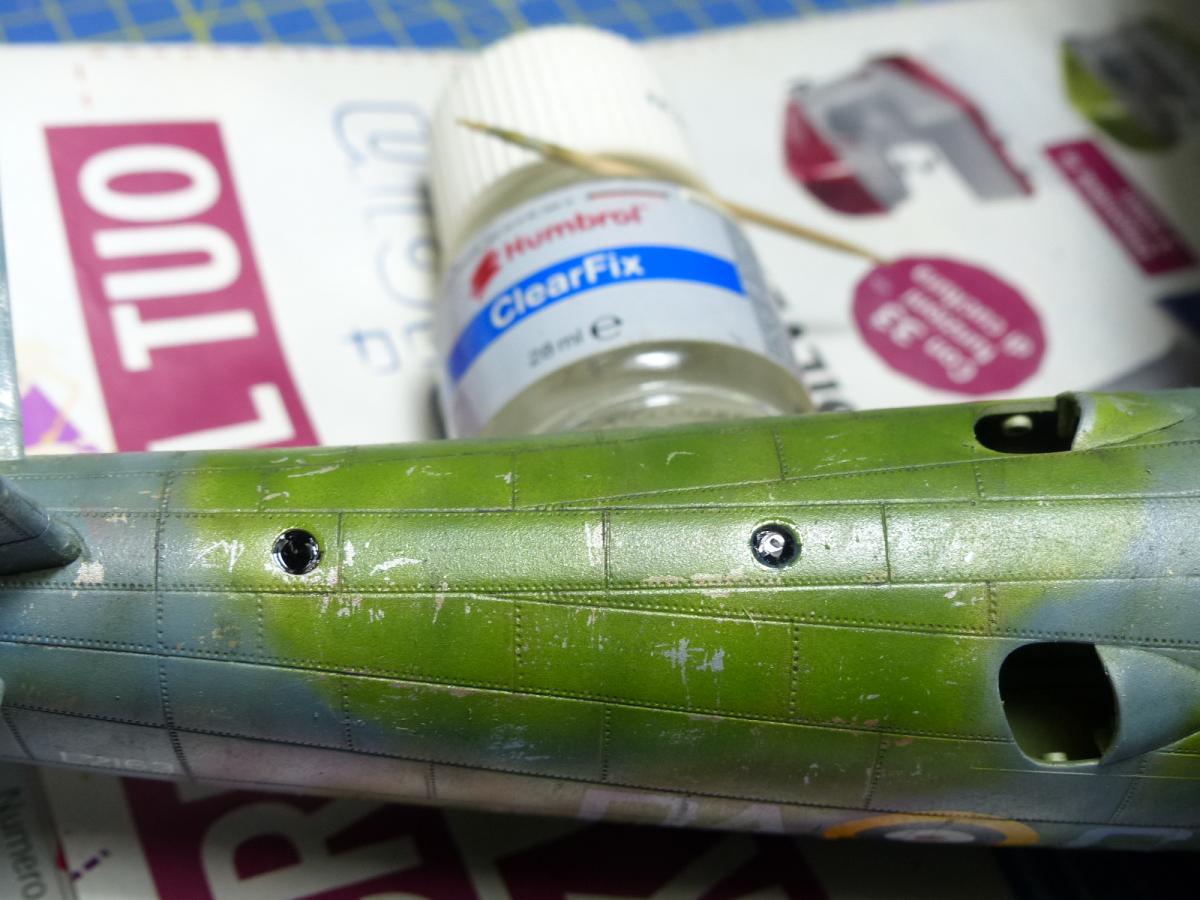
With the weathering completed i turned my attention to the small windows on the top fuselage: indeed, when i closed the fuselage, i left them open, because i didn't trusted in the way suggested by Italieri to assemble them (glue each one on half the fuselage, and then gluing the fuselage parts). To make the small windows i used Humbrol Cristal Clear glue: it worked well, BUT... only for the first 3 ... going ahed, when they dried, i discovered some air bubbles inside the last windows. So , lesson learned: for each window use a clean different toothpick.
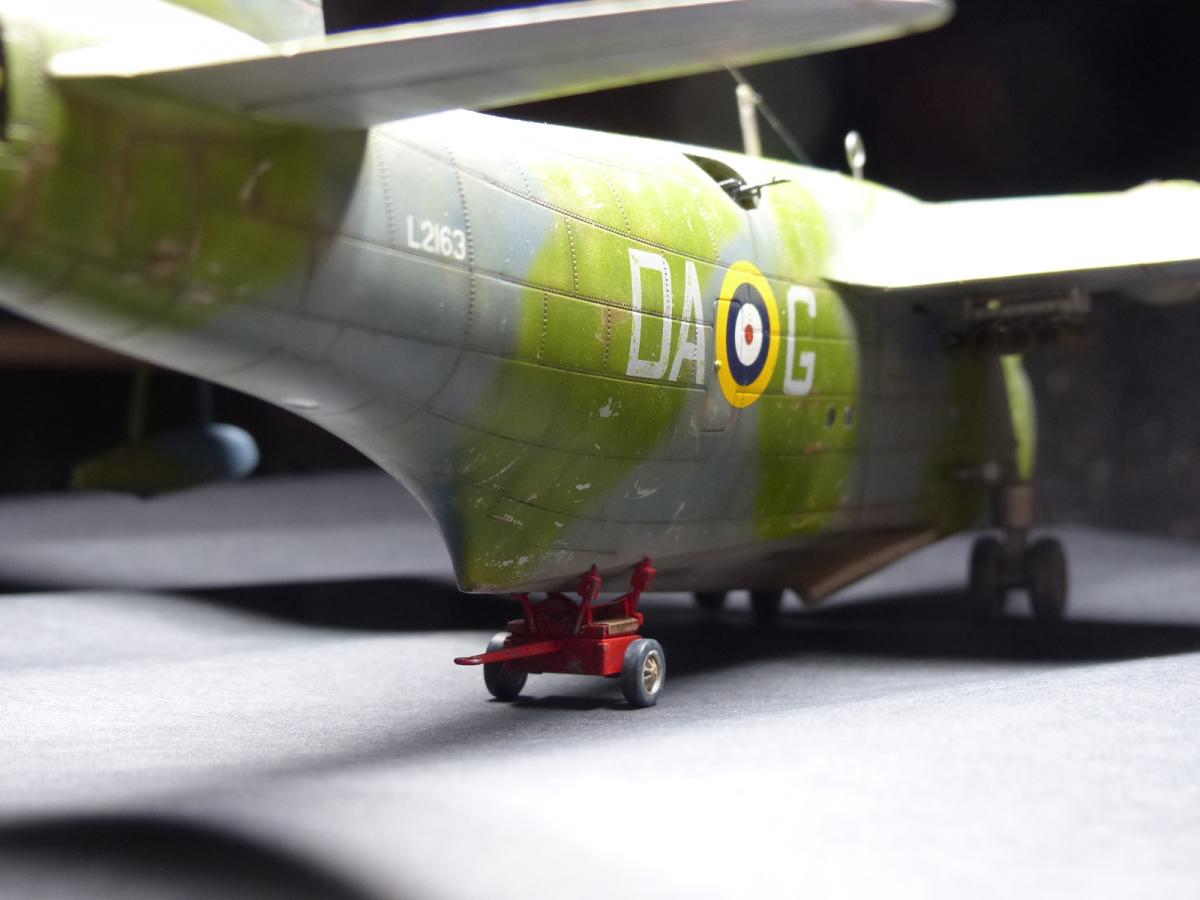
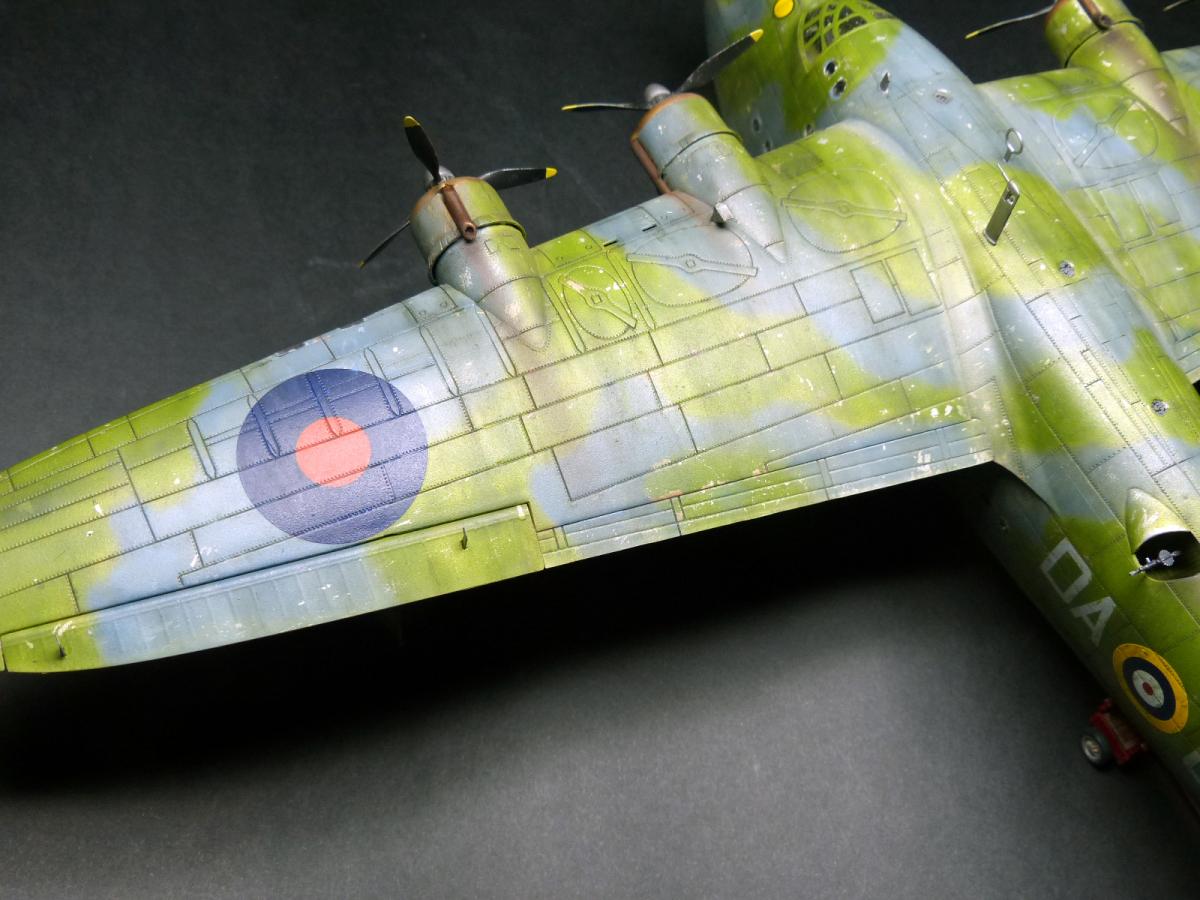
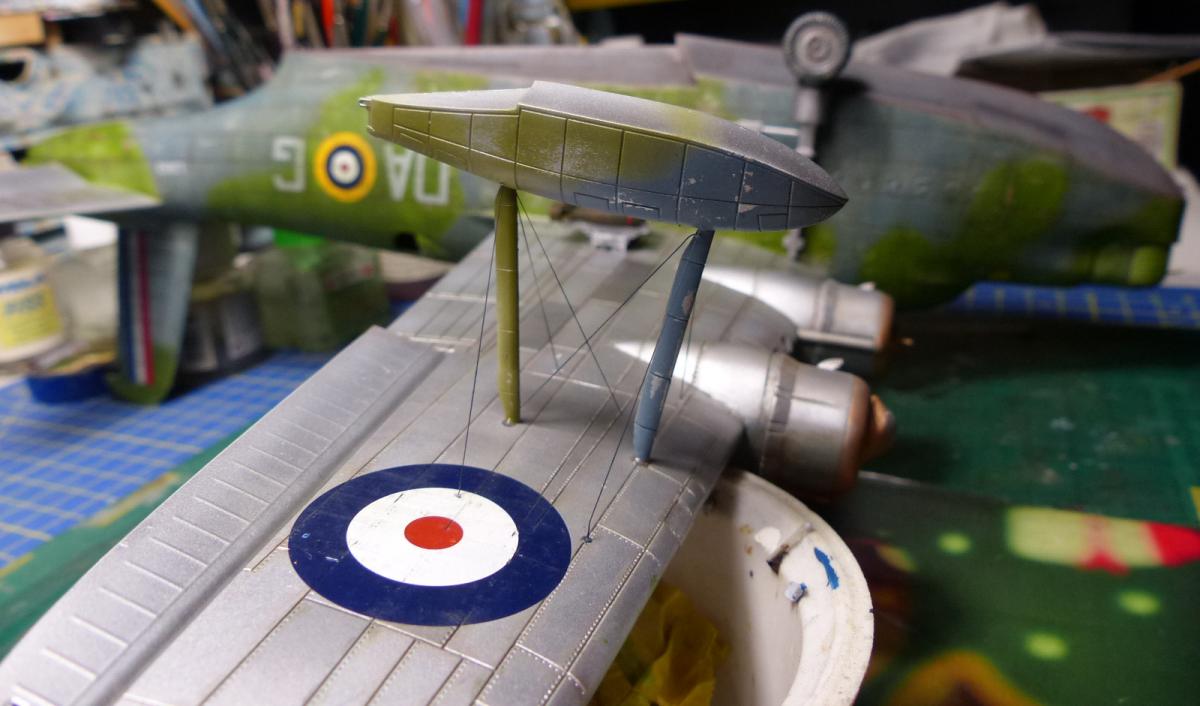
To complete the model i glued the floats and rigged them; i assembled, painted and weathered the small cart provided with the kit (i used the sponge method for the chippings); and painted and weathered the propellers (again with the sponge, and adding some Tamiya pigments).

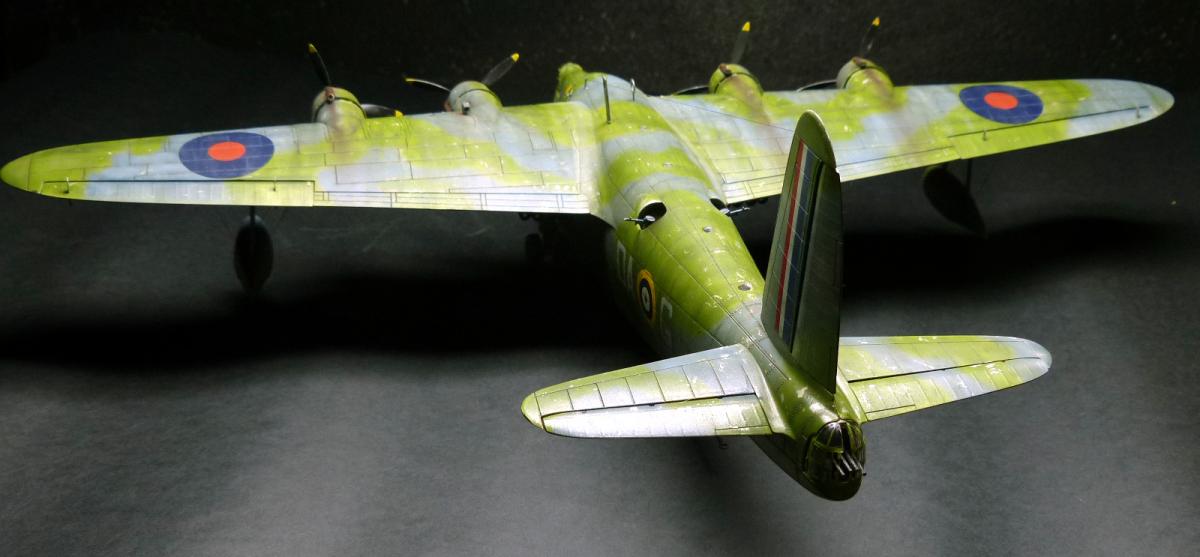
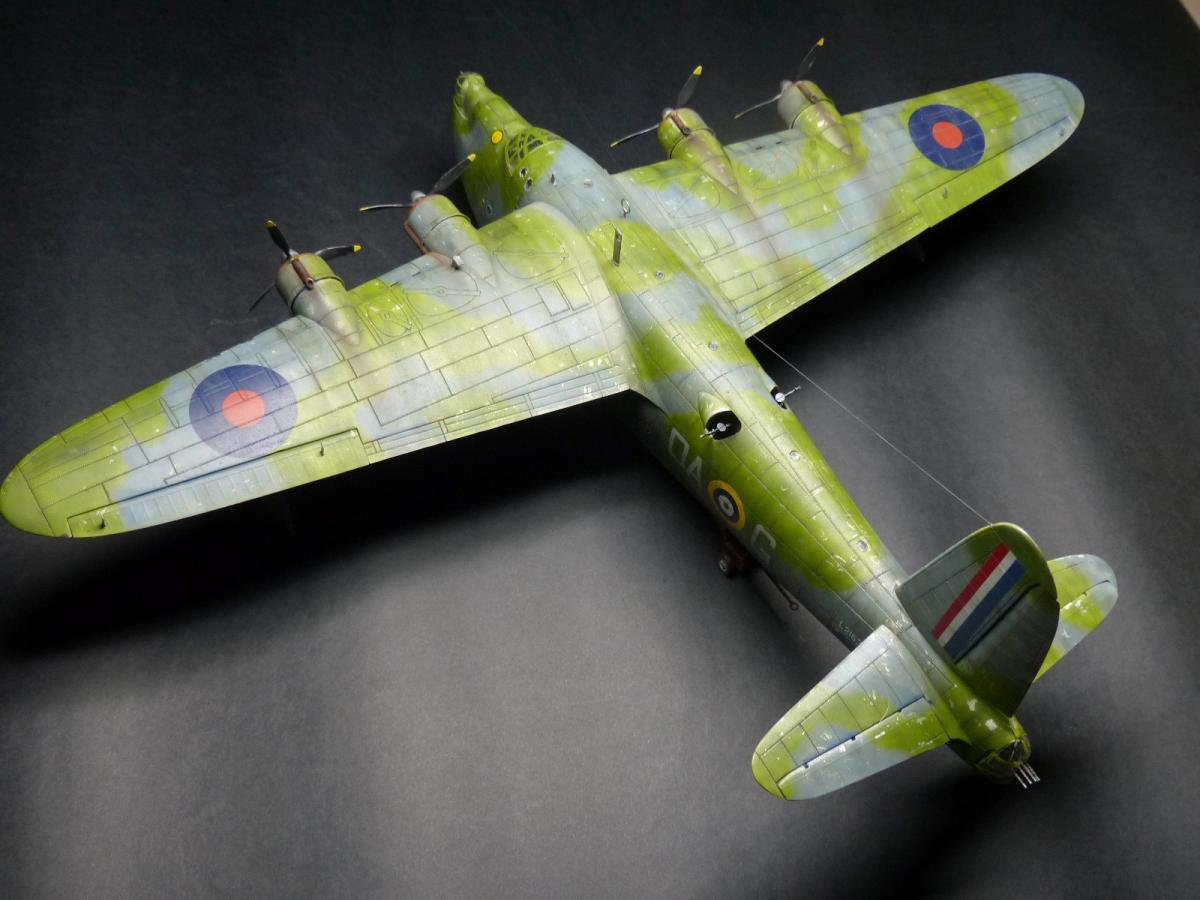
Final Reveal Images